4 Cozy Reading Nooks You’ll Want in Your Home Right Now Constructing a reading nook doesn’t have to be hard. Sometimes all you need is lots of pillows and a little unused space. Reading nooks are also a great way to use dead, unused, or awkward space within a home. Nooks can help maximize living space and provide additional seating, along with providing a personal sanctuary. With these four easy DIY reading nook projects, it won’t be long before you find yourself dreaming of getting lost in a good book. 1. Make Use of Dead Space with a Corner Bench Do you have a dead corner in your house that’s just…there? A great remedy for that empty space is a corner bench. Creating an L-shaped bench will maximize your space. Not only will it provide additional seating, but it can also become storage. Create this bench with bookshelves, cushions, and pillows for the ultimate reading nook space. When the bookshelves are placed together, you can then determine what size cushion you will need to go on ...
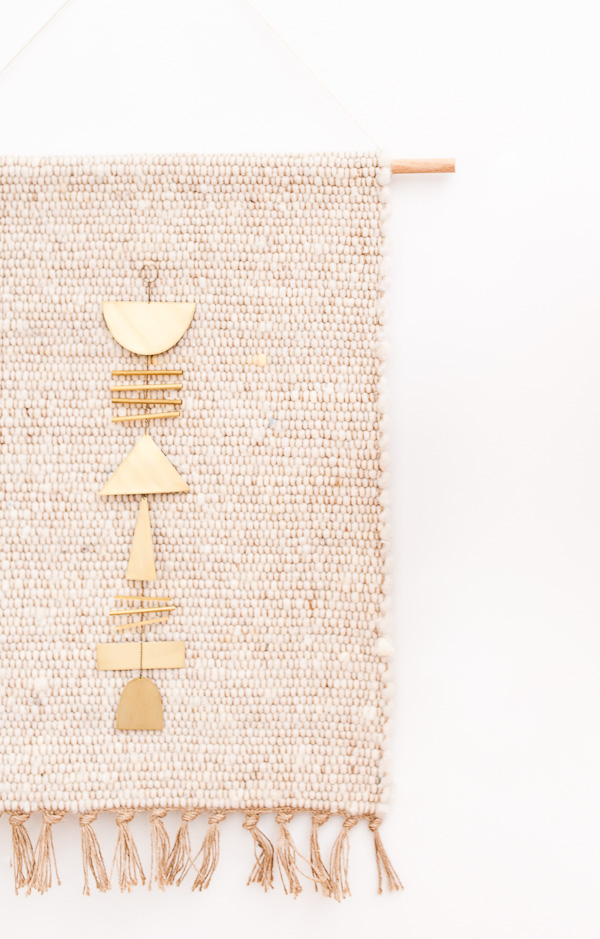
DIY Woven Wall Hanging

Woven Wall Hanging Materials
- 2×3 woven rug
- stitch witchery OR a needle and thread if your rug is thick
- yarn or twine
- brass hanging piece (or make your own – I’ll explain later)
- dowel rod
- iron (only needed if you’re using stitch witchery)
How to Make a Woven Wall Hanging
1. Start by cutting a dowel rod down to size. You’ll need the dowel to be a couple inches longer than your weaving width on both sides. See photo for a guide. *If you measure ahead of time, you can have the dowel rod cut for you at a hardware store, as long as it’s over 12 inches.
2. Next, flip the rug over (good side facing the ground) and place the dowel rod approximately where it will be. Then add a strip of stitch witch underneath the dowel rod. Again, as shown.
3. Heat up your iron, fold over the top flap of the rug and follow instructions on stitch witchery…basically just continue running an iron over the top until the heat from the iron and bonded the two pieces together. *If you have a particularly thick rug, you may have to use a needle and thread instead.
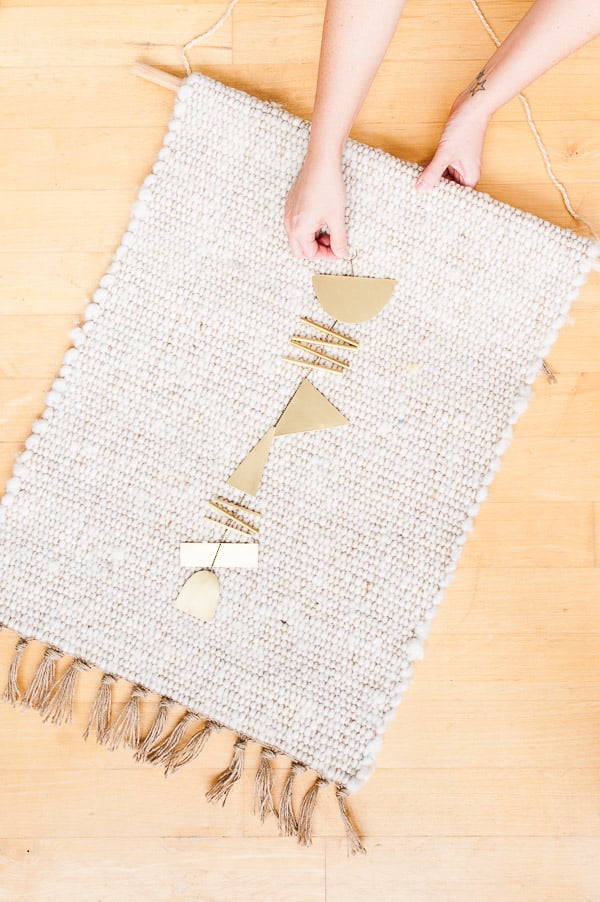
4. Tie a piece of yarn to each side of the dowel rod and double or triple knot on each side, as shown. Cut off any excess and it’s ready to hang. OR you can add a brass piece on top like mine. In which, case there’s one more step…
5. Using an extra piece of yarn, weave through a hole in the brass and a weaving opening in the rug, double or triple knot and you’re good to go. Super easy, right?!

Can’t find a brass hanging sculpture-like mine? You can DIY your own!
Just grab some thin brass sheets (or even copper sheets) and some handheld metal cutters and cut out shapes on your own, then punch a small hole through each one to string them together or attach them directly to your weaving.


Source from here
Komentar
Posting Komentar