4 Cozy Reading Nooks You’ll Want in Your Home Right Now Constructing a reading nook doesn’t have to be hard. Sometimes all you need is lots of pillows and a little unused space. Reading nooks are also a great way to use dead, unused, or awkward space within a home. Nooks can help maximize living space and provide additional seating, along with providing a personal sanctuary. With these four easy DIY reading nook projects, it won’t be long before you find yourself dreaming of getting lost in a good book. 1. Make Use of Dead Space with a Corner Bench Do you have a dead corner in your house that’s just…there? A great remedy for that empty space is a corner bench. Creating an L-shaped bench will maximize your space. Not only will it provide additional seating, but it can also become storage. Create this bench with bookshelves, cushions, and pillows for the ultimate reading nook space. When the bookshelves are placed together, you can then determine what size cushion you will need to go on ...
DIY Beauty - Paper Earrings
Supplies:
- Die-cutter
- Cardstock
- Template – download here
- Mod Podge Matte
- Mod Podge Silicone Mat
- Liquid Gilding or Spray Paint
- Mod Podge Hard Coat or another sealer
- Earring hooks
- Jump rings
- Flat nose pliers
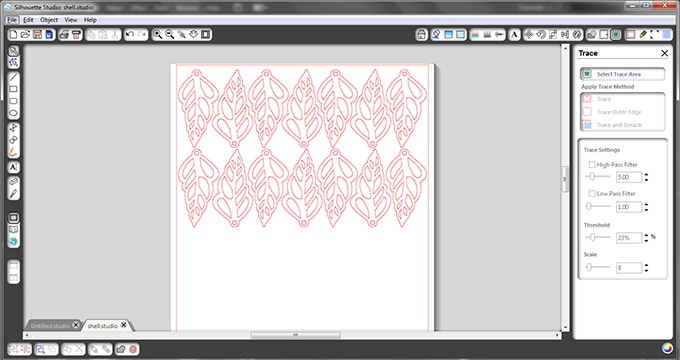
Step 1. I drew a sketch of a seashell cross-section on Adobe Illustrator and transferred them to my Silhouette program to cut them out. You can draw your own, or download the shell template I have made.
Since I was using cardstock, I cut about 7 pieces of ‘shells’ for each earring, each measuring about 2.5″ in height. You can definitely make them bigger or smaller – I just prefer them bigger.
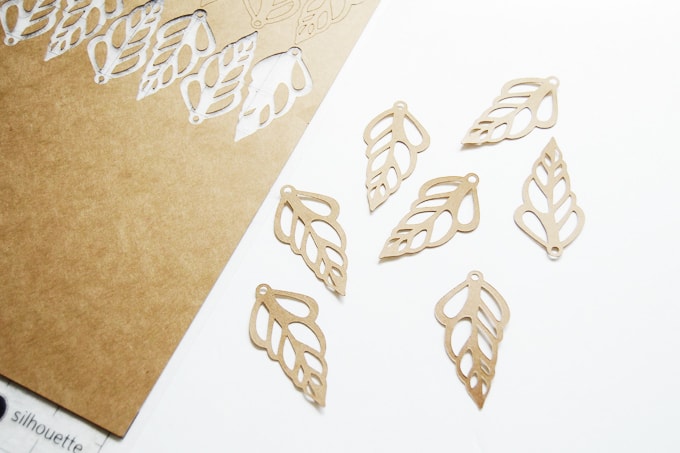
Step 2. For a perfect cut, you may want to double-cut your pieces as they are somewhat detailed.
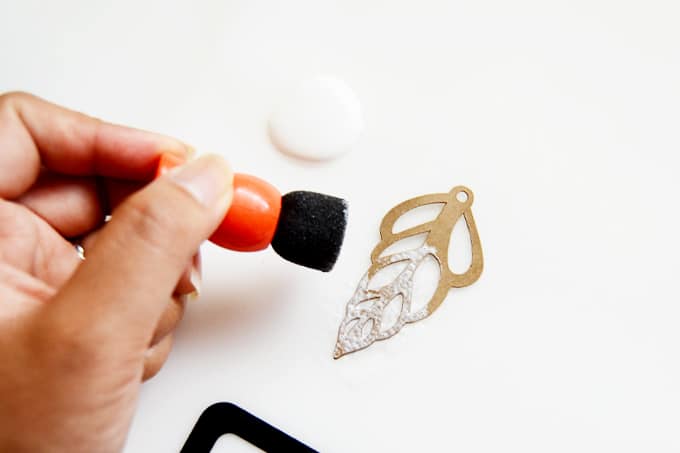
Step 3. Using a foam brush or pouncer, use Mod Podge to adhere to your ‘shell’ layers together. You will want to add the back layer and front layer last. The Mod Podge Silicone Craft Mat actually helps with this step as your shell pieces won’t adhere to the surface if you are using the mat.
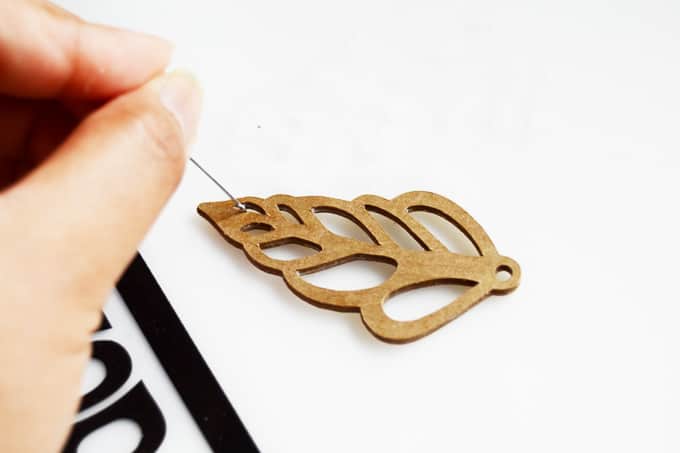
Step 4. Wipe off the excess glue in the nooks and crannies of your shell piece using a thin object such as a sewing needle, pin, or even a safety pin.
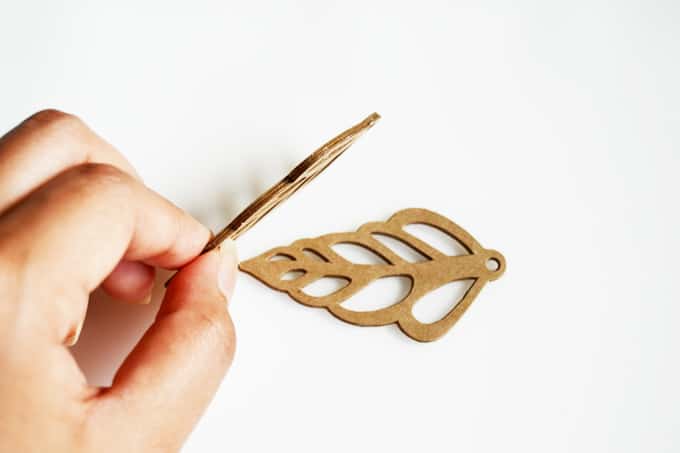
This will how thick it will be after 7 layers of cardstock – I’d say it’s pretty sturdy after this point! Make sure to sandwich your pieces between two big books while it’s trying to encourage flattening of the pieces.
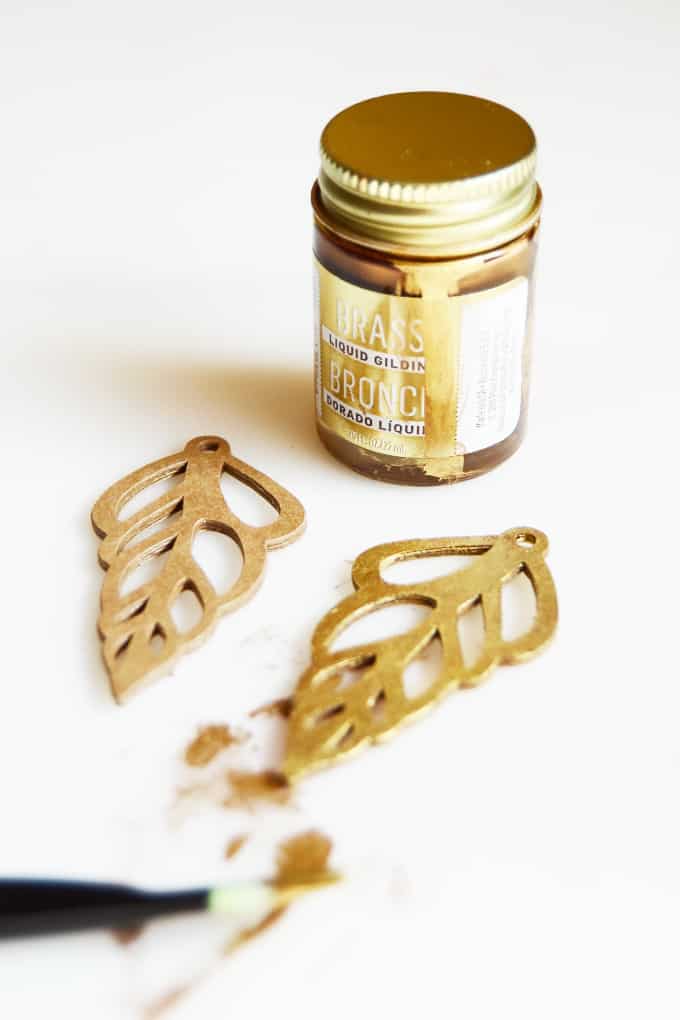
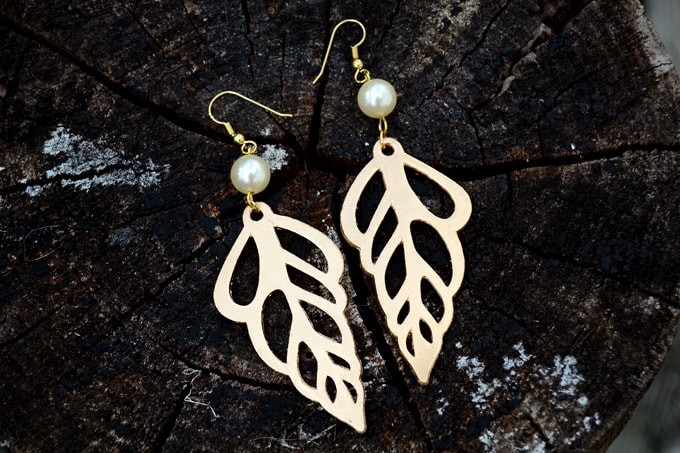
Step 5. Now it’s time to paint your earrings – I really have a strong preference for metallic colors, so I used liquid gilding to color them.
I used brass at first but switched to copper after one coat. Coat them with Mod Podge Hard Coat or a spray-on the sealer to seal and strengthen them.
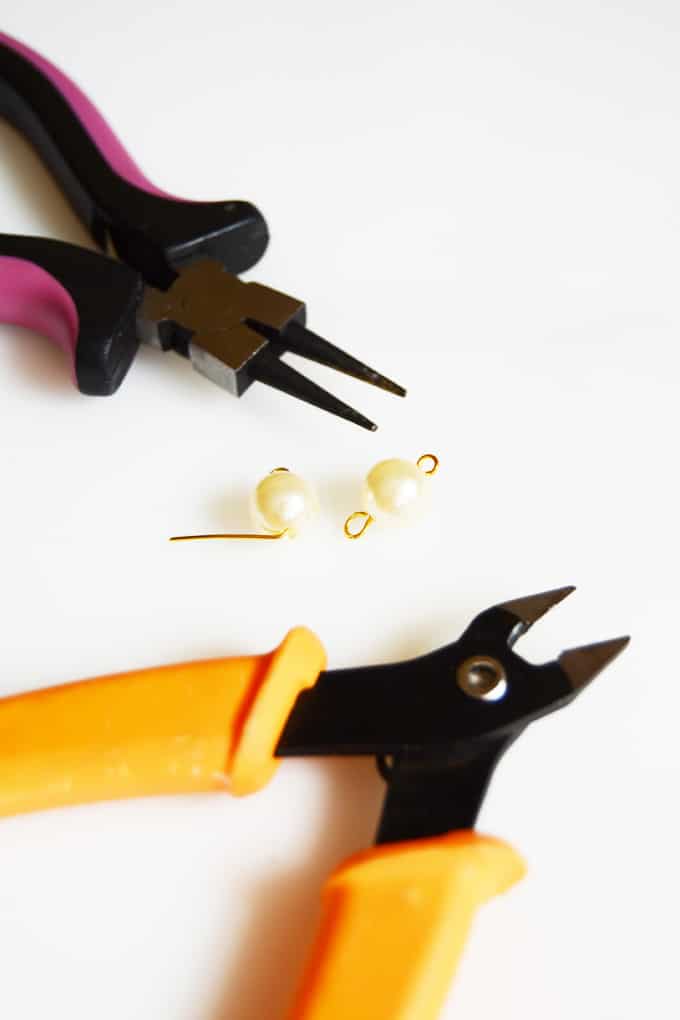
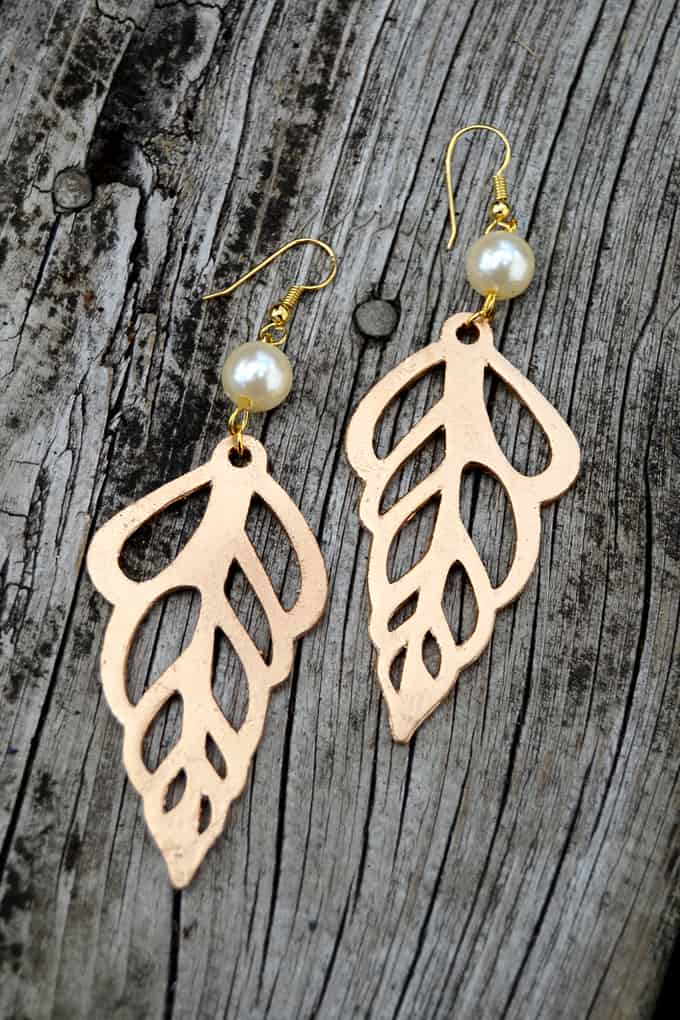
Step 6. Now make some pearl links – thread one pearl bead onto an eye pin, cut off the excess wire and loop the end to secure the bead on the eye pin.
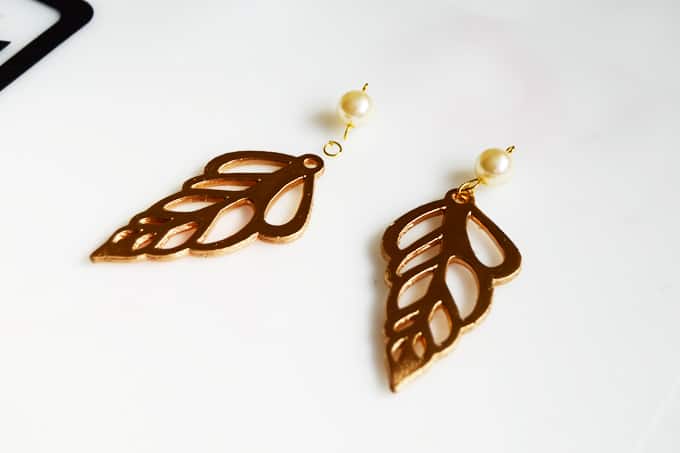
Step 7. Attach your pearl link using a jump ring on the circle on top of the shell.
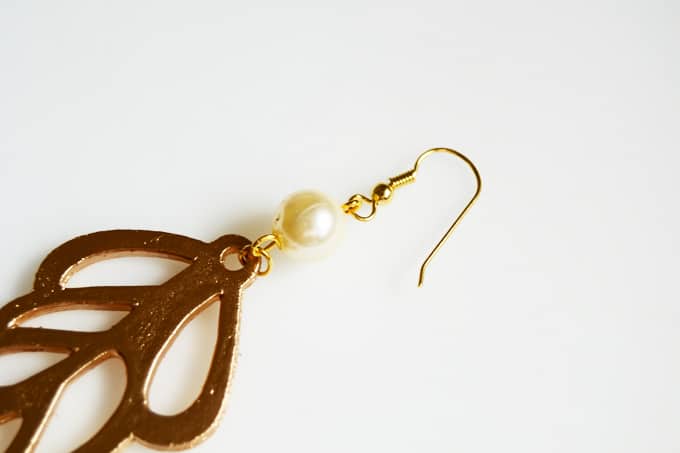
Step 8. Finally, attach your pearl link to the earring hook, and you are done!
Komentar
Posting Komentar