4 Cozy Reading Nooks You’ll Want in Your Home Right Now Constructing a reading nook doesn’t have to be hard. Sometimes all you need is lots of pillows and a little unused space. Reading nooks are also a great way to use dead, unused, or awkward space within a home. Nooks can help maximize living space and provide additional seating, along with providing a personal sanctuary. With these four easy DIY reading nook projects, it won’t be long before you find yourself dreaming of getting lost in a good book. 1. Make Use of Dead Space with a Corner Bench Do you have a dead corner in your house that’s just…there? A great remedy for that empty space is a corner bench. Creating an L-shaped bench will maximize your space. Not only will it provide additional seating, but it can also become storage. Create this bench with bookshelves, cushions, and pillows for the ultimate reading nook space. When the bookshelves are placed together, you can then determine what size cushion you will need to go on ...
DIY BEGINNER MACRAME GARLAND
MATERIALS NEEDED:
- macrame yarn (I use this one HERE and HERE)
- sharp scissors (I like using haircutting scissors)
- wood beads (I used these HERE and some slightly larger ones I had, I lied alternating slightly different sizes)
- hair comb (if you want to brush out the edges again)
INSTRUCTIONS:
I made another video which you can see below and you can also follow my step-by-step instructions as described with the photos:
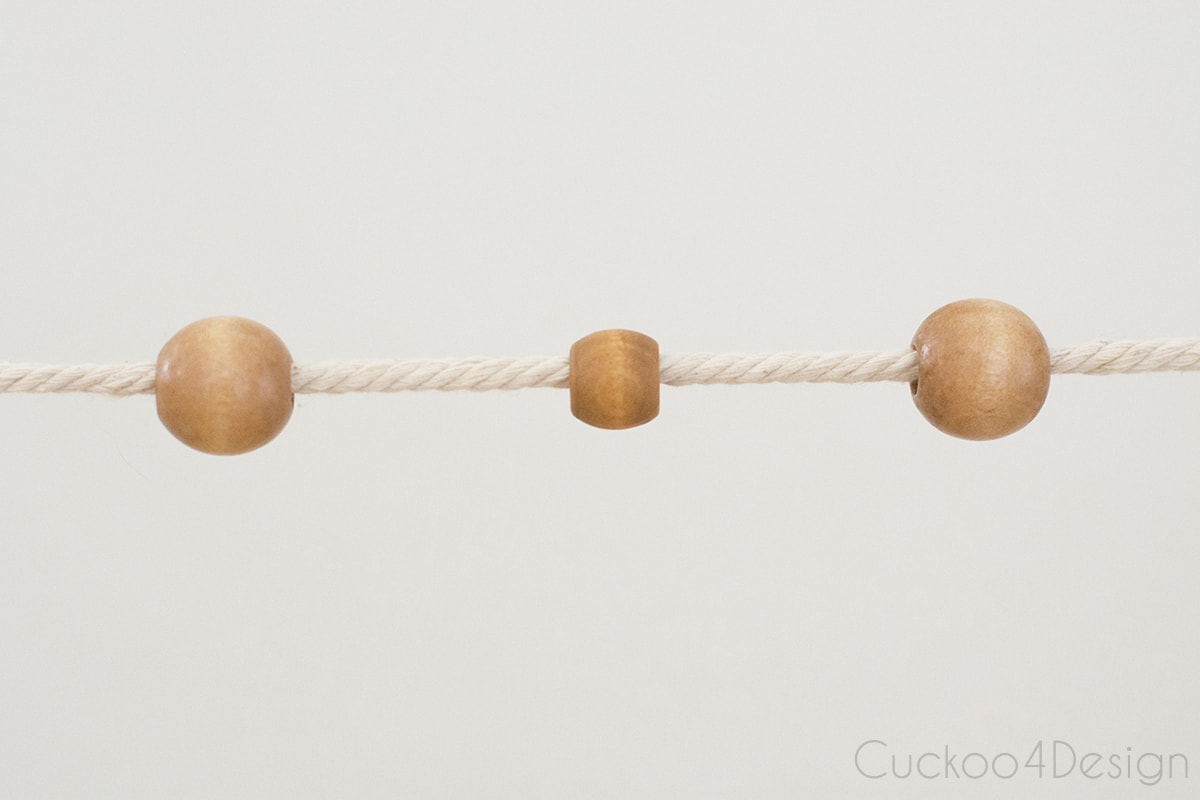
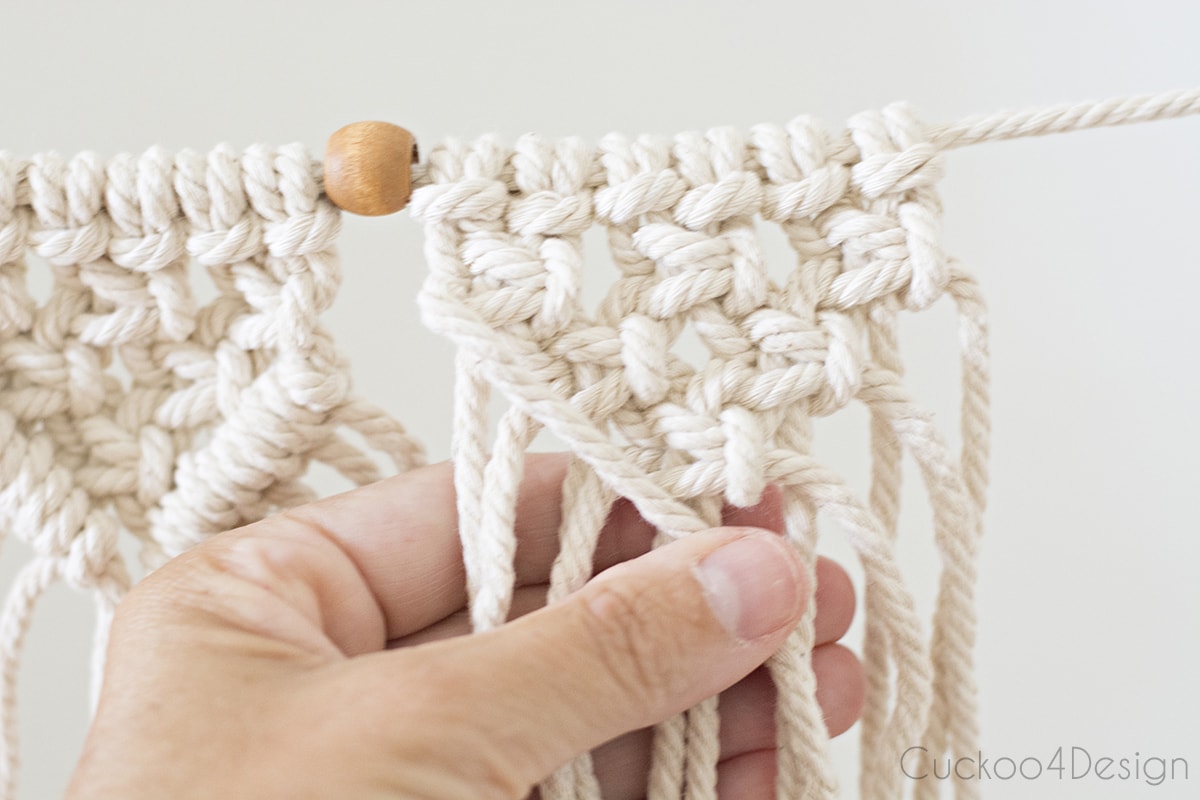
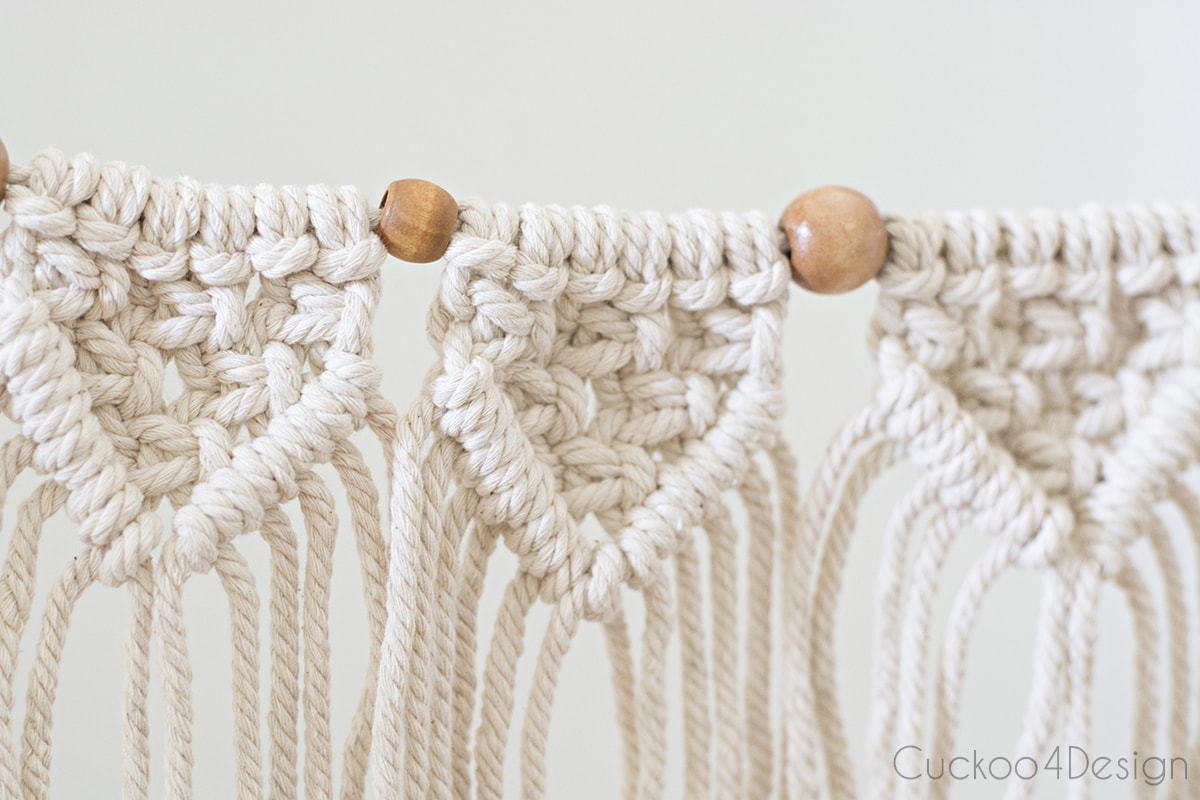
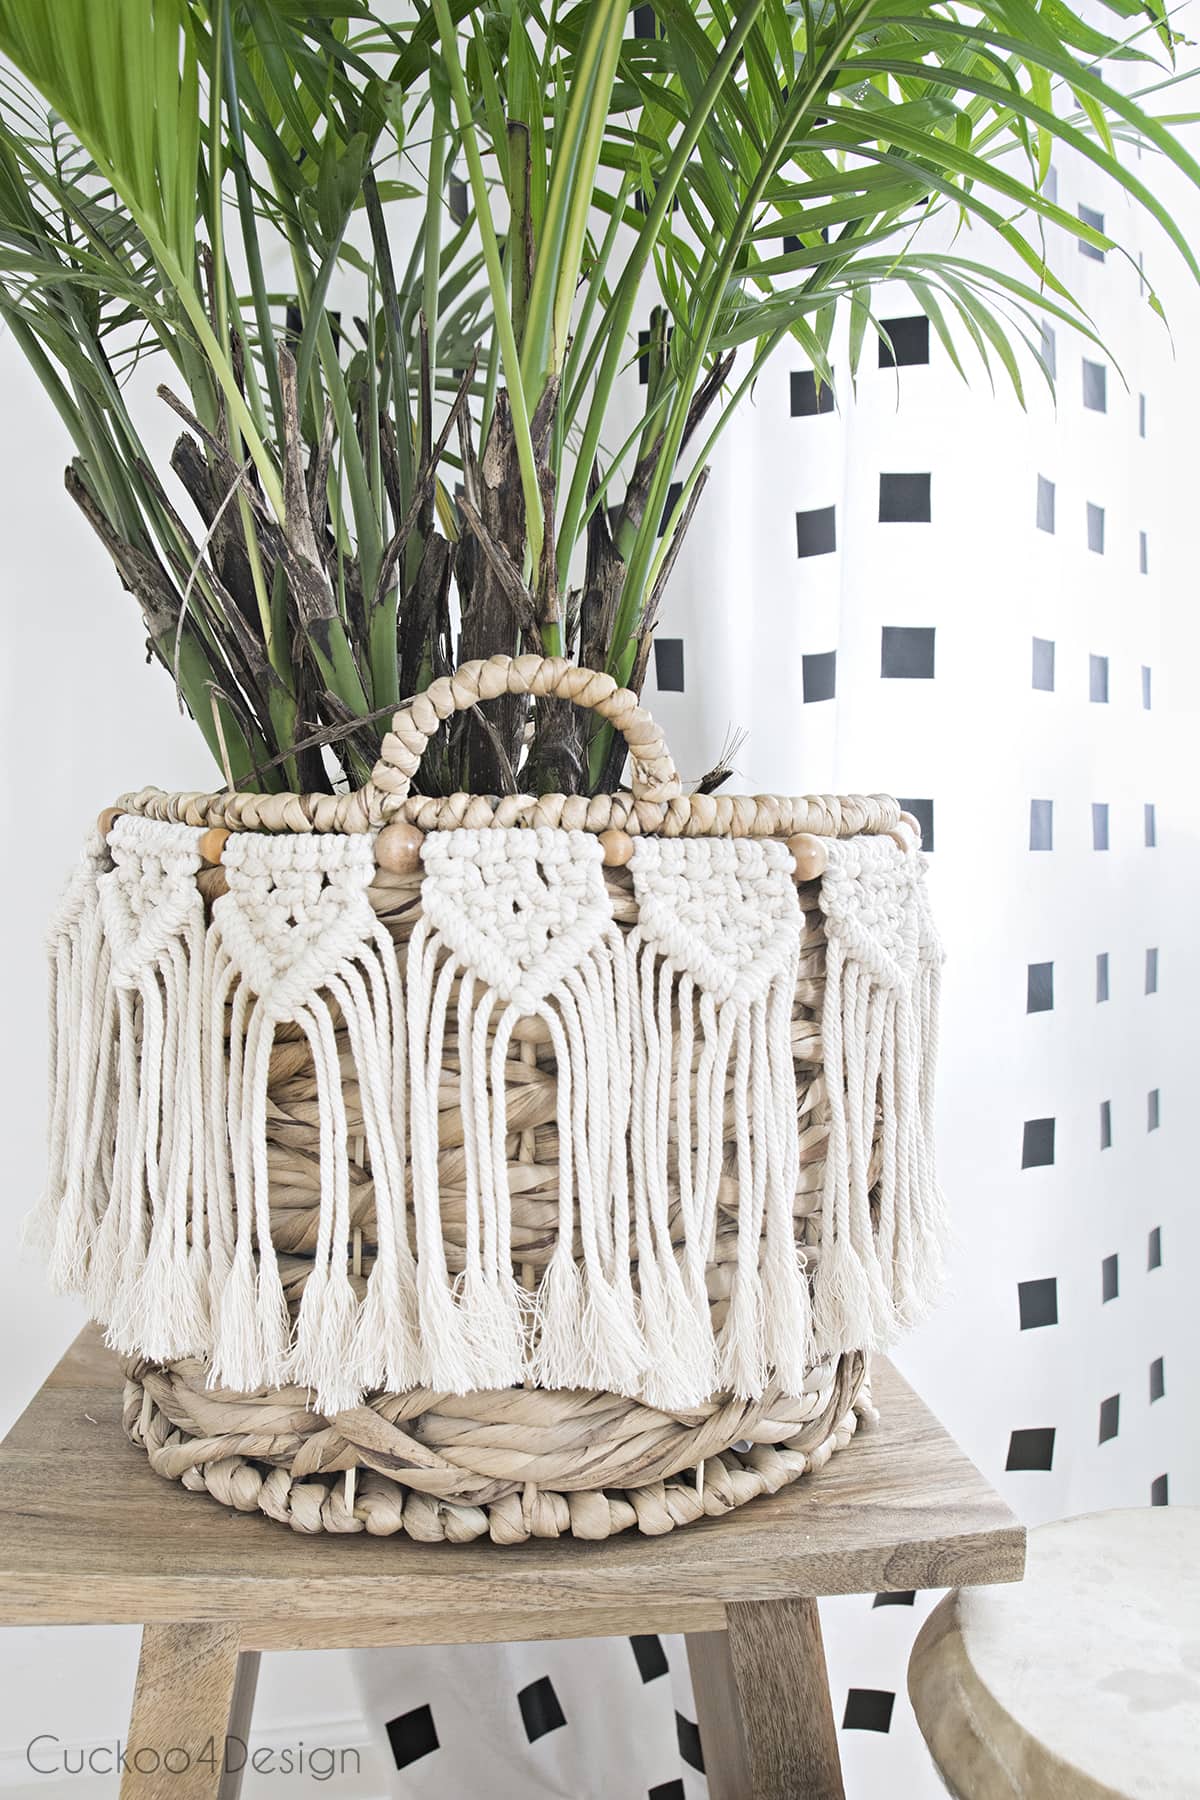
For my garland, I used 23 wooden beads threaded on a 10-foot piece of macrame cord. I wanted it to belong so I could possibly use it on a Christmas tree shortly.
For my length of garland, you need to knot 22 small pieces of macrame altogether.
And when you make one piece of macrame in-between the above wood beads you need to cut 6 pieces of 40-inch macrame yarn which you then have to repeat 22 times or however long you want your garland. I had to cut 132 pieces of 40-inch macrame yarn strings.
Does that make sense?
SO I SPECIFICALLY USED:
- A 10-foot piece of yarn (for garland base)
- 23 wooden beads
- 132 pieces of 40-inch macrame yarn
I started out my beginner macrame garland by folding the 40-inch pieces of macrame in half and looping them onto the base string with Lark’s Head knots as shown below. My little video shows you how to do this too and it might be easier to follow that then the photos and descriptions.
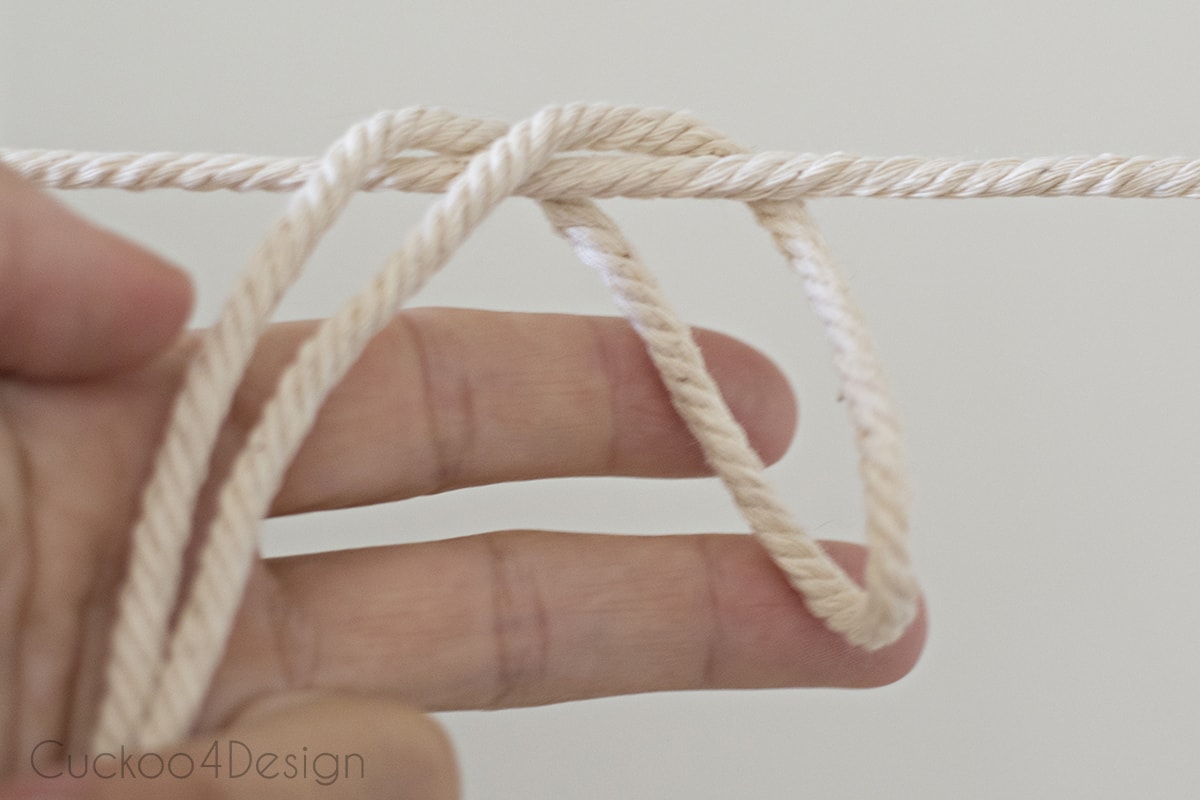
Make sure to pull them tight and repeat 6 times.
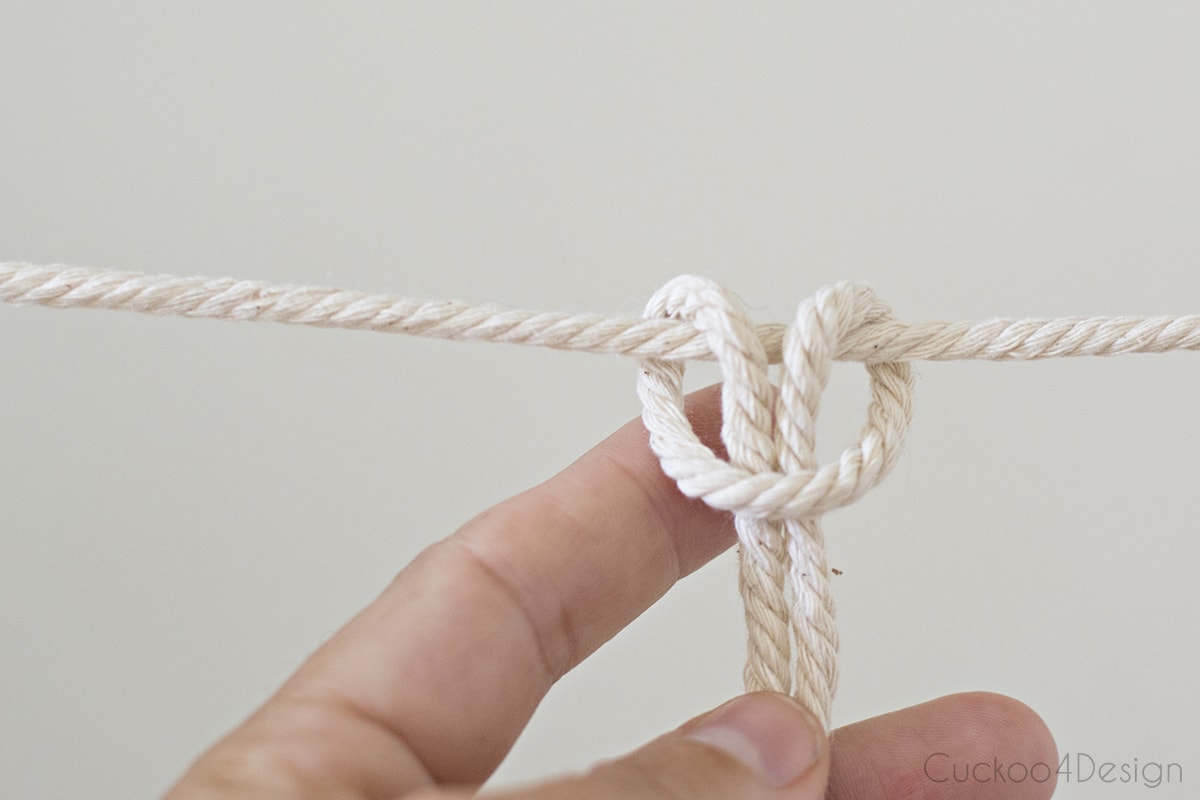
After that, you have to make square knots. Be sure to alternate that string which is placed on top.
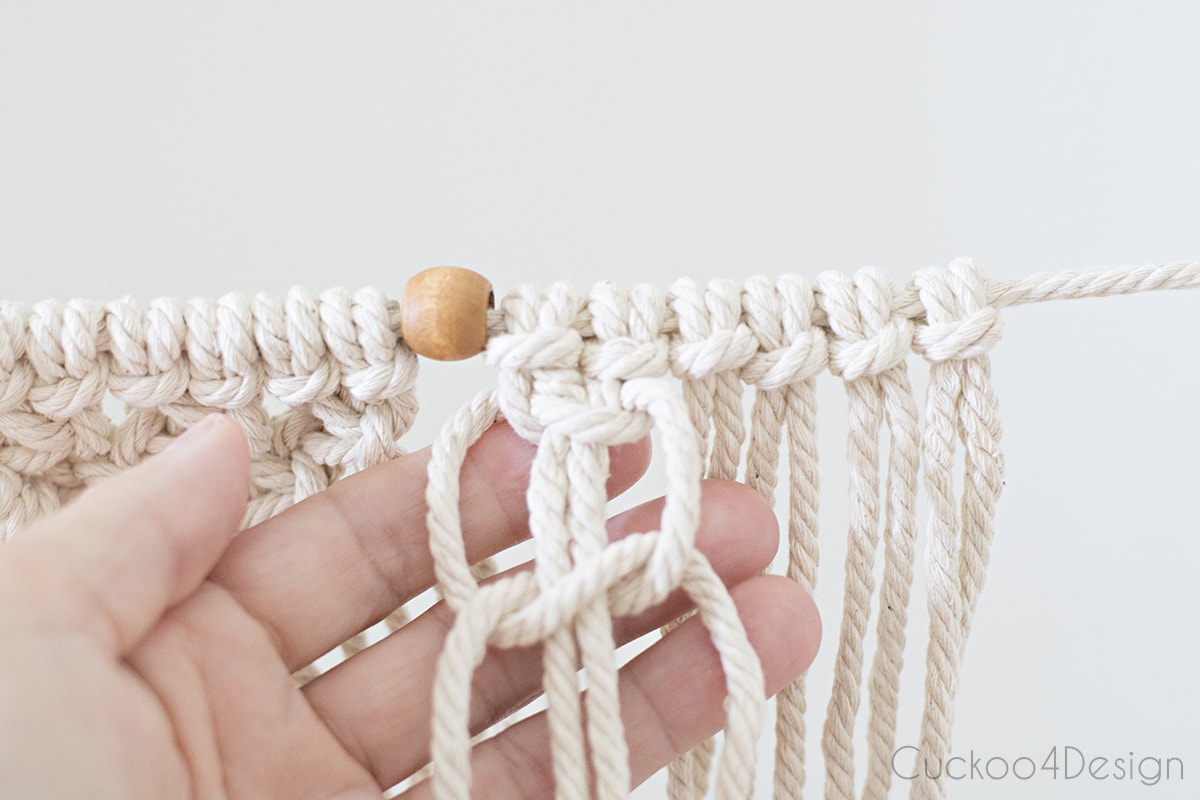
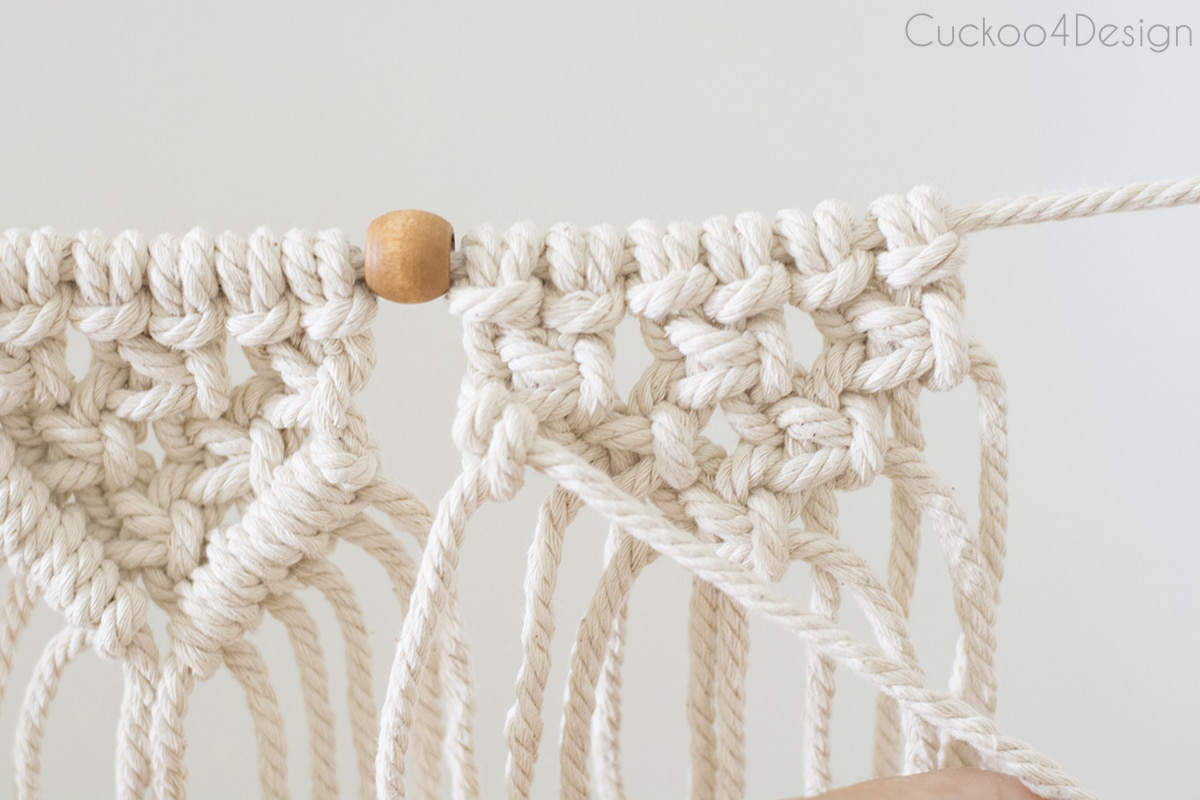
After making a row, you have to offset the knots so you can create a pyramid at the end.
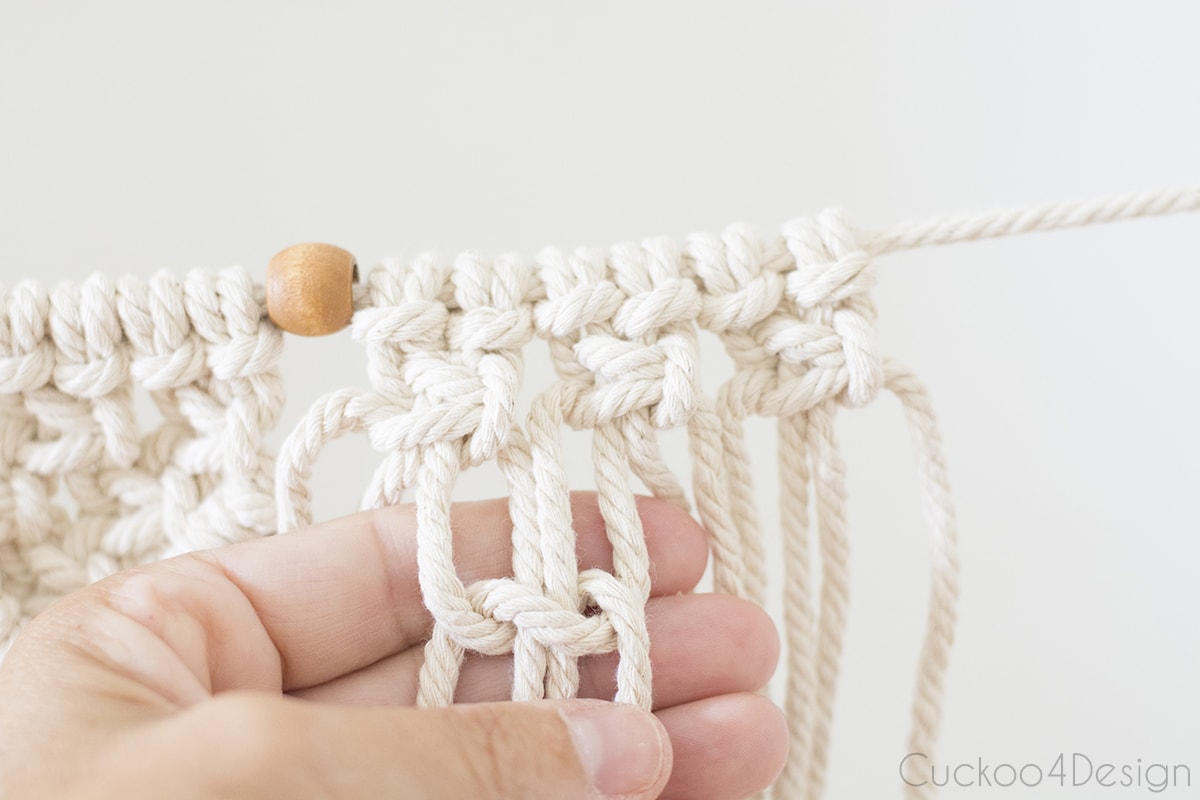
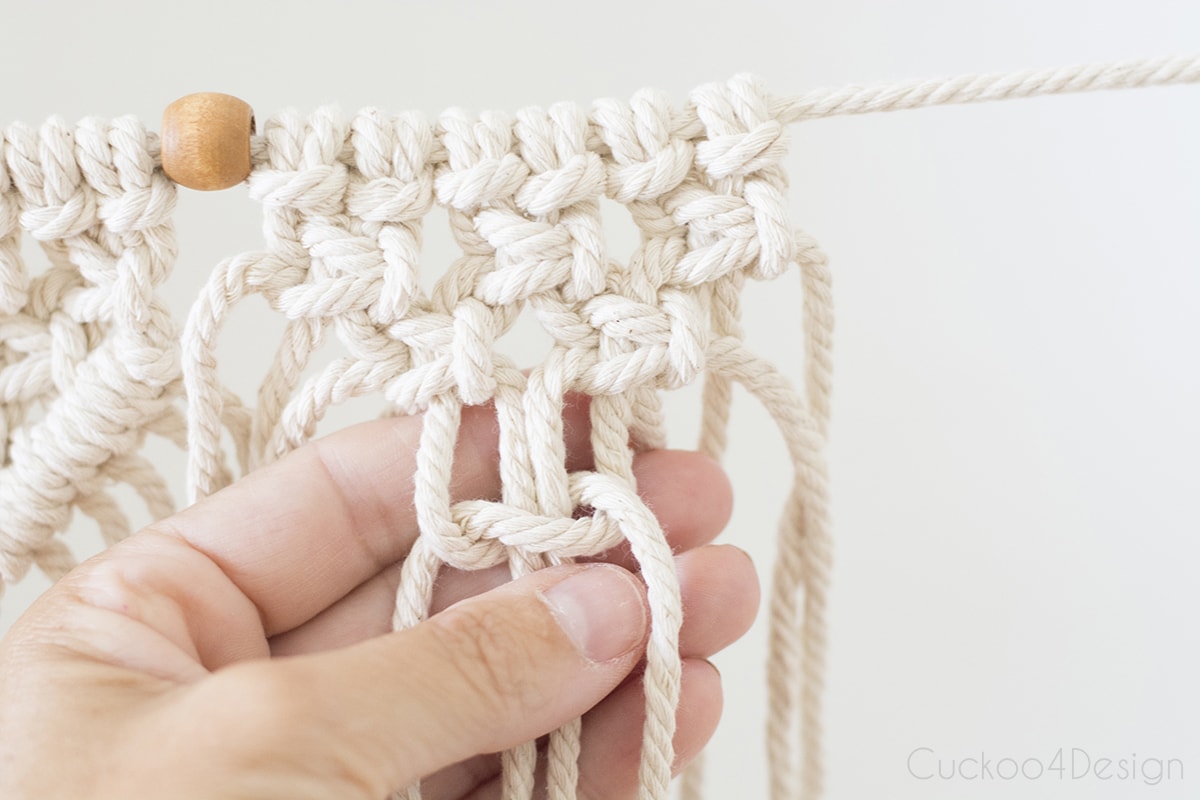
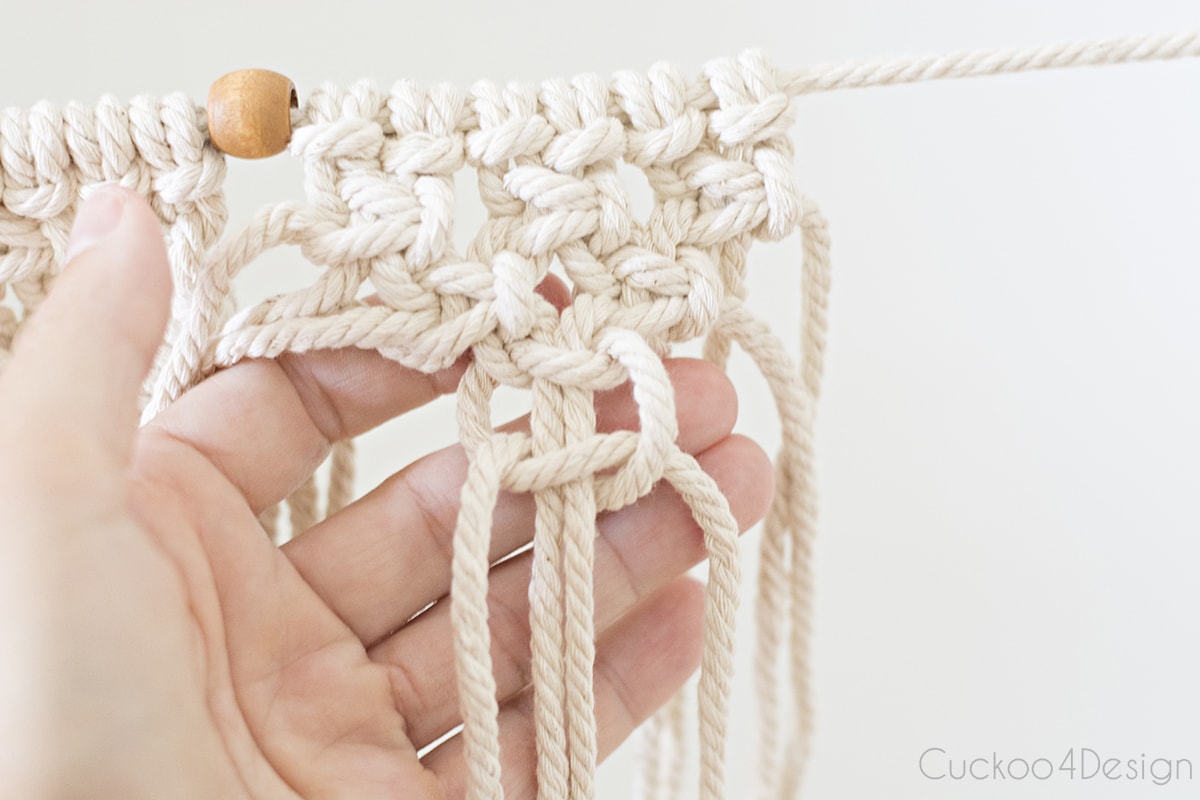
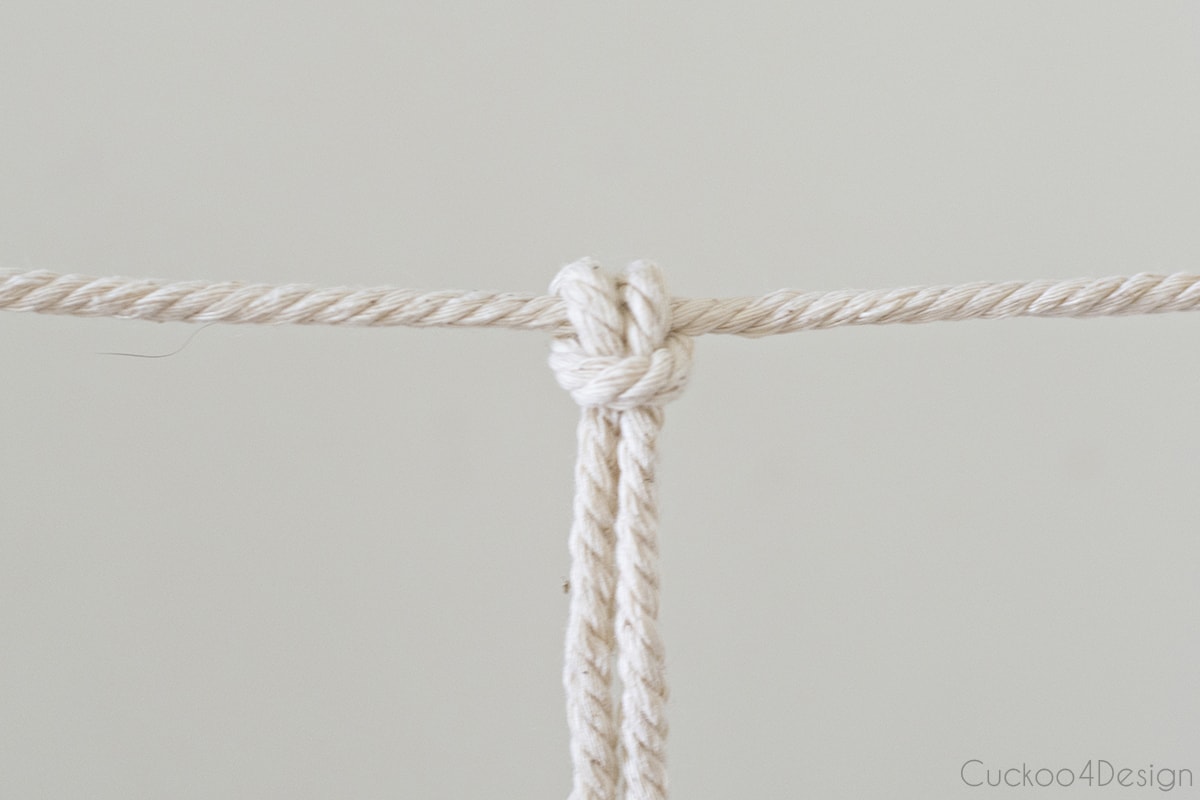
Then it is time to make diagonal Half Hitch knots on each side of the little macrame triangle/pyramid.
These types of knots are basically loops placed on to the outer string on each side that then meets at the center of the piece.

My video might help you better with this step as well.
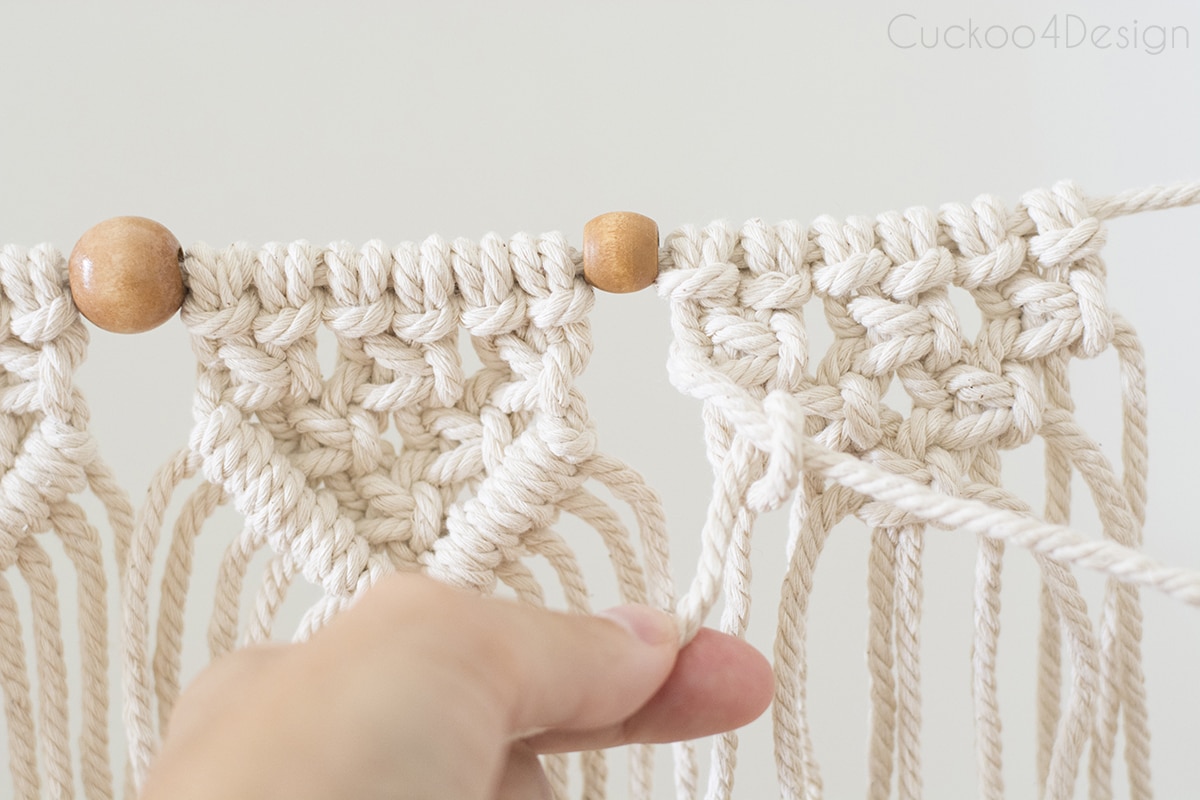
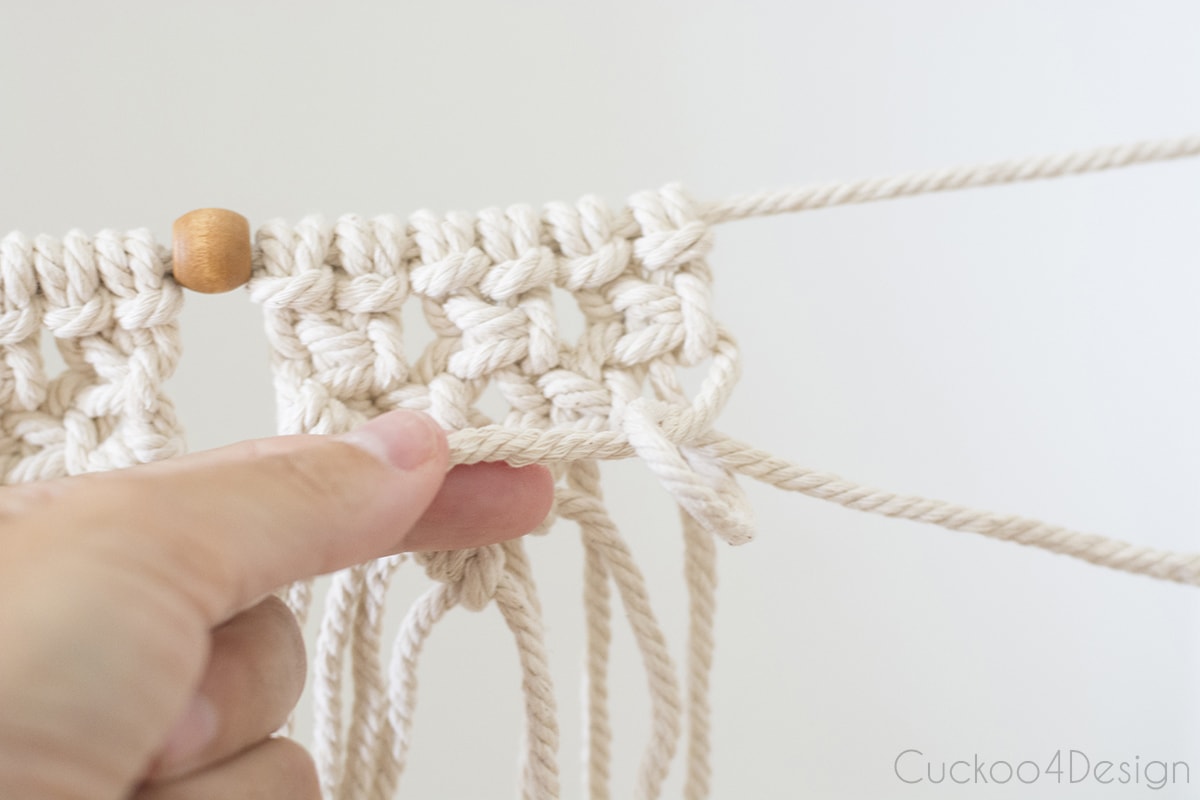
And then the garland is almost done. You can either chose to leave the garland open or you can tie each macrame off into a little tassel at the bottom which I will show you below.
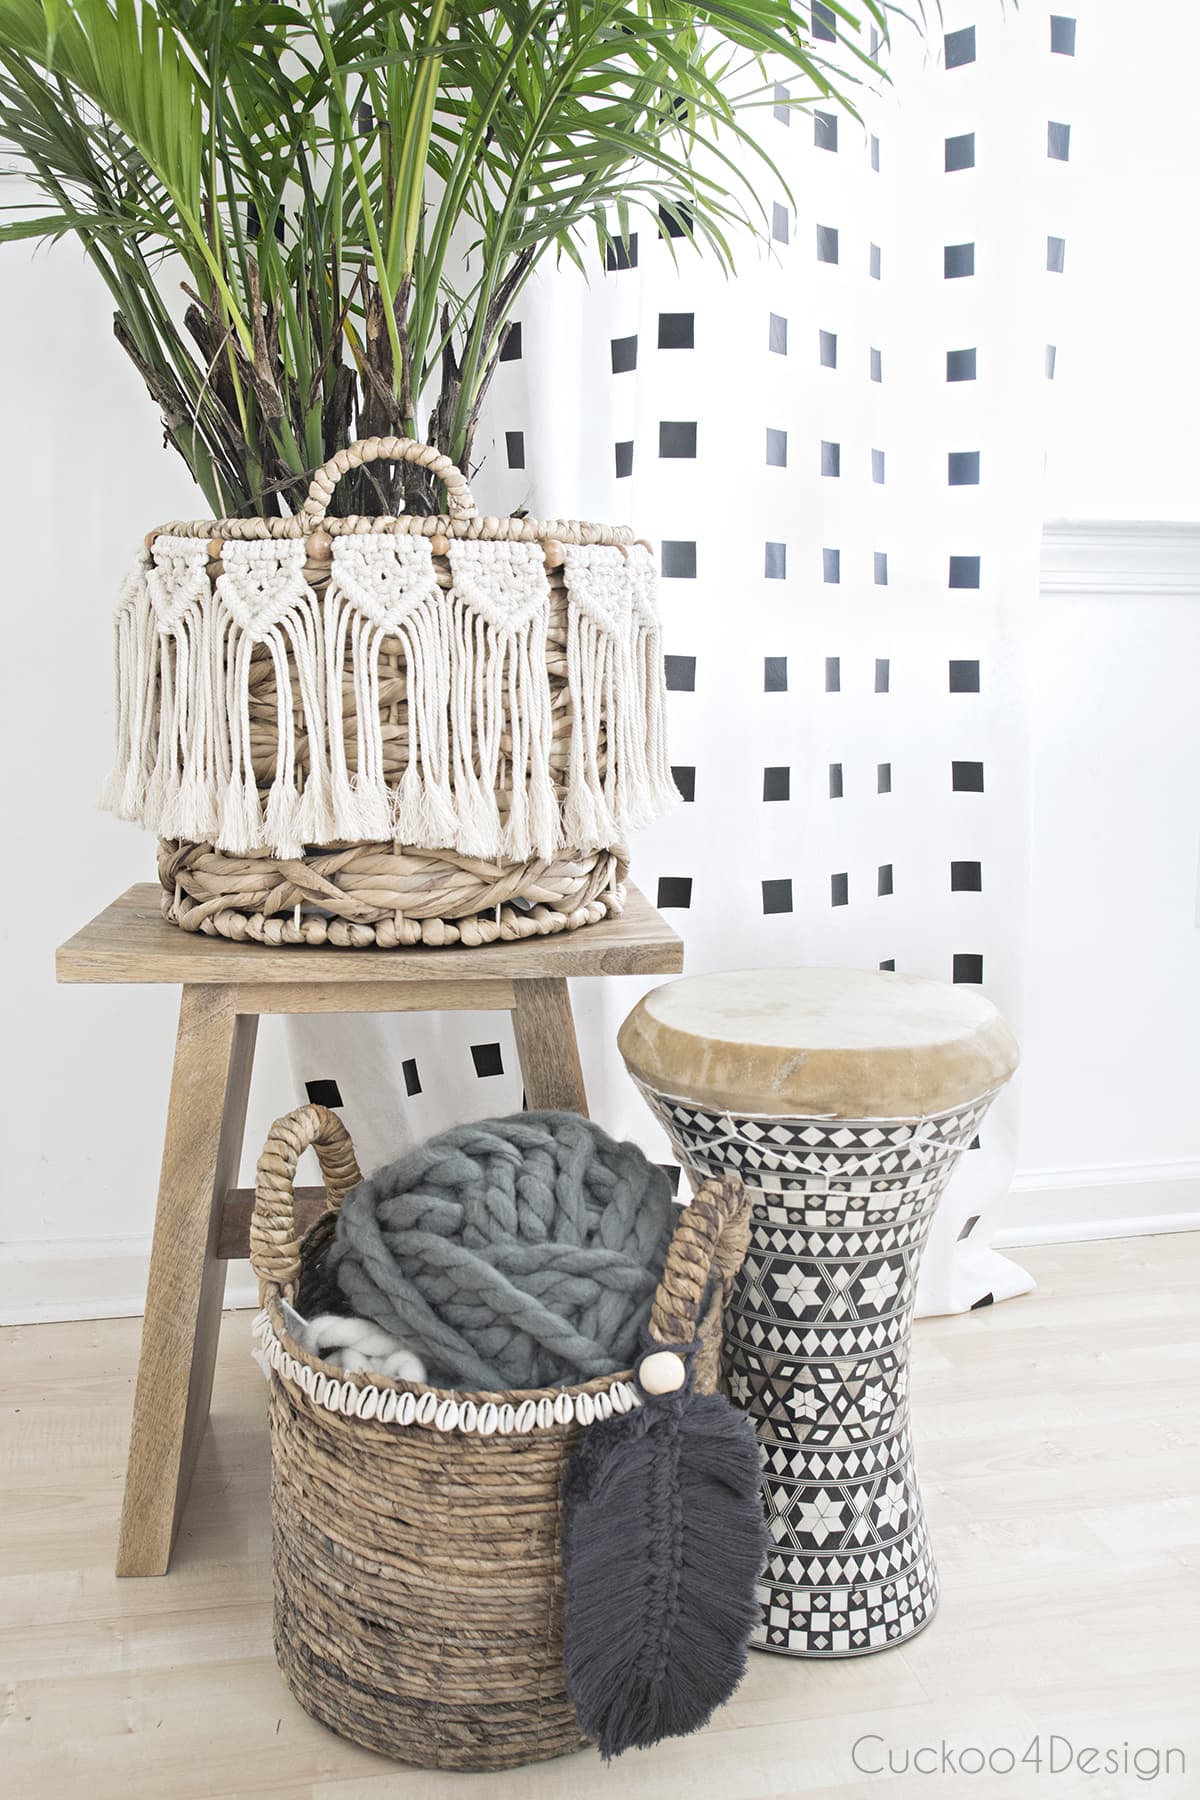
I love using the garland around flower pots and below it is open:
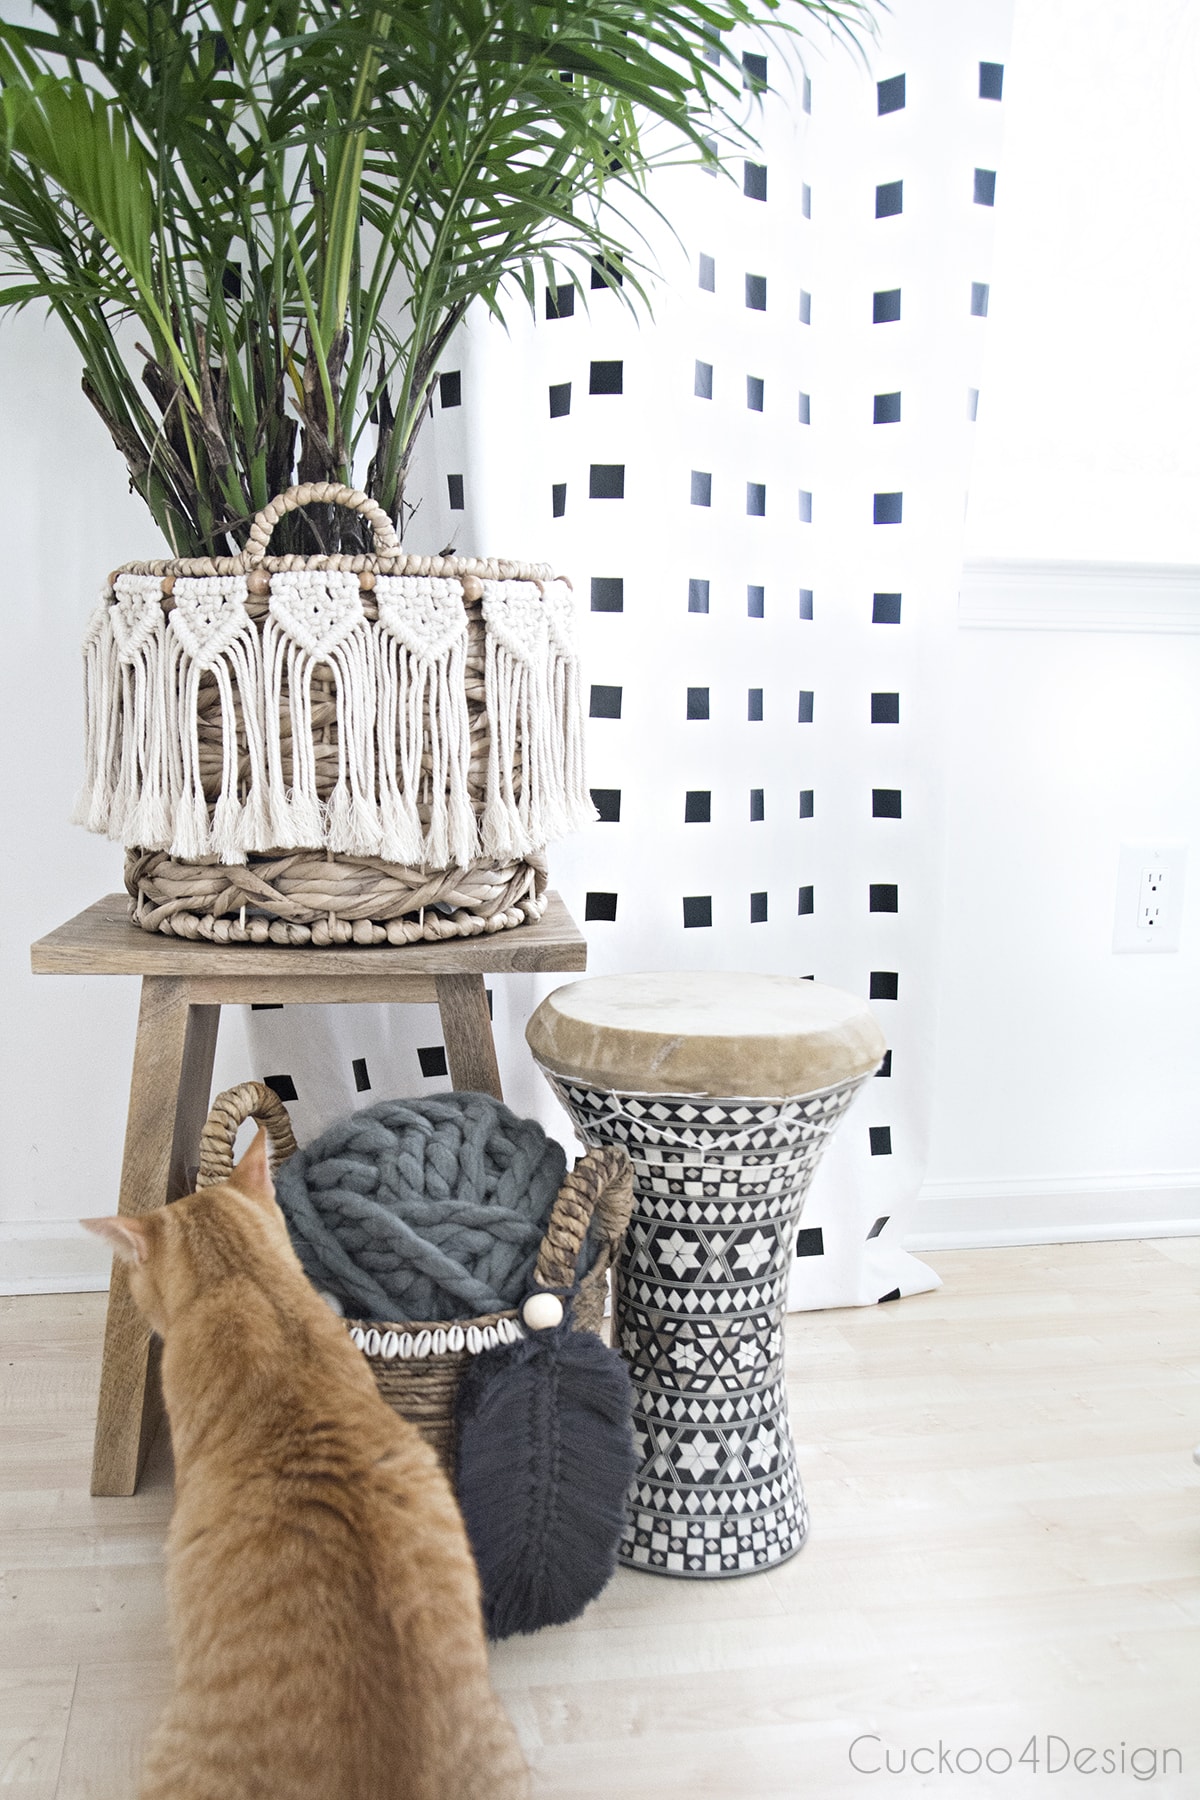
Source from here
Komentar
Posting Komentar