4 Cozy Reading Nooks You’ll Want in Your Home Right Now Constructing a reading nook doesn’t have to be hard. Sometimes all you need is lots of pillows and a little unused space. Reading nooks are also a great way to use dead, unused, or awkward space within a home. Nooks can help maximize living space and provide additional seating, along with providing a personal sanctuary. With these four easy DIY reading nook projects, it won’t be long before you find yourself dreaming of getting lost in a good book. 1. Make Use of Dead Space with a Corner Bench Do you have a dead corner in your house that’s just…there? A great remedy for that empty space is a corner bench. Creating an L-shaped bench will maximize your space. Not only will it provide additional seating, but it can also become storage. Create this bench with bookshelves, cushions, and pillows for the ultimate reading nook space. When the bookshelves are placed together, you can then determine what size cushion you will need to go on ...
DIY Cold Frame

What Materials We Used to Build our DIY Cold Frame:
- Our cold frame measures 41″ by 45″
- 4 windows, our were 28″ by 33″. If you are using old windows, make sure the paint is Lead-Free.
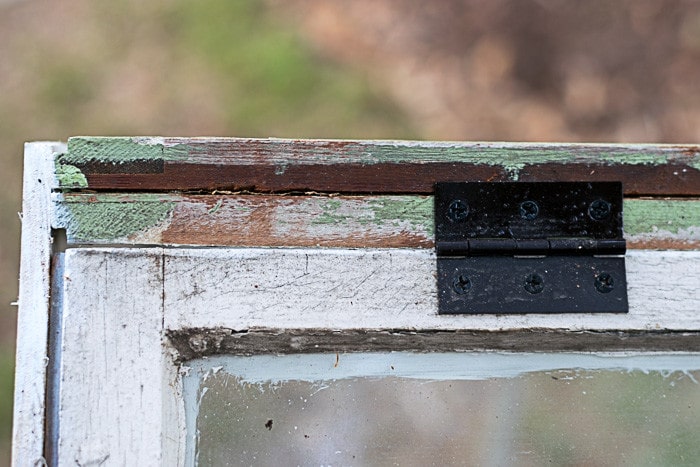
- 3 hinges
- 1 piece of 4′ by 8′, 1/4″ thick plywood
- Drill with screw bit or screwdriver
- Screws for hinges
- Hammer
- Nails
- Primer, Paint, Polyurethane
How we Made our DIY Cold Frame:
- Without a doubt, this project was made easier with 2 sets of hands.
- With the plywood on the floor, we set the windows up on the plywood in the size we wanted the finished Cold Frame to be.
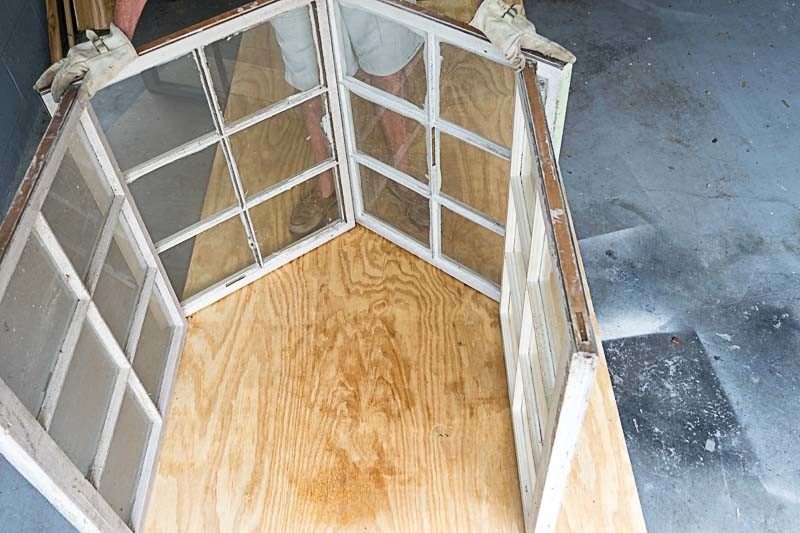
Once we had it how we wanted it…we traced the outline of the windows on the plywood. Mark your outline on the outside of the window. You want the plywood to cover all the edges of the windows. It wasn’t perfectly symmetrical as one window on the roof is offset such that we could hinge it to the other one; one roof window is secured permanently, while the other is hinged. You can see that in these pics.

- I would HIGHLY recommend priming and sealing your plywood side panels before you cut them. Also, seal the bottom of the plywood that will be on the ground and the part of the exposed window frame that is hinged with the polyurethane. We had to do this after the Cold Frame was built and realized it would be much easier to do it beforehand. You can then touch up the cut sides easily after you cut the wood.
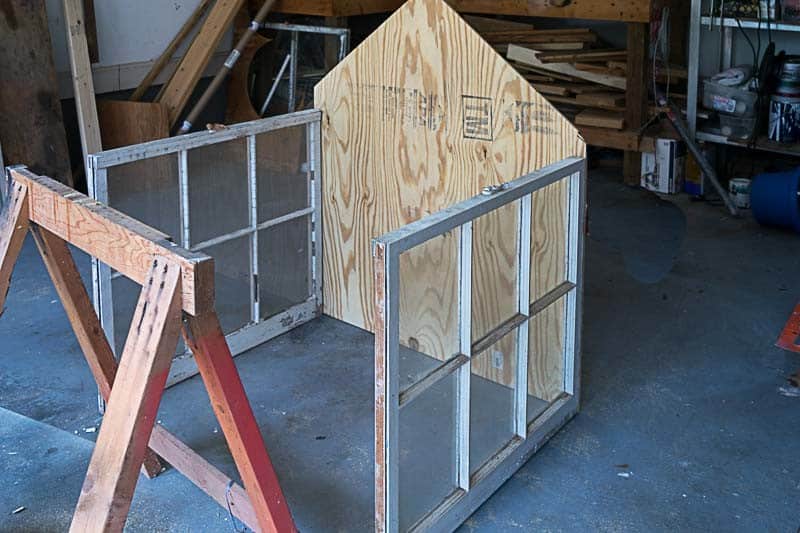
- We cut out 2 side pieces based on the outline. We cut the original one and then used that as the guide to cut the second one.
- We then nailed the plywood sides of the Cold Frame to the windows, making sure all our edges were squared up.

- Turned it on its side and nailed the other side to the windows.
- Then we nailed the stationary roof window to both sides.
- Once the 3 windows were secured to the 2 sides, we hinged the final window to the stationary window.
- Assuming you primed and painted before you nailed everything together, you are done!
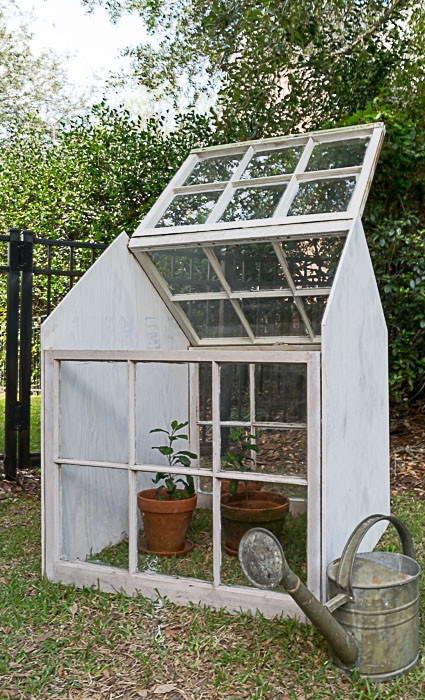
- Put your greenhouse, I mean cold frame in a sunny spot such that the window side will receive sun throughout the day.
Komentar
Posting Komentar