4 Cozy Reading Nooks You’ll Want in Your Home Right Now Constructing a reading nook doesn’t have to be hard. Sometimes all you need is lots of pillows and a little unused space. Reading nooks are also a great way to use dead, unused, or awkward space within a home. Nooks can help maximize living space and provide additional seating, along with providing a personal sanctuary. With these four easy DIY reading nook projects, it won’t be long before you find yourself dreaming of getting lost in a good book. 1. Make Use of Dead Space with a Corner Bench Do you have a dead corner in your house that’s just…there? A great remedy for that empty space is a corner bench. Creating an L-shaped bench will maximize your space. Not only will it provide additional seating, but it can also become storage. Create this bench with bookshelves, cushions, and pillows for the ultimate reading nook space. When the bookshelves are placed together, you can then determine what size cushion you will need to go on ...
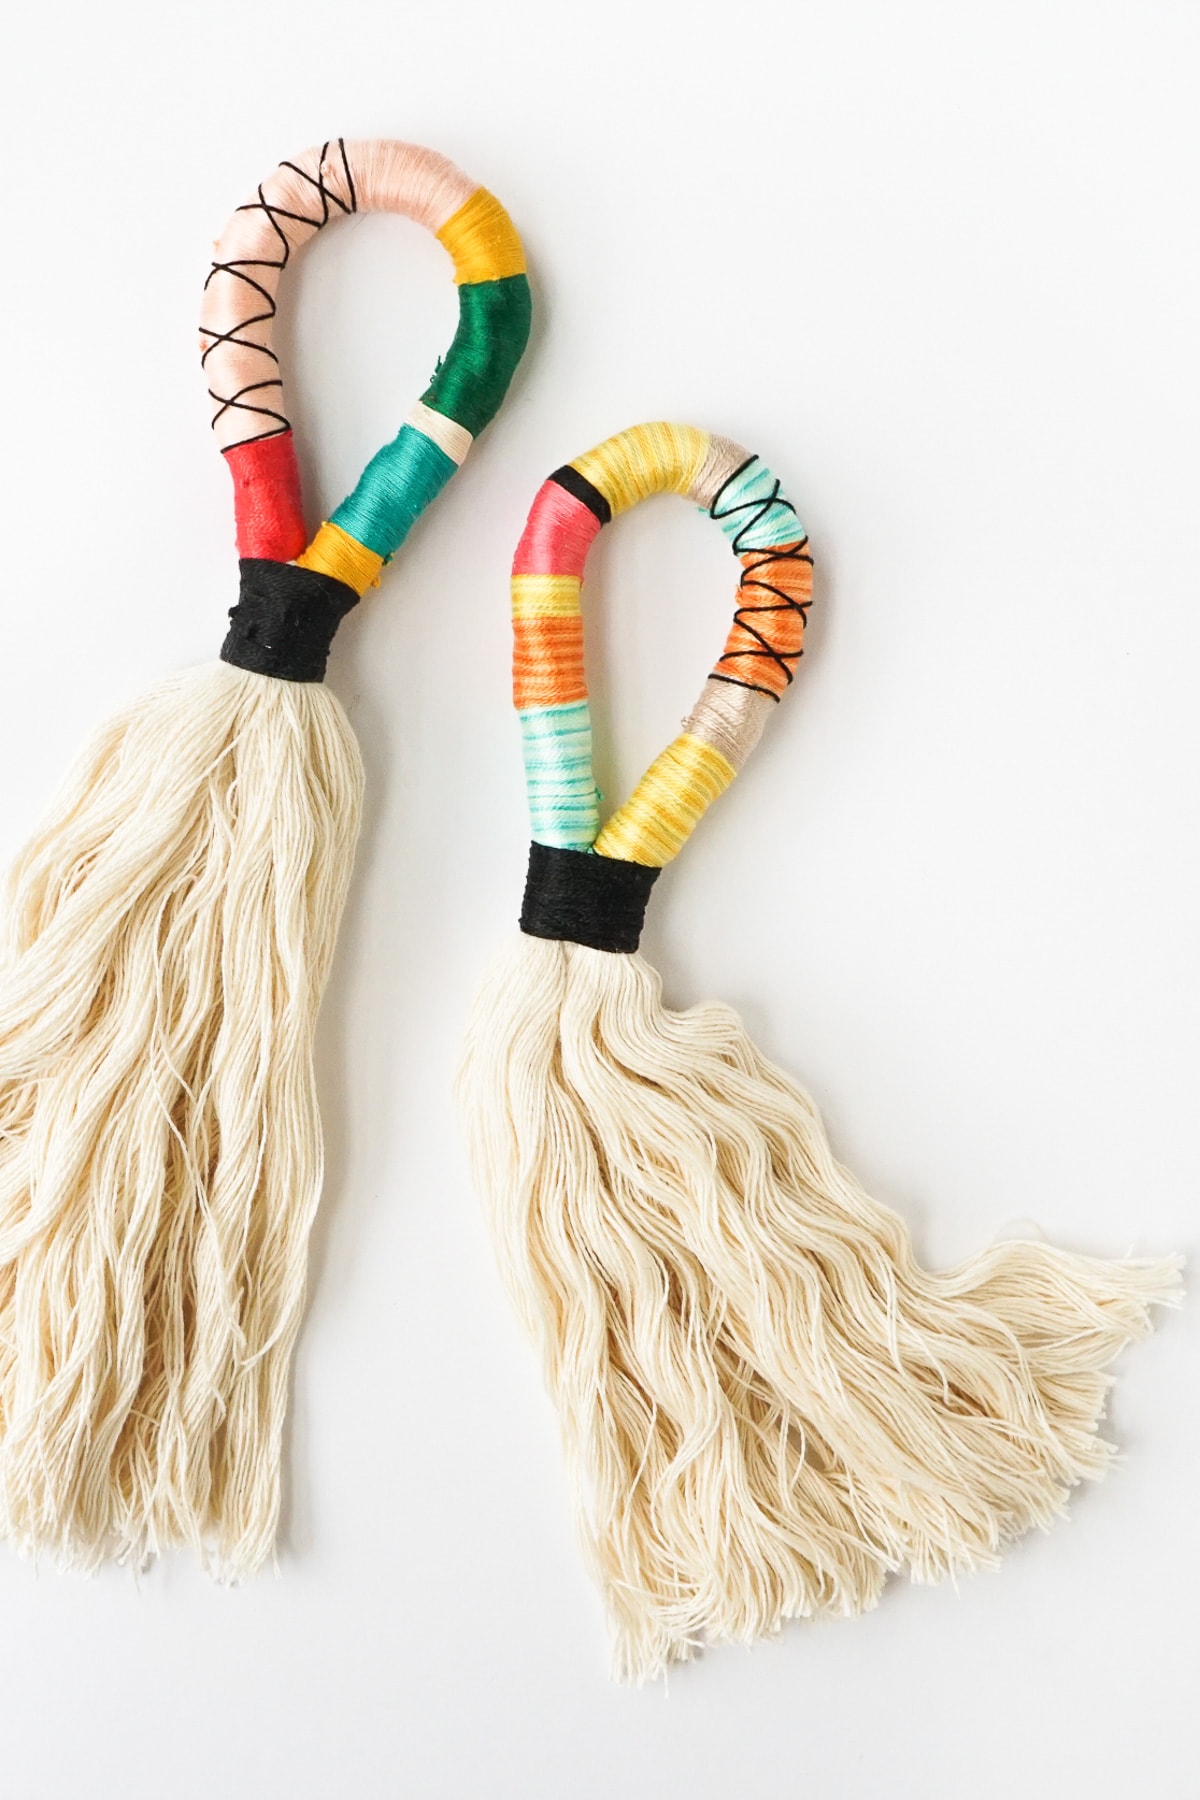
DIY Door Handle Tassel

Inspired by the camel swag trend, these colorful DIY Door Handle Tassels are the perfect detail to add texture and color in your home!
Servings: 1
Cost: $40
Equipment
- Scissors
- Market
Ingredients
Instructions
- Cut a 28″ piece of jumbo cotton rope. Fold the rope in half and cinch it together roughly 4-5″ from the top to form a loop. Check to make sure the cinched loop fits around your doorknob.
- Mark the rope with a marker at the cinched location. These marks will denote where to start and stop the wrapped string.
- Decide what order the colors will wrap around the rope loop. Double knot the first color around the rope at one of the marks made in the previous step, and begin tightly wrapping the rope with string. Don’t trim the string tail as you’ll need it later.
- When ready to switch colors, simply double knot the new color onto the end of the previous color. When adding another color, try to position the knot so it falls towards the backside of the rope.
- Continue wrapping the rope with various colors until you reach the opposite rope mark, and bend the string-wrapped rope into a loop. Secure the loop with a contrasting string wrap.
- Double knot the contrasting color onto the preceding string color. (Same as you did in the previous step.)
- Begin at the bottom, and wrap the entire base with a 1” band. Tie off the string to the first string color used in Step 2.
- For the criss-cross embellishment, wrap the contrasting string around the loop and double knot it placing the knot on the backside. Do not trim the tail just yet
- Wind the string up diagonally a few times and then wrap it back down at the opposite angle to form an “X”. Tie the string to the tail formed at the beginning of this step.
- Untwist and fluff the rope below the loop, and trim to your desired length. Hang on your door!
Source from here
Komentar
Posting Komentar