4 Cozy Reading Nooks You’ll Want in Your Home Right Now Constructing a reading nook doesn’t have to be hard. Sometimes all you need is lots of pillows and a little unused space. Reading nooks are also a great way to use dead, unused, or awkward space within a home. Nooks can help maximize living space and provide additional seating, along with providing a personal sanctuary. With these four easy DIY reading nook projects, it won’t be long before you find yourself dreaming of getting lost in a good book. 1. Make Use of Dead Space with a Corner Bench Do you have a dead corner in your house that’s just…there? A great remedy for that empty space is a corner bench. Creating an L-shaped bench will maximize your space. Not only will it provide additional seating, but it can also become storage. Create this bench with bookshelves, cushions, and pillows for the ultimate reading nook space. When the bookshelves are placed together, you can then determine what size cushion you will need to go on ...
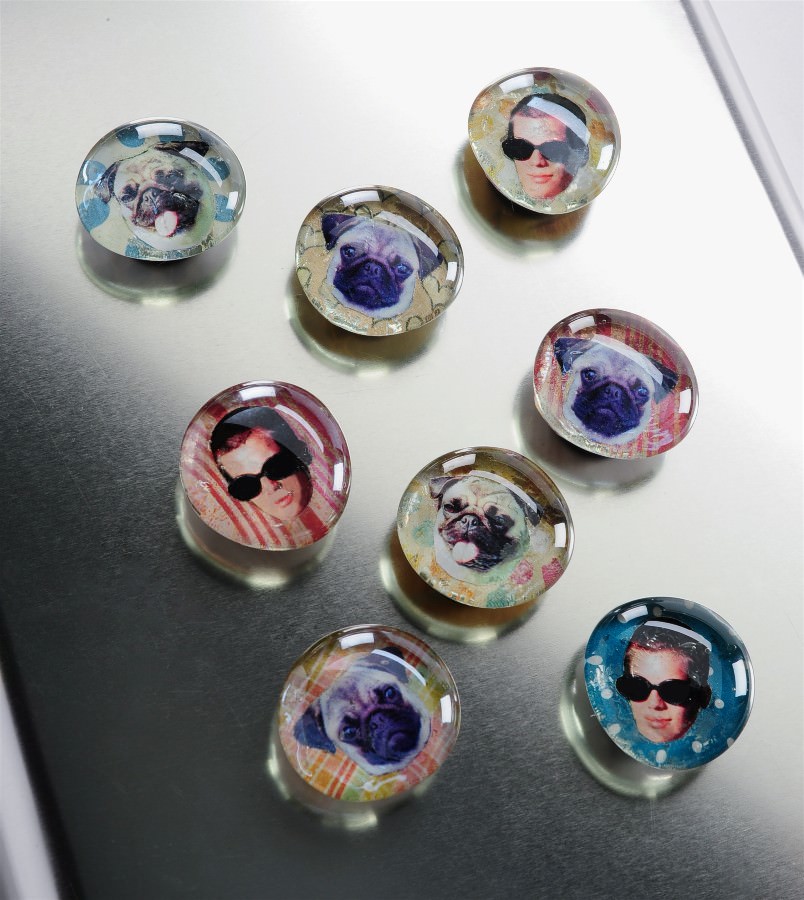
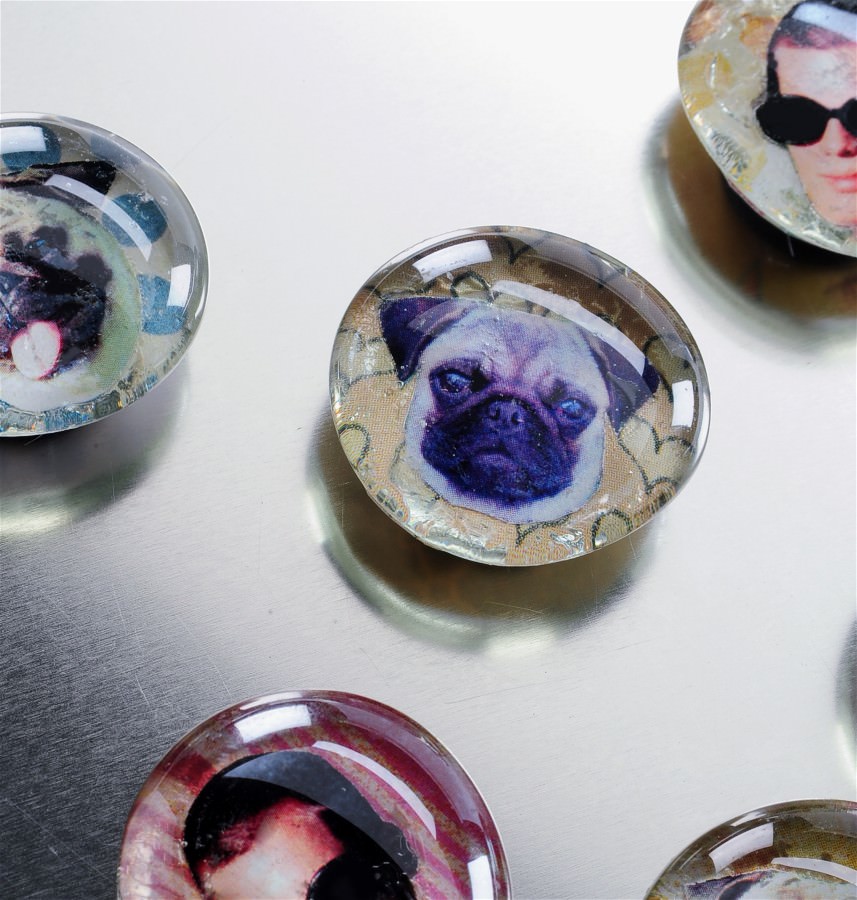
DIY GLASS PHOTO MAGNETS WITH LOW BUDGET
Materials
- Photos to scan
- Mod Podge Gloss
- Scrapbook paper scraps
- Glass beads
- Magnets
Tools
- Computer and printer/scanner
- Hot glue gun
- Pencil or pen
- Paintbrush
Instructions
- Use photo editing software to size your images to fit your glass marbles; print out using a laserjet or dry ink printer.
- Cut out your photo shapes and set aside.
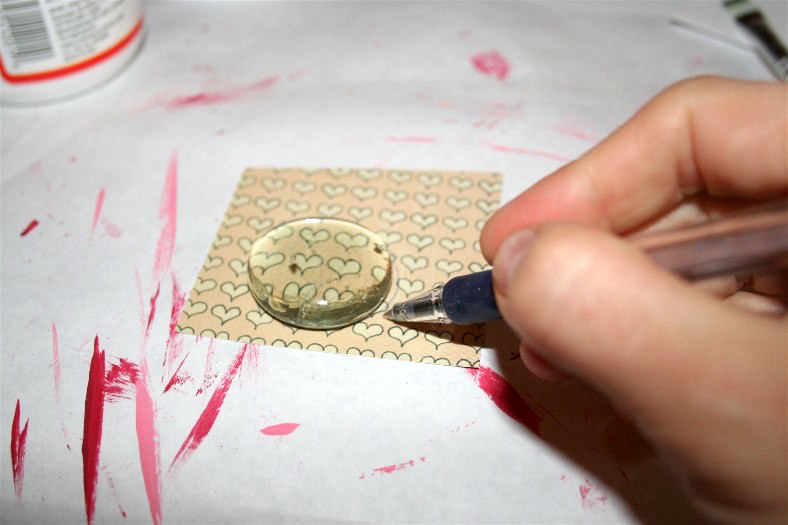
- The glass marbles are not completely round, so trace them onto your scrapbook paper pieces and then cut out the shapes just inside the lines.
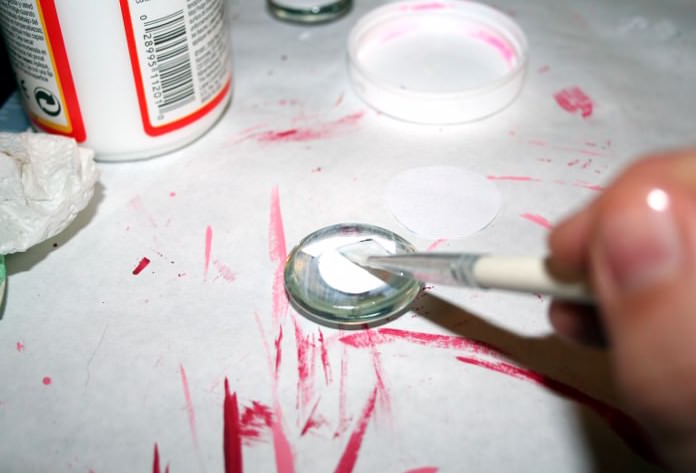
- Use Mod Podge to adhere the face (right side down on the marble). Smooth and allow to dry for 15 - 20 minutes.
- Adhere the scrapbook paper (right side down) on to the marble, allow to dry overnight.
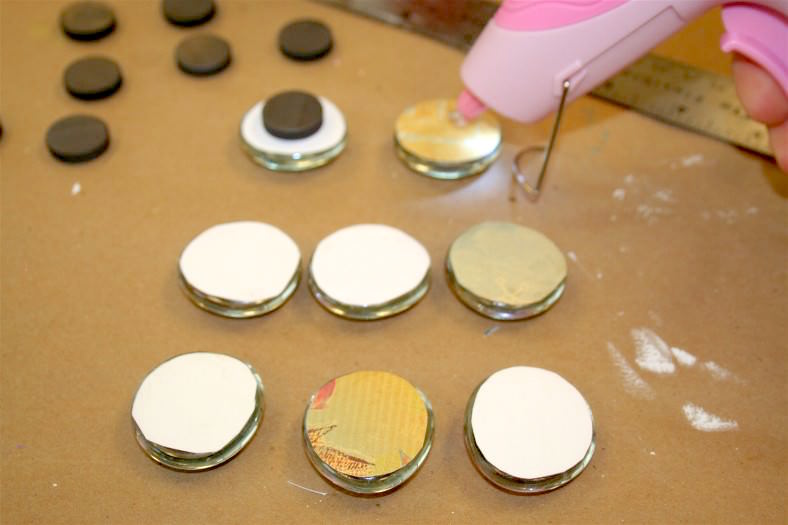
- Hot glue to the magnets to the back to finish.
Source from here
Komentar
Posting Komentar