4 Cozy Reading Nooks You’ll Want in Your Home Right Now Constructing a reading nook doesn’t have to be hard. Sometimes all you need is lots of pillows and a little unused space. Reading nooks are also a great way to use dead, unused, or awkward space within a home. Nooks can help maximize living space and provide additional seating, along with providing a personal sanctuary. With these four easy DIY reading nook projects, it won’t be long before you find yourself dreaming of getting lost in a good book. 1. Make Use of Dead Space with a Corner Bench Do you have a dead corner in your house that’s just…there? A great remedy for that empty space is a corner bench. Creating an L-shaped bench will maximize your space. Not only will it provide additional seating, but it can also become storage. Create this bench with bookshelves, cushions, and pillows for the ultimate reading nook space. When the bookshelves are placed together, you can then determine what size cushion you will need to go on ...
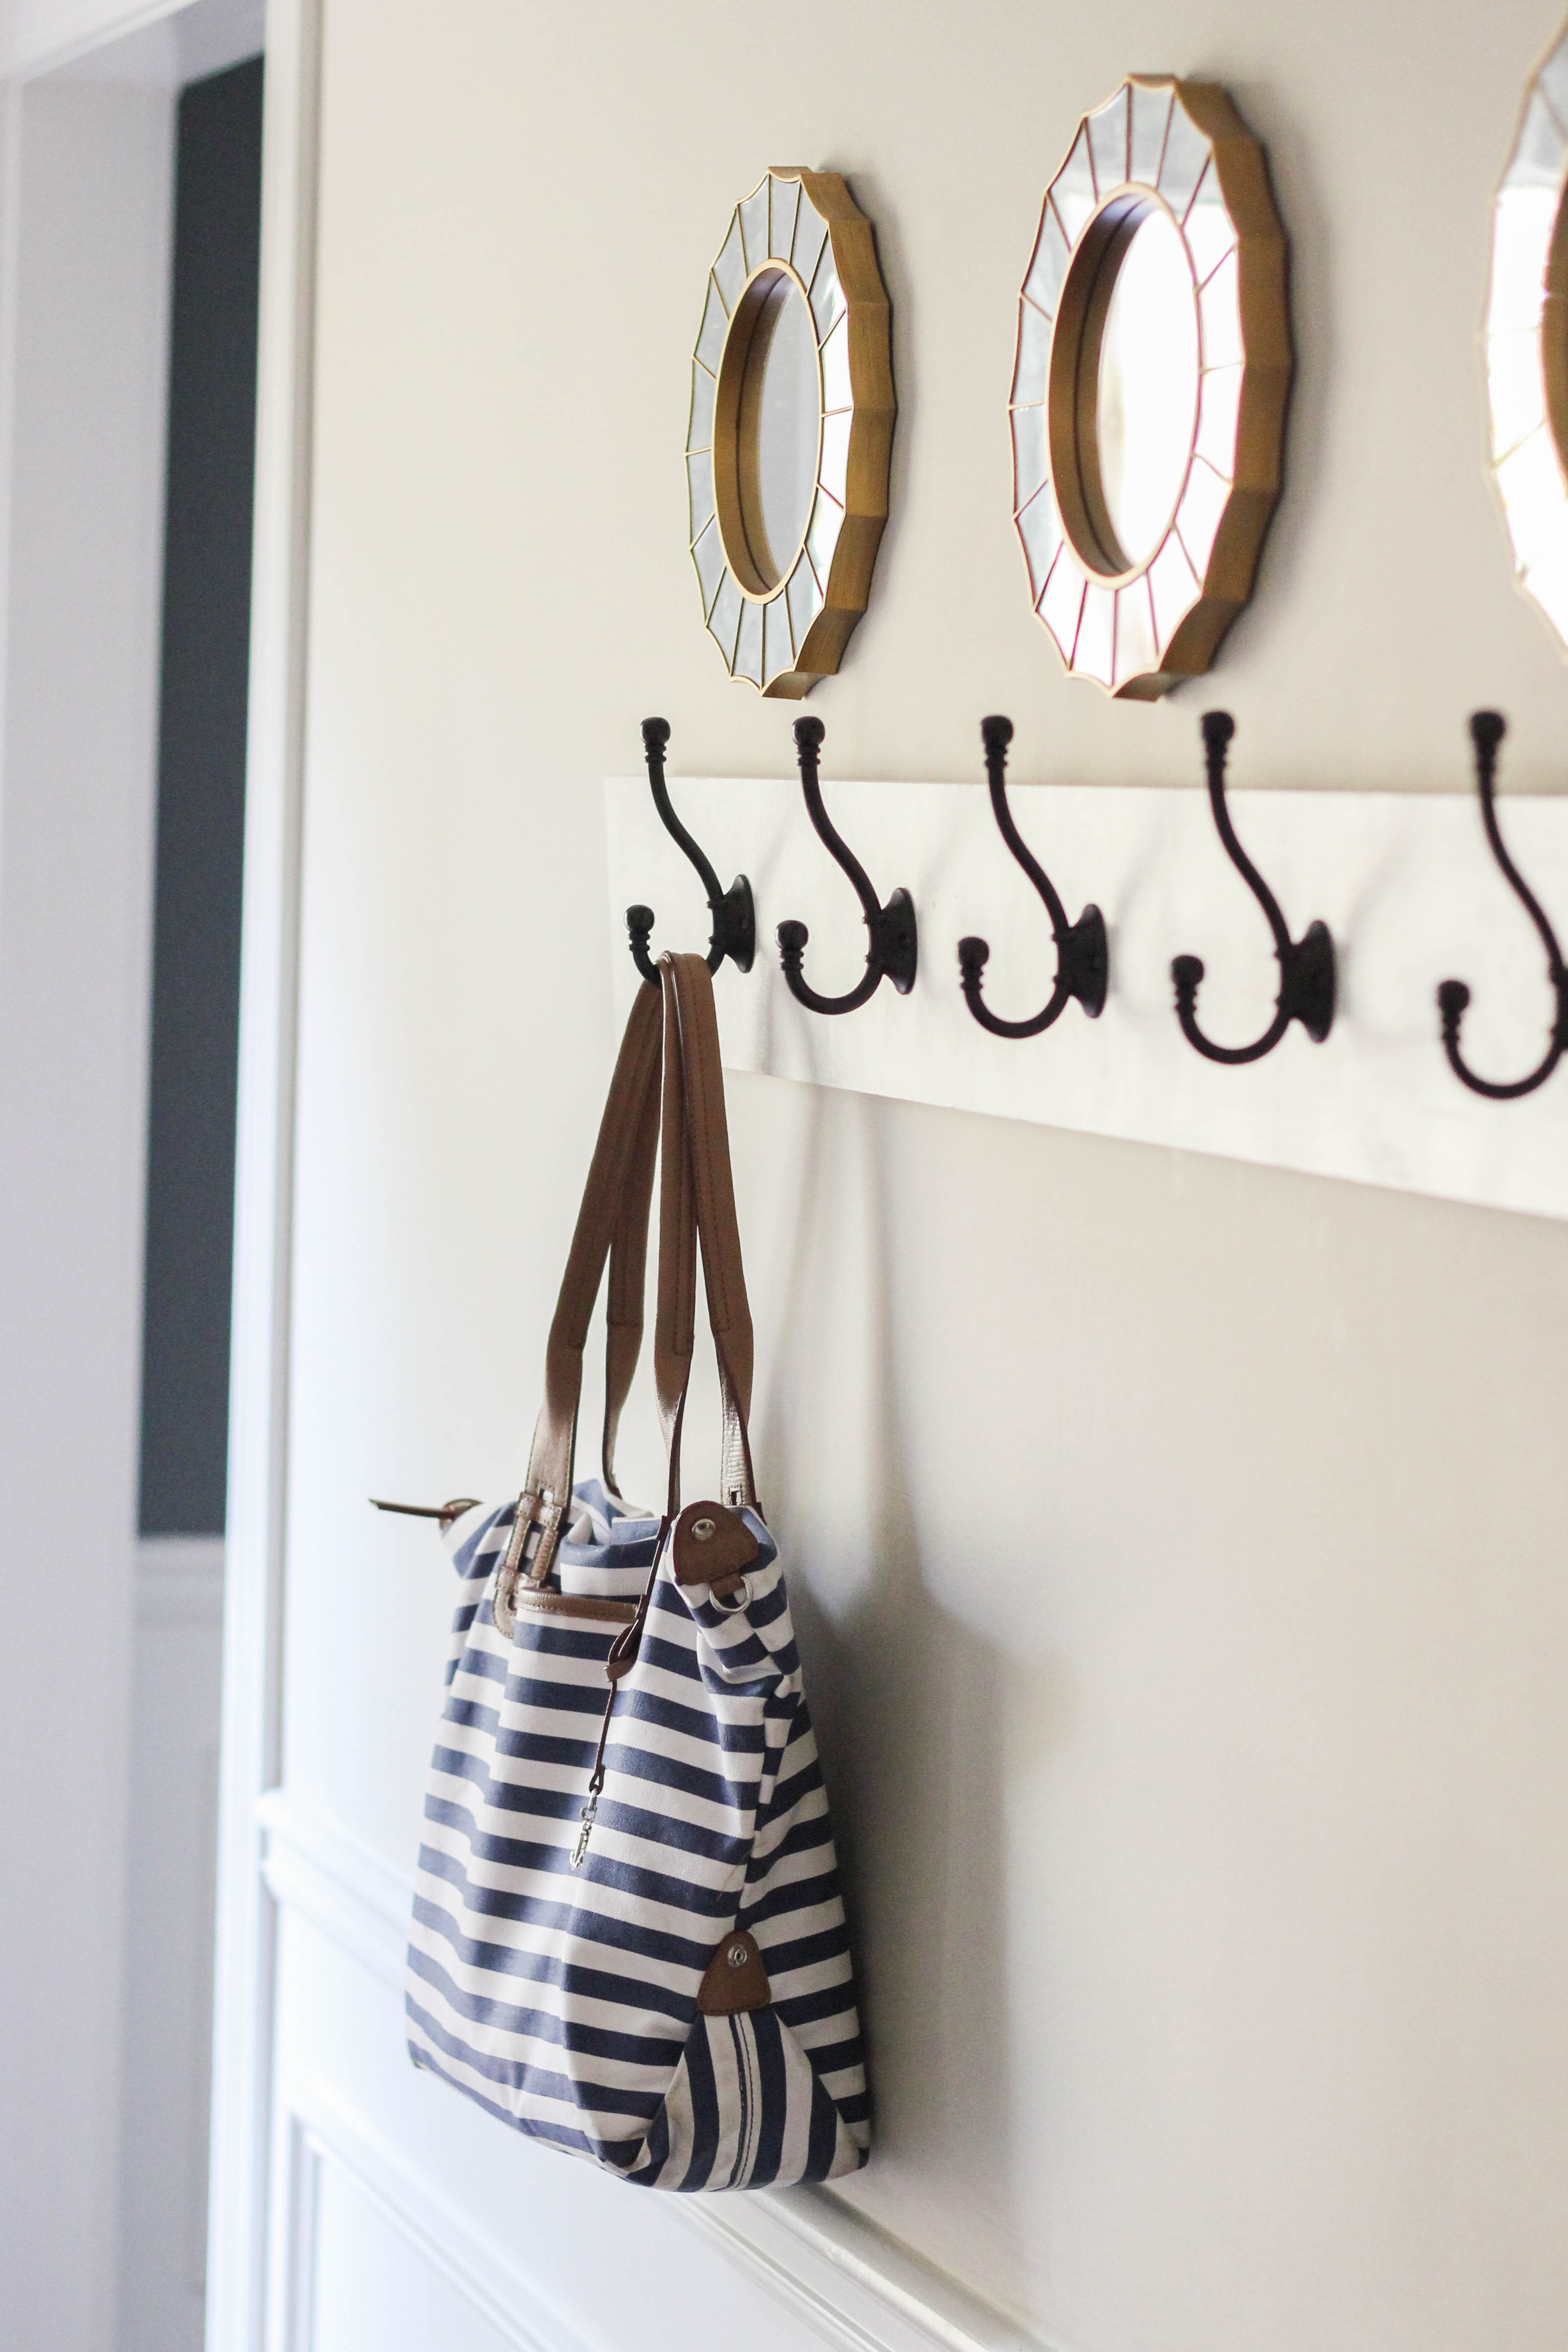
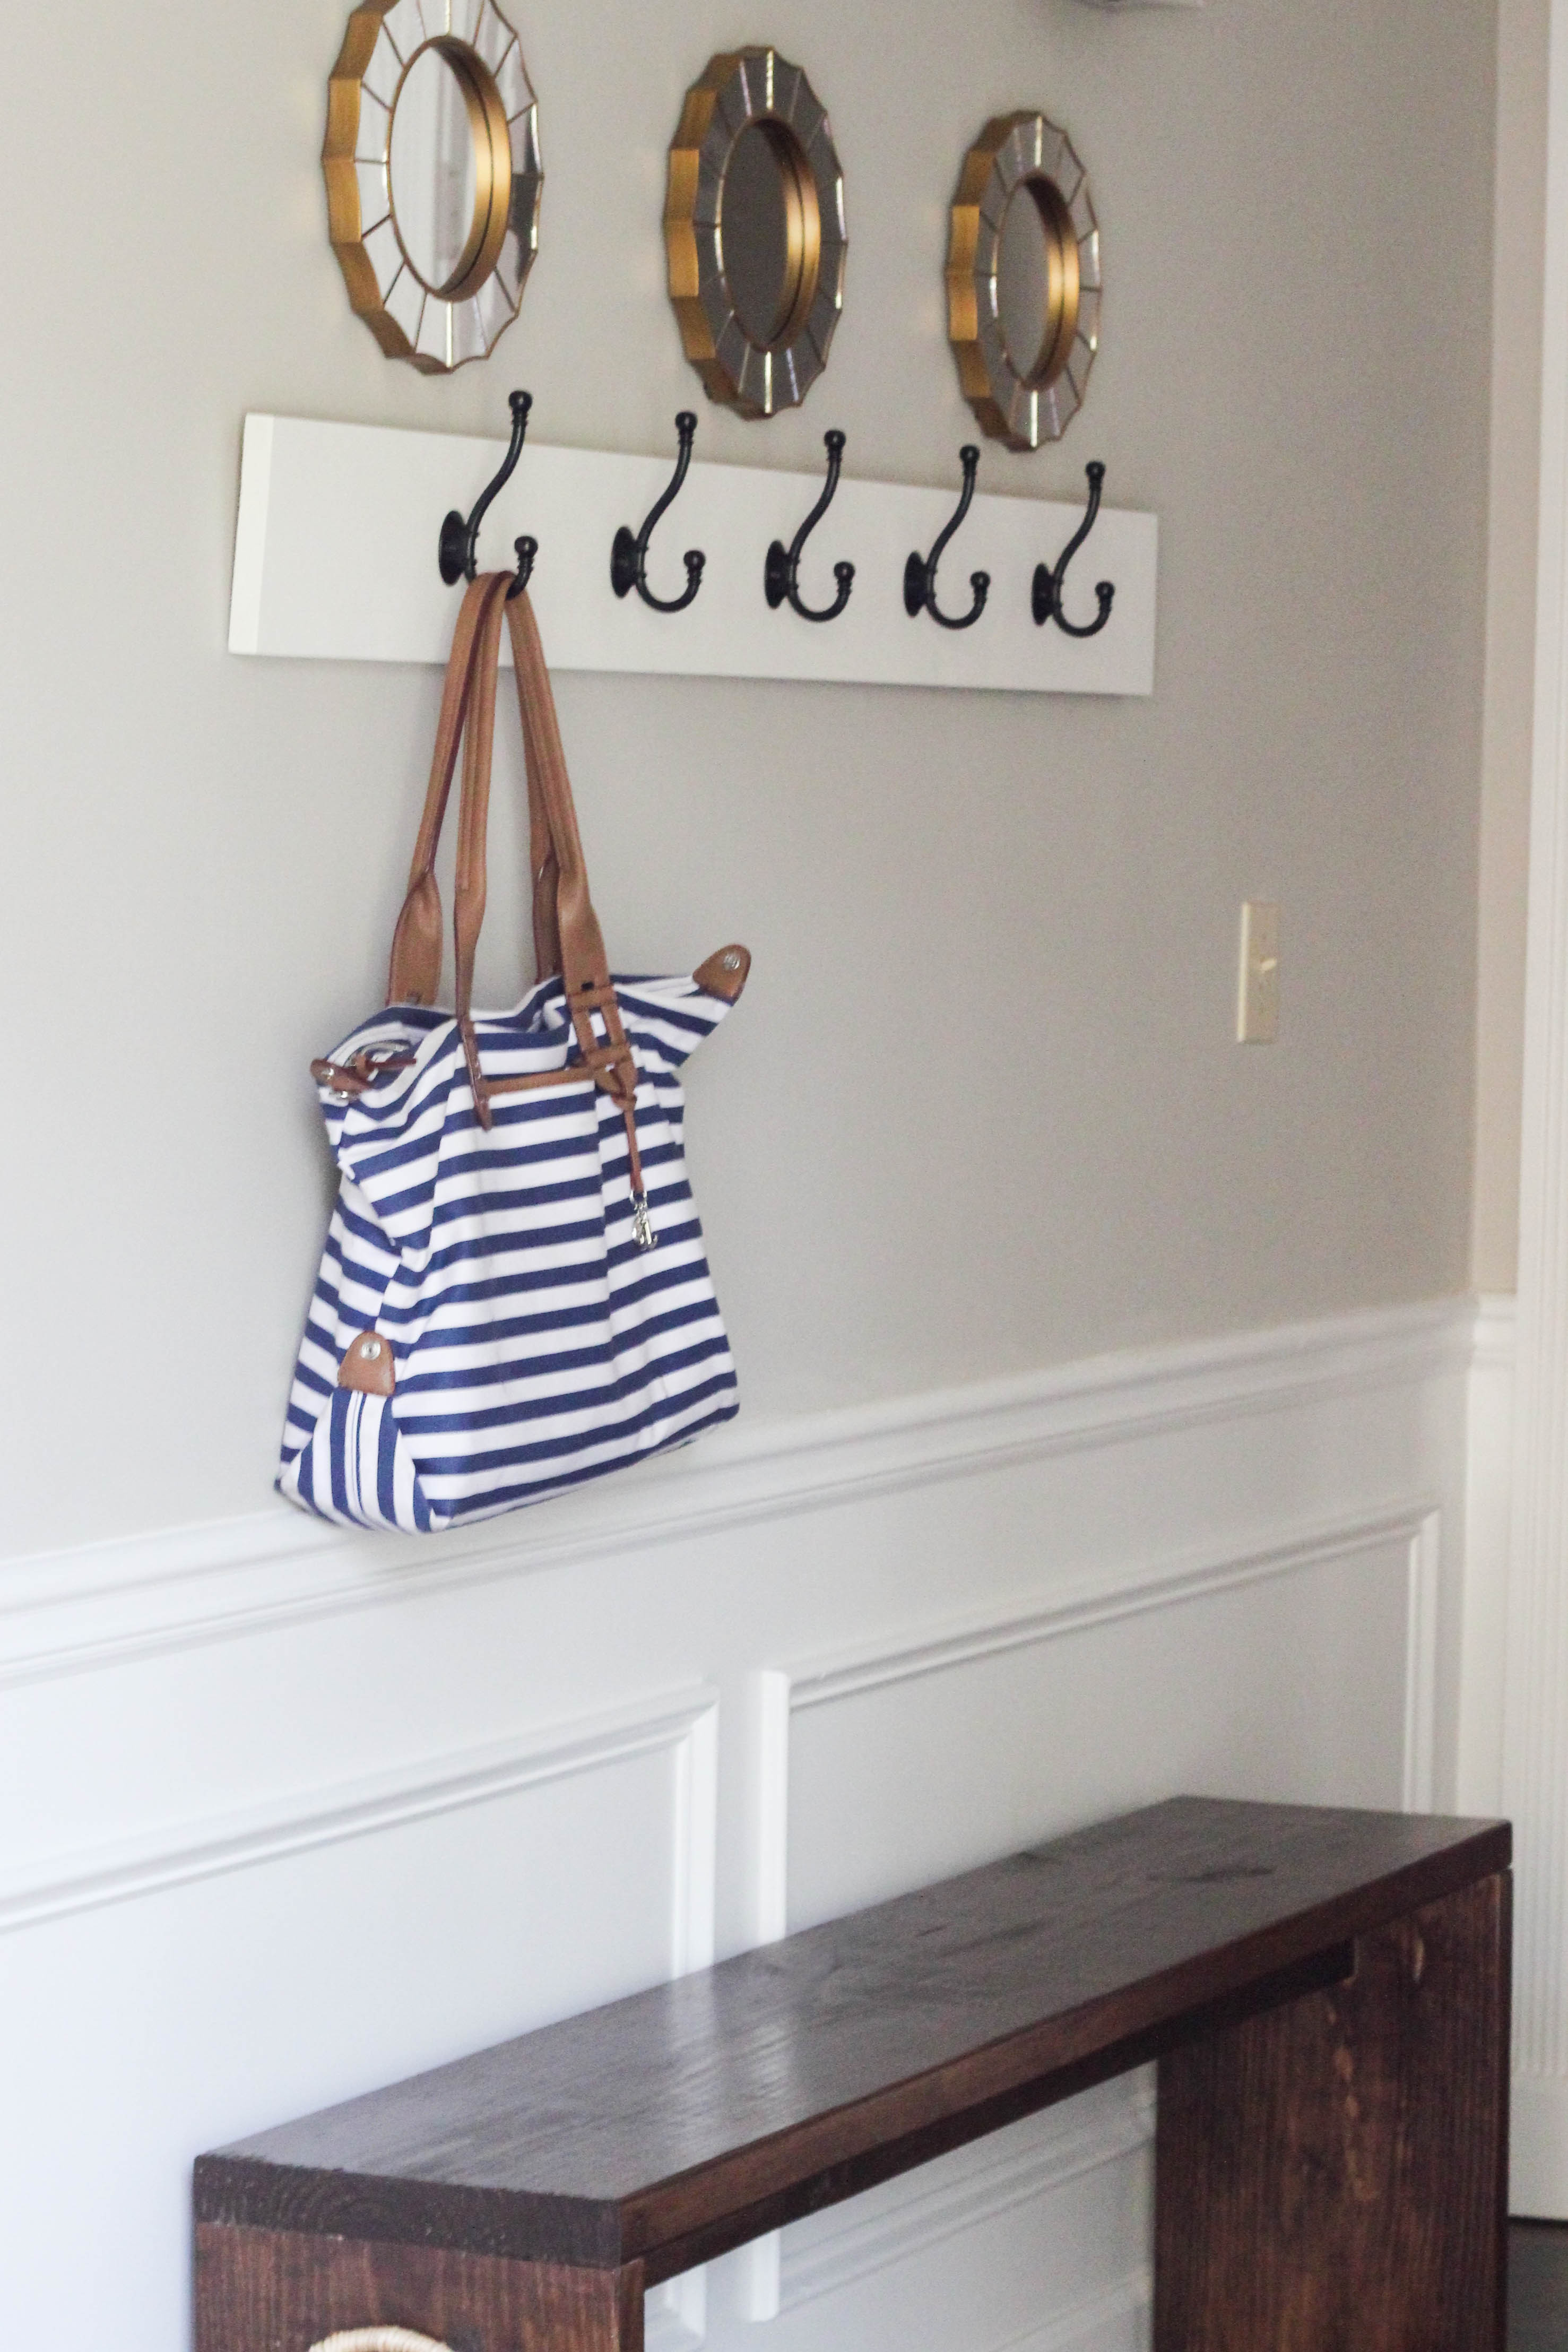
HOW TO BUILD A WALL MOUNTED COAT RACK
What you’ll need for this project:
- 1×6 cut to 54″ long (or length of your choice)
- 5 Coat Hooks
(I used oil-rubbed bronze from D. Lawless Hardware)
- Drill
- Screwdriver
- Primer and paint of your choice, or stain (I used Sherwin Williams Alabaster in semi-gloss)
- Paintbrush
- Foam Roller
- Wood Screws
or Wall Anchors and screws
- Miter Saw
or Circular Saw
(or you can have your 1×6 cut to length at The Home Depot when you buy it)
- Measuring tape
- Pencil
- Sander
- RYOBI Multi-Tool/Duct Tape/or Shorter screws for the coat hooks (see Step 6)
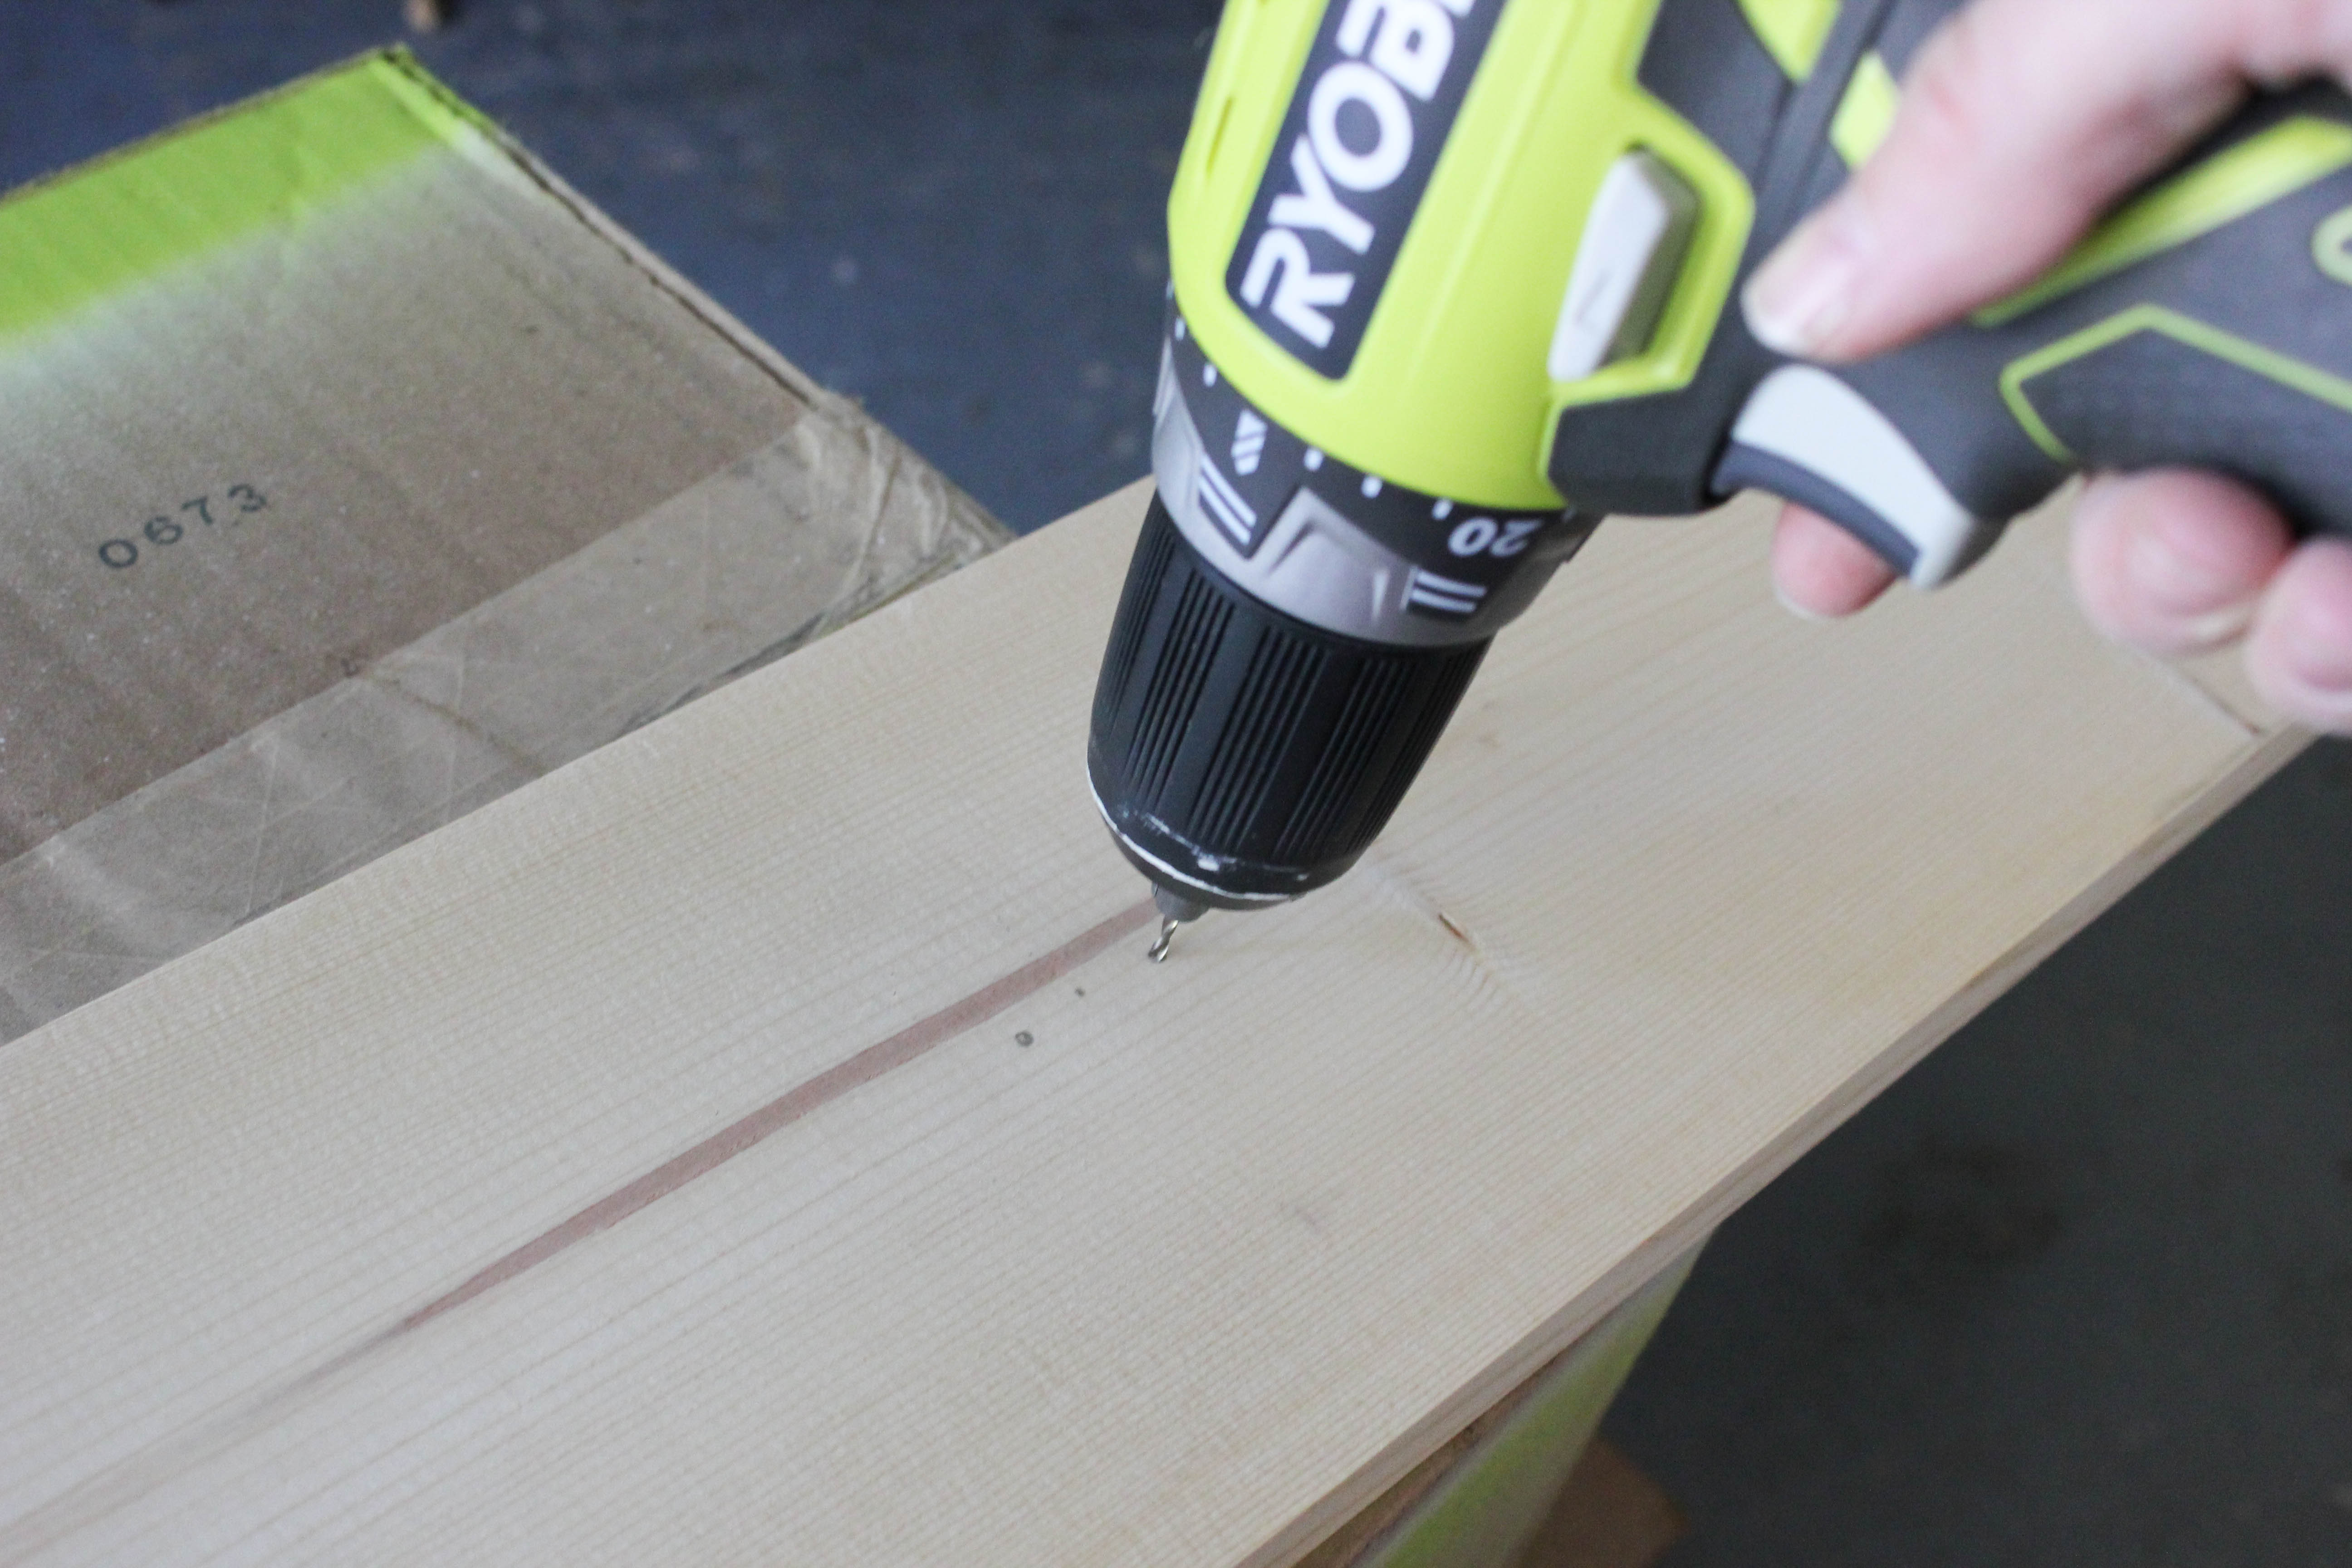
Step 1:
Cut your 1×6 to 54″ inches long (or length of your choice), or have your wood cut for you when you purchase it at The Home Depot.

Step 2:
Sand the wood.
Step 3:
Place the coat hooks 9 inches apart, center the hooks on the board, and use a pencil to mark the holes. Then, drill pilot holes where the coat hooks will go.

Step 4:
Prime and paint the wood. (Or stain it.) I use a combo of a paint brush for the edges and a foam roller. You can seal it with Minwax Finishing Paste for extra protection if you choose to.

Step 5:
Use a screwdriver to attach the coat hooks, inserting the screws into the pre-drilled pilot holes.

Step 6:
The screws that came with my coat hooks were just a teensy bit too long and protruded out the back of the wood just a bit. I used a RYOBI Multi-tool to cut the tips of the screws off so they wouldn’t scratch the wall, and then I covered them with tiny pieces of duct tape for added protection. You could purchase shorter screws instead, but I couldn’t find the color I needed so I just improvised.
Step 7:
Drill directly into wall studs, or use wall anchors. If you prefer for the screws to not be visible, you can countersink them and then use wood filler and paint to cover them up. Another option is to use D-Rings and wall anchors, which is how I chose to hang mine since I didn’t want the screws to be visible.
That’s it! Pretty simple. This is a great beginner project since it doesn’t require complex cuts, and you could use a regular handsaw instead of a miter saw if you wanted to.
Source from here
Komentar
Posting Komentar