4 Cozy Reading Nooks You’ll Want in Your Home Right Now Constructing a reading nook doesn’t have to be hard. Sometimes all you need is lots of pillows and a little unused space. Reading nooks are also a great way to use dead, unused, or awkward space within a home. Nooks can help maximize living space and provide additional seating, along with providing a personal sanctuary. With these four easy DIY reading nook projects, it won’t be long before you find yourself dreaming of getting lost in a good book. 1. Make Use of Dead Space with a Corner Bench Do you have a dead corner in your house that’s just…there? A great remedy for that empty space is a corner bench. Creating an L-shaped bench will maximize your space. Not only will it provide additional seating, but it can also become storage. Create this bench with bookshelves, cushions, and pillows for the ultimate reading nook space. When the bookshelves are placed together, you can then determine what size cushion you will need to go on ...
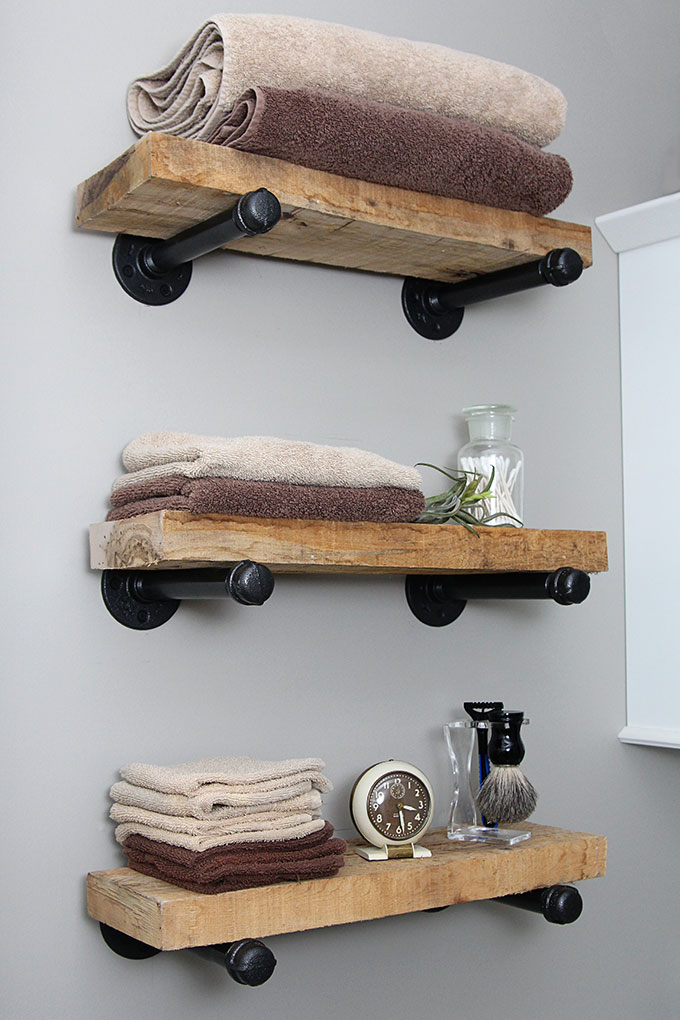
DIY INDUSTRIAL PIPE SHELVES
SUPPLIES:
For 3 shelves we used
- 6 3/4″ Floor Flanges
- 6 3/4″ Caps
- 6 3/4″ x 8″ Nipples
- 1 1/4″ x 8 – 3.18 cm Coarse Thread Drywall Screws
- 1 Board cut to the length you need (in our case we used reclaimed lumber that was roughly 2″ wide x 6″ deep x 5′ long, cut in thirds – if you buy a new board from the hardware store, have them cut it to length for you)
- Black Spray Paint (I used less than 1 can of Rustoleum’s Universal Hammered Paint & Primer In One in the black color)
- Measuring Tape
- Phillips head screwdriver, handheld or electric as you prefer
- Pencil
- Level

(A) Coarse Thread Drywall Screws / (B) Floor Flange / (C) Nipple / (D) Cap
INSTRUCTIONS:
- If you have shelves already in place, remove those shelves and patch any holes if necessary
- Wipe the grease and grime off your plumbing parts. I used soap and water for the floor flanges and the caps and since the nipples had tape wrapped around the price stickers, I used some Goo Gone on those. I think they are covered in “greasy stuff” so they don’t rust while at the store, which reminds me, be careful when carrying them around the store while wearing a white shirt. Been there, done that, not doing it again.
- Screw one floor flange and one cap onto each nipple (ouch). These will be your brackets.

- Spray paint the brackets and allow to thoroughly dry.

- Decide where you want shelves to be.
- If possible, try to align your flanges with wall studs. We were only able to do this on one side of the shelf, due to the size of the shelves, but still felt they were pretty darn sturdy. You may want to use dry wall anchors if you are unable to hit a stud with your placement of the brackets.
- It looks best to have at least 2 1/2″ – 3″ between the outside of the bracket and the outside end of the board.
- Position your first bracket on the stud and screw into place.
- You can use a pencil to mark the floor flange holes onto the wall if you want to drill pilot holes first. I went straight into the drywall without pilot holes though. I’m wild like that.
- Hold your second bracket in place, put the board on top of the bracket and the level on top of that. Once the board is showing it is in a level position, screw the 2nd bracket into place.
- Screw remaining shelves into place the same way making sure they are spaced equal distances apart and all the brackets are placed vertically in line with each other.

- Stand back and admire your handiwork.

Source from here
Komentar
Posting Komentar