4 Cozy Reading Nooks You’ll Want in Your Home Right Now Constructing a reading nook doesn’t have to be hard. Sometimes all you need is lots of pillows and a little unused space. Reading nooks are also a great way to use dead, unused, or awkward space within a home. Nooks can help maximize living space and provide additional seating, along with providing a personal sanctuary. With these four easy DIY reading nook projects, it won’t be long before you find yourself dreaming of getting lost in a good book. 1. Make Use of Dead Space with a Corner Bench Do you have a dead corner in your house that’s just…there? A great remedy for that empty space is a corner bench. Creating an L-shaped bench will maximize your space. Not only will it provide additional seating, but it can also become storage. Create this bench with bookshelves, cushions, and pillows for the ultimate reading nook space. When the bookshelves are placed together, you can then determine what size cushion you will need to go on ...
DIY Zipper Book Clutch Tutorial!

Materials:
-one old hardcover book, about 8.5″ by 5″ with a 1″ to 1.25″ spine is the size I am using
–heat n bond (red package)
-fabric, scraps or 1/4 yard
–archival glue, (PVA is great!)
–brush for glue
–thick metal zipper, 20-24″
–x-acto knife
–ruler
–e6000 glue (open your windows or buy the fume-free kind)
Instructions:
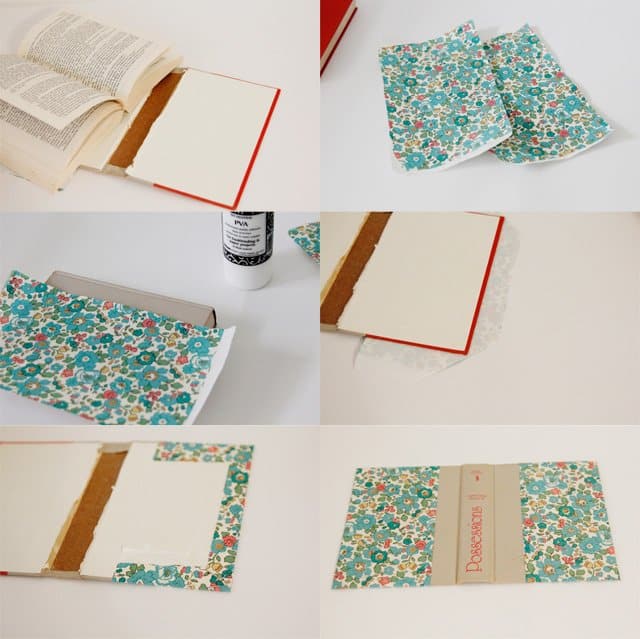
1. Gut your book. This is usually done by simply slicing down the inside cover where the cover meets the pages. Simply cut out the page block with an X-Acto knife. Of course, you can save this for more projects, read it, or recycle it!
2. Cut out rectangles of fabric and heat and bond. They will need to be about 1-1.5″ wide and long than the front of your book that you will be covered with fabric.
3. Iron heat-n-bond to the fabric. Then square one of the long edges.
4. Glue fabric to the front of the book, then flip it over and trim the corners. You will leave a little bit more than 1/8″ on the corner.
5. Flip over top and side flaps to finish your book cover. Repeat on the other side.
6. Let dry.
While the book is drying, create the zipper insert.
7. Cut four squares of fabric that are about 2″ by 2″.
8. Sandwich the zipper between these two layers of fabric with the end of the zipper peeking out. Then sew along the line indicated.
9. Fold over the two flaps and press. Repeat with another side. And trim to the width of the zipper.
10. Cut four strips as long as your zipper piece (including the fabric ends) and 2″ wide. Sew these onto the zipper like so:
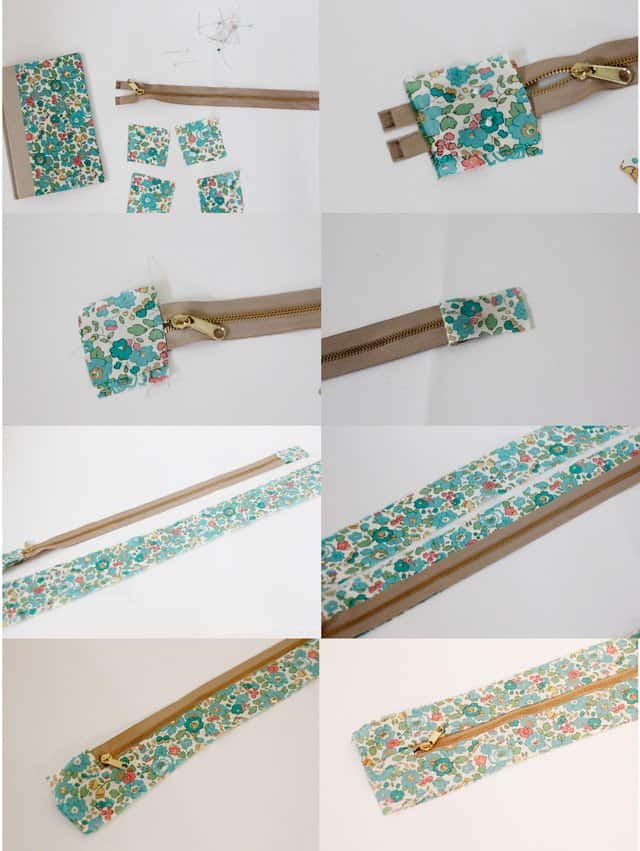
11. Repeat with the other side and you’ll have a fully encased zipper with fabric all around. Now you’re ready to glue it in.
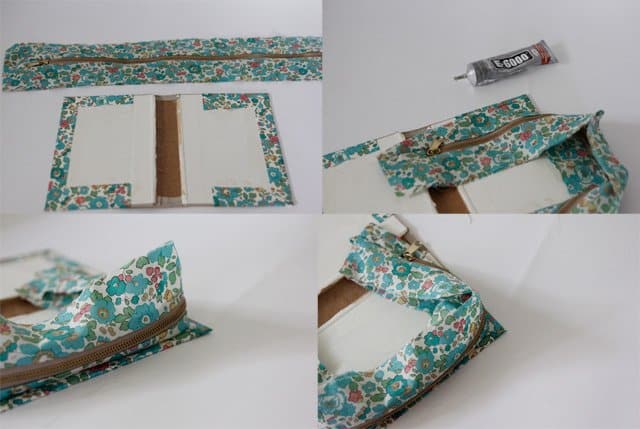
12. Start by gluing the end of the zipper. Fold over 1/2″ and glue underneath the fold. Then curve the fabric and start gluing one side of the fabric to the book. When you reach the corners, pivot and fold your fabric to fit.
13. When you get to the end let it dry. Then open the zipper and repeat with the other side.
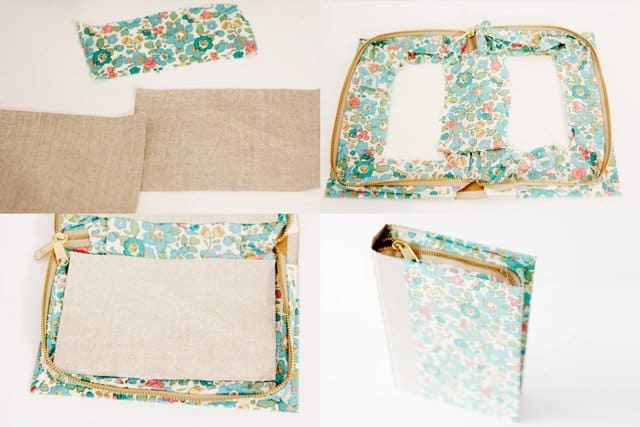
14. Cover the inside spine with fabric. Turn under the raw edges at the top and bottom and glue it down.
15. Now cut two pastedowns from fabric backed with heat n bond. They should be about 1/2″ smaller than the inside of the cover. Glue and press firmly.
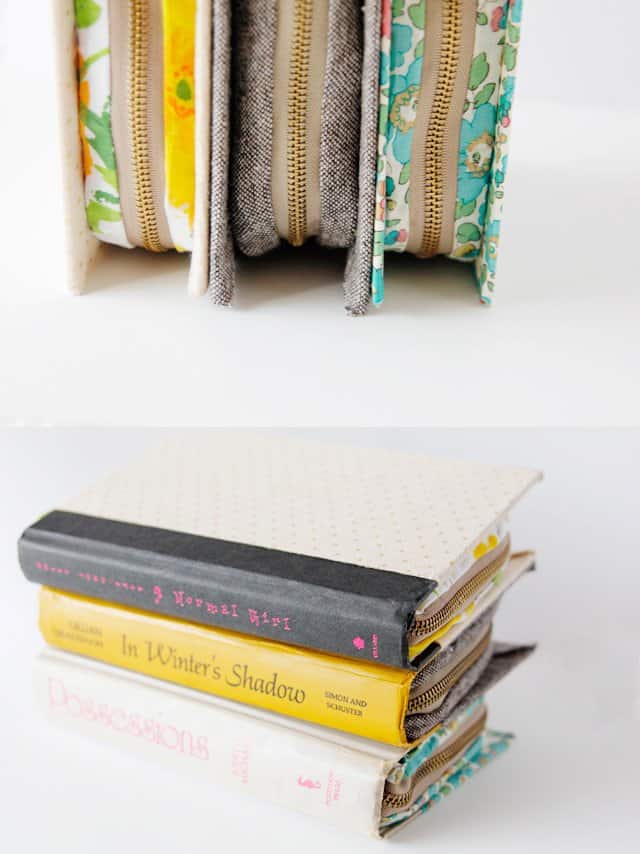
16. Let dry and you are done!

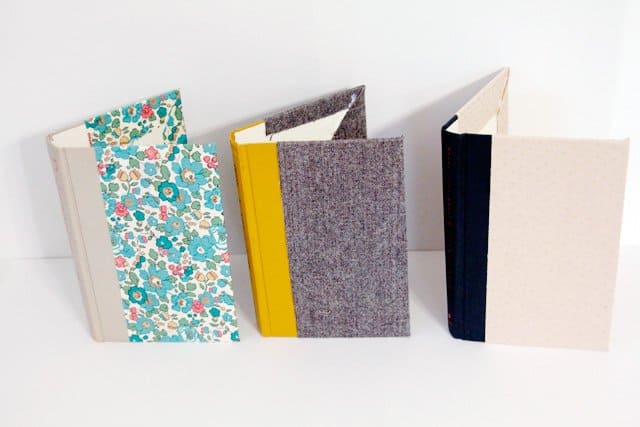
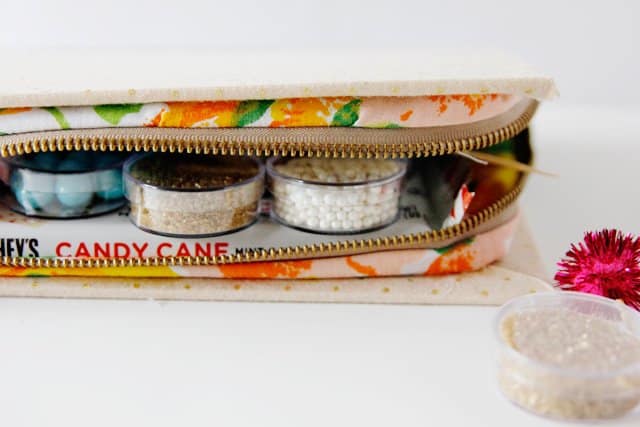
Make it into a kit to give as a gift:
Add sprinkles, chocolate, baking cups, and cupcake toppers to make a cute little baking kit! I got the little clear cases in the bead storage section of Michaels.


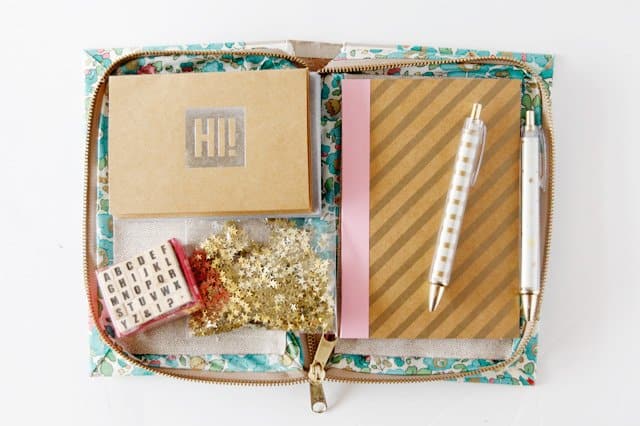
Or add stationery supplies, like paper, notepads, pens, confetti, envelopes and card and stamps for a perfect little stationery set (supplies from Target and Michaels):

Source from here
Komentar
Posting Komentar