4 Cozy Reading Nooks You’ll Want in Your Home Right Now Constructing a reading nook doesn’t have to be hard. Sometimes all you need is lots of pillows and a little unused space. Reading nooks are also a great way to use dead, unused, or awkward space within a home. Nooks can help maximize living space and provide additional seating, along with providing a personal sanctuary. With these four easy DIY reading nook projects, it won’t be long before you find yourself dreaming of getting lost in a good book. 1. Make Use of Dead Space with a Corner Bench Do you have a dead corner in your house that’s just…there? A great remedy for that empty space is a corner bench. Creating an L-shaped bench will maximize your space. Not only will it provide additional seating, but it can also become storage. Create this bench with bookshelves, cushions, and pillows for the ultimate reading nook space. When the bookshelves are placed together, you can then determine what size cushion you will need to go on ...
Face Mask Sewing Pattern and Tutorial

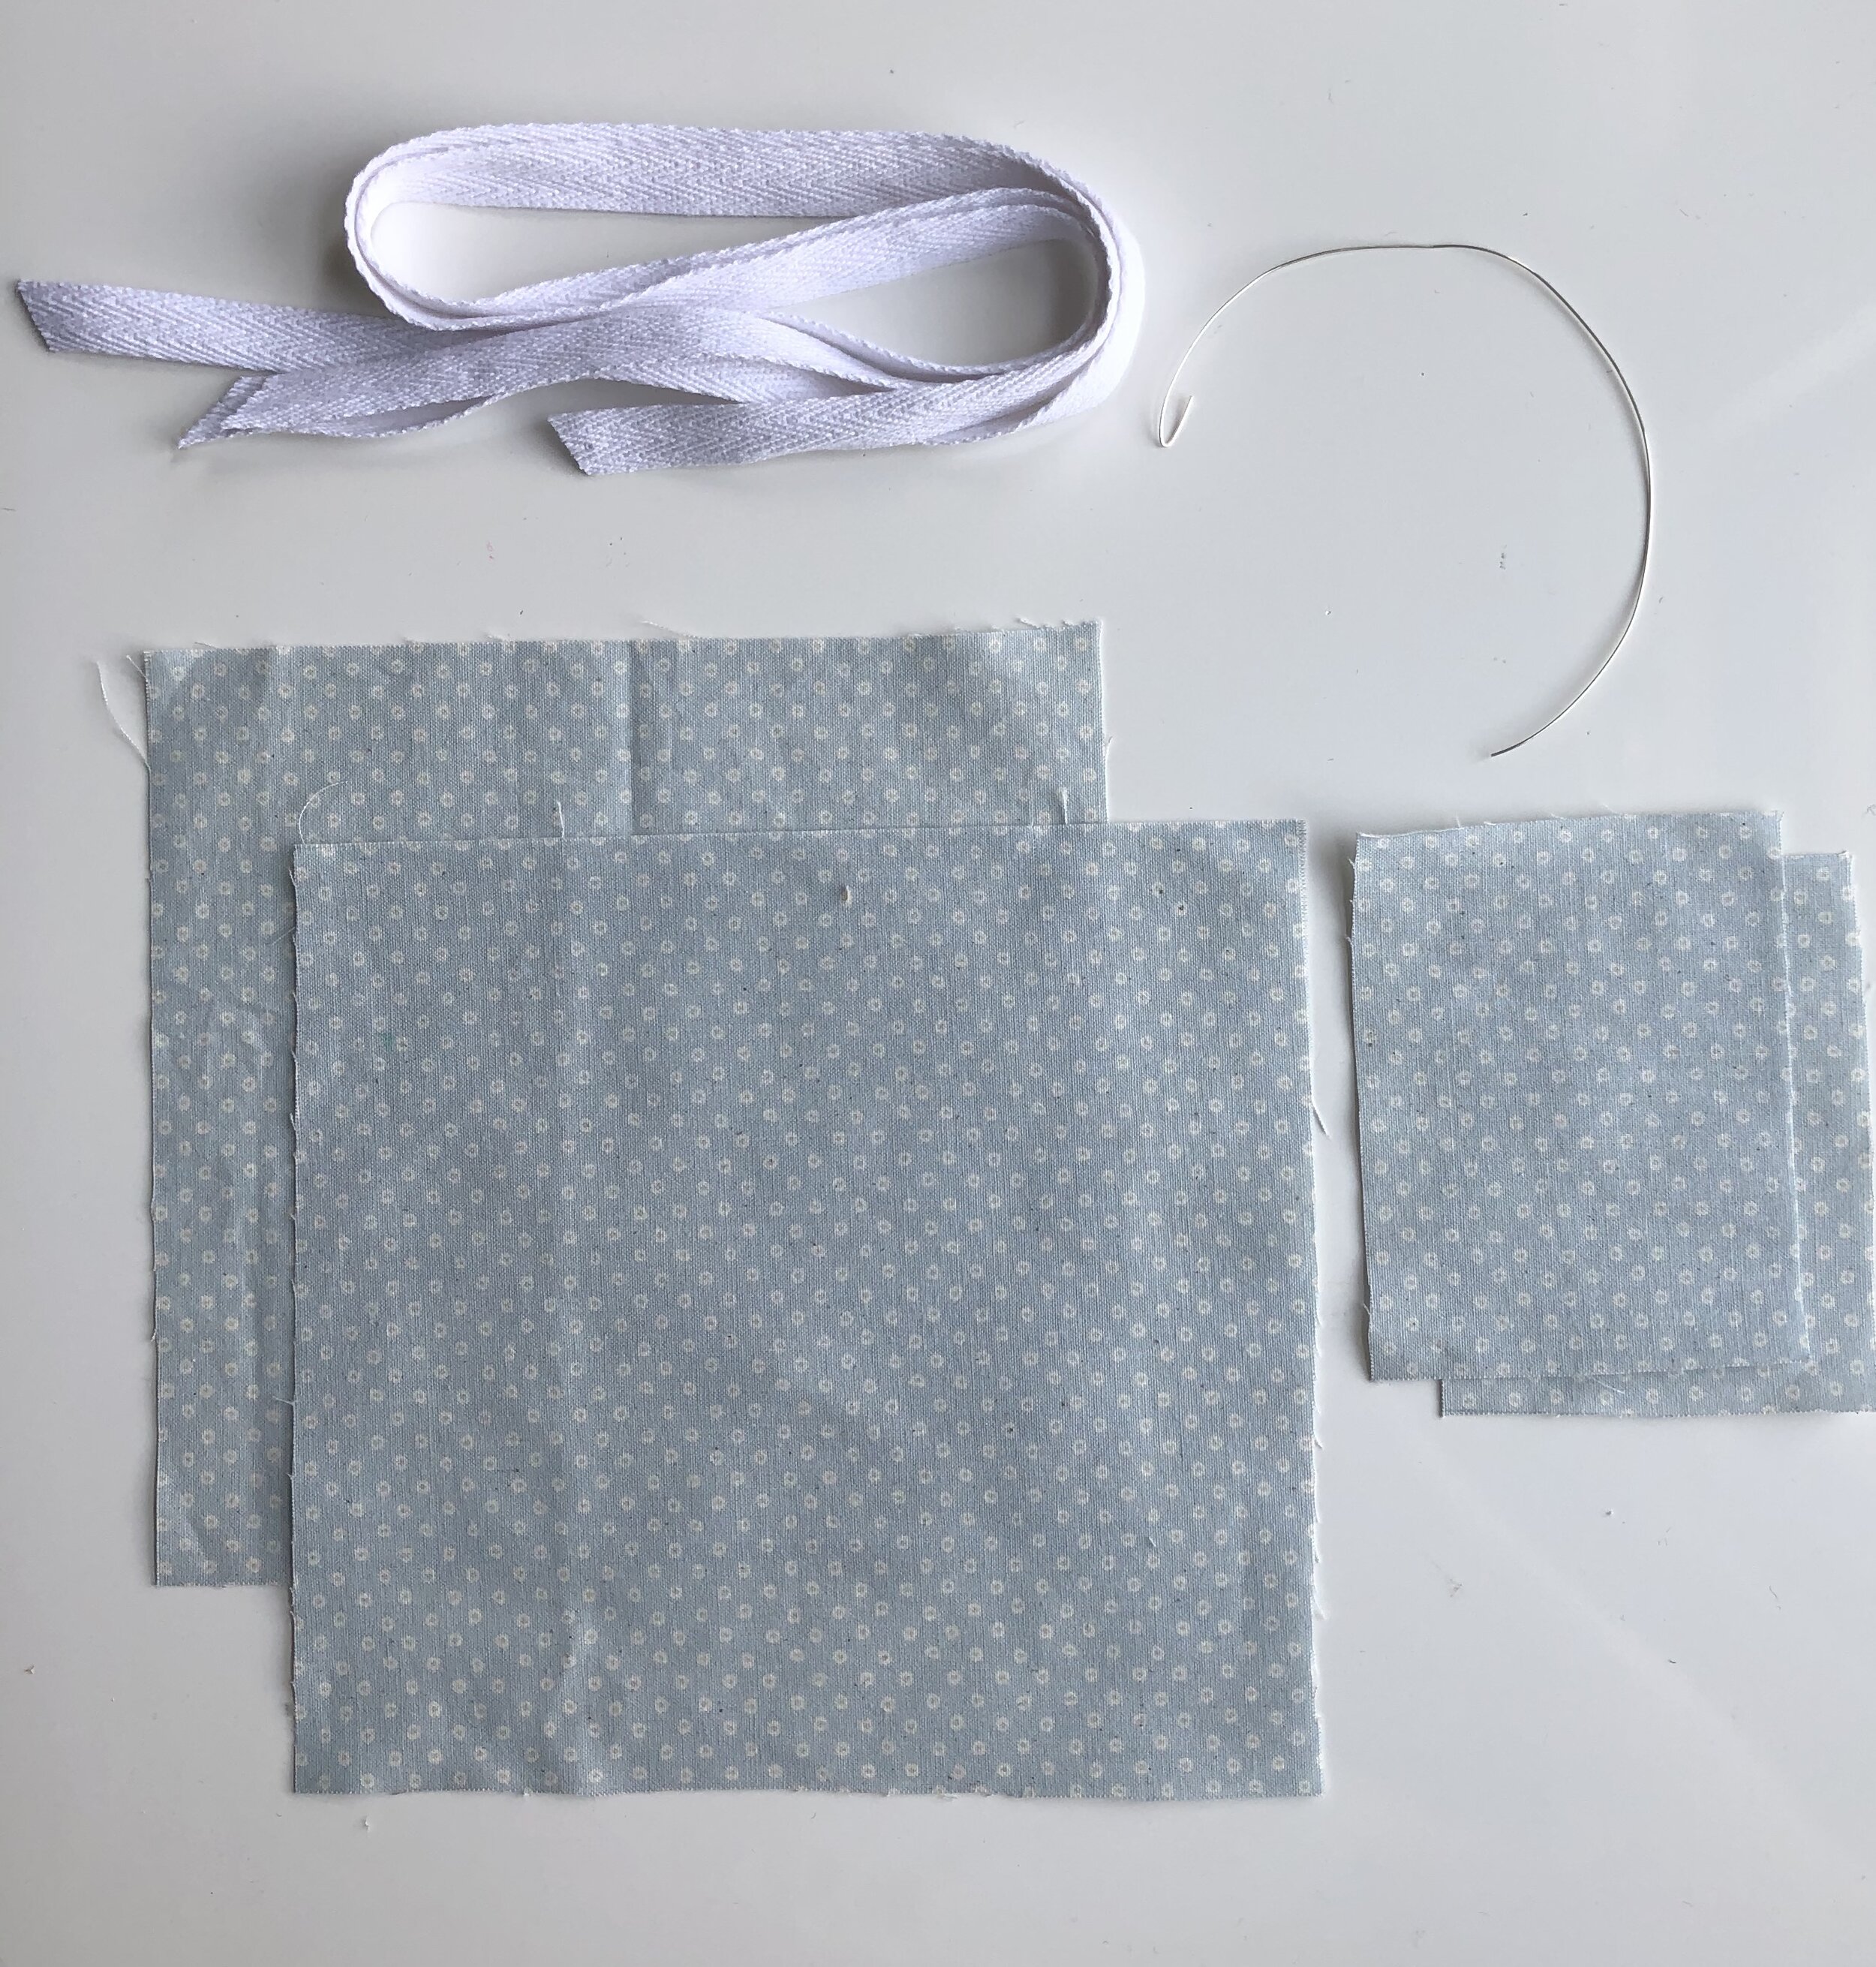
SUPPLIES
Fabric,
2 - 10” pieces of 1/4” -1/2” flat elastic or 2 yards of 1/2” ribbon
7.5” of metal wire , I used 16 gauge wire, but would image that a straightened out paper clip would likely work in a pinch.
8” of Bias tape OR 2 rectangles of fabric 3 x 4.5”
Filter for pocket option
SIZE
Finished Dimensions: Approximately 3.5” x 7”
PREPARE
Cut 2 pieces of fabric in a 7.5” square. Pin and sew across the top and the bottom using a 1/2” seam allowance.
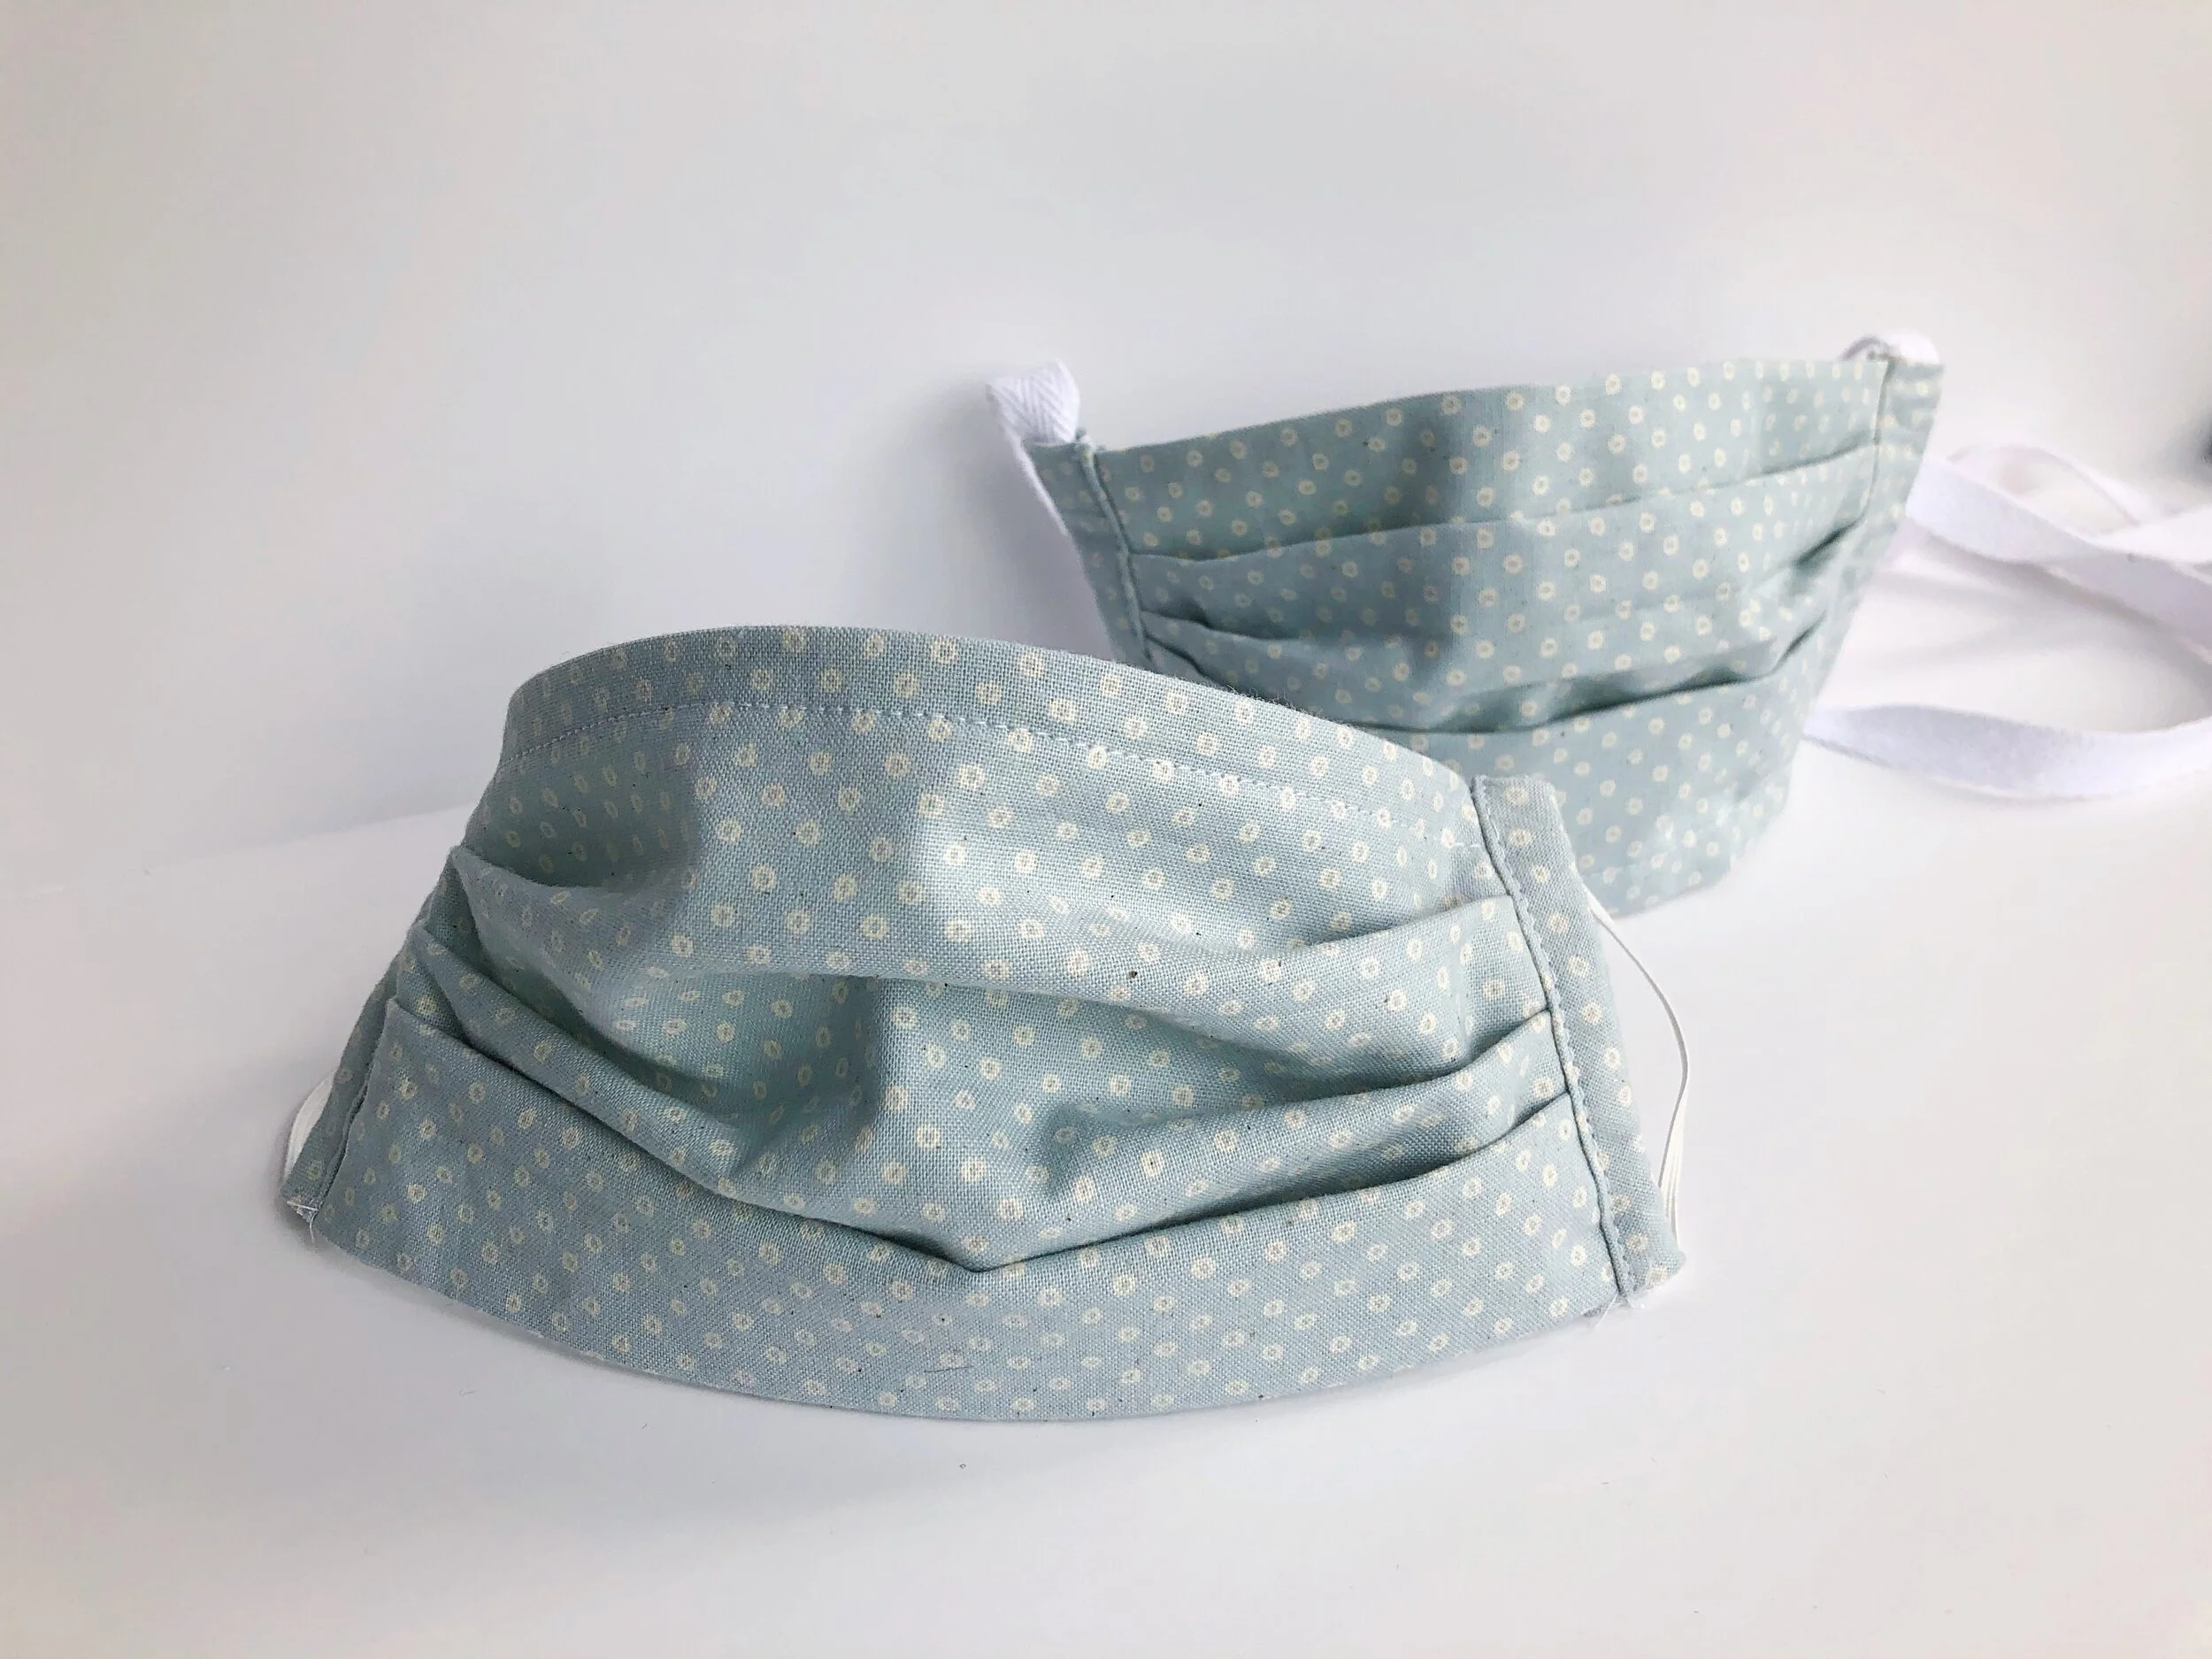
How to Sew a double layered face mask with elastic
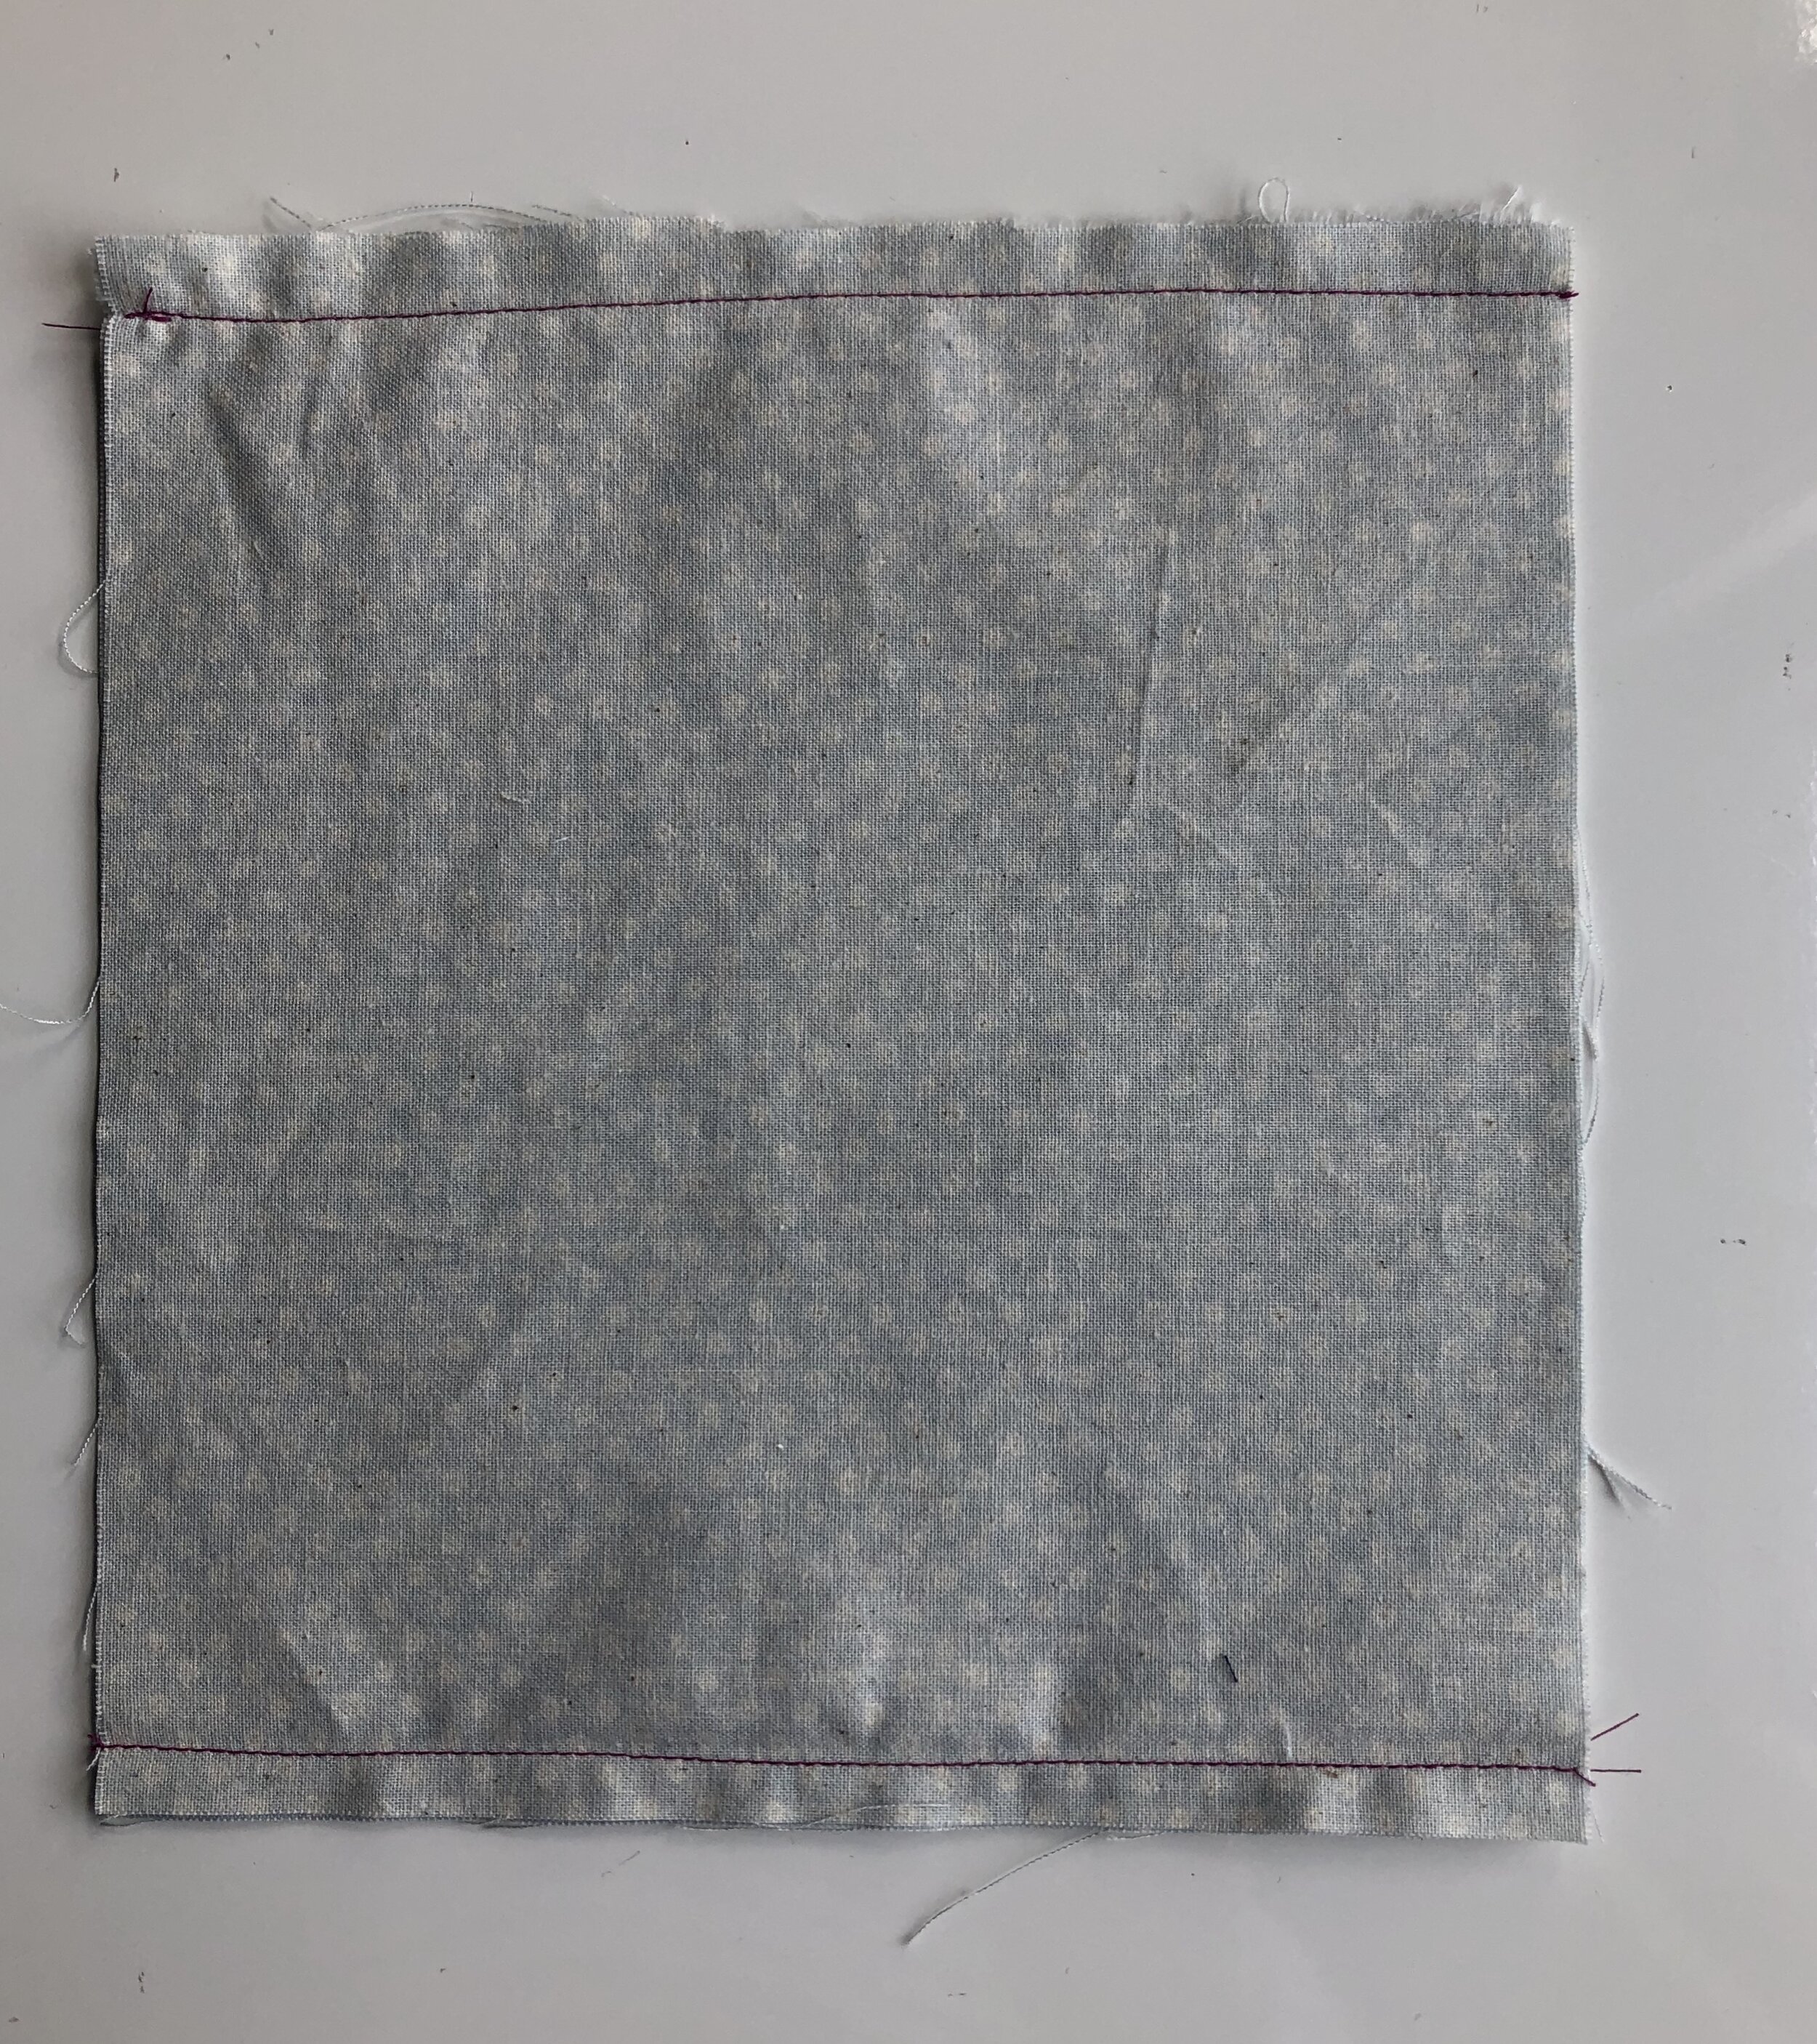
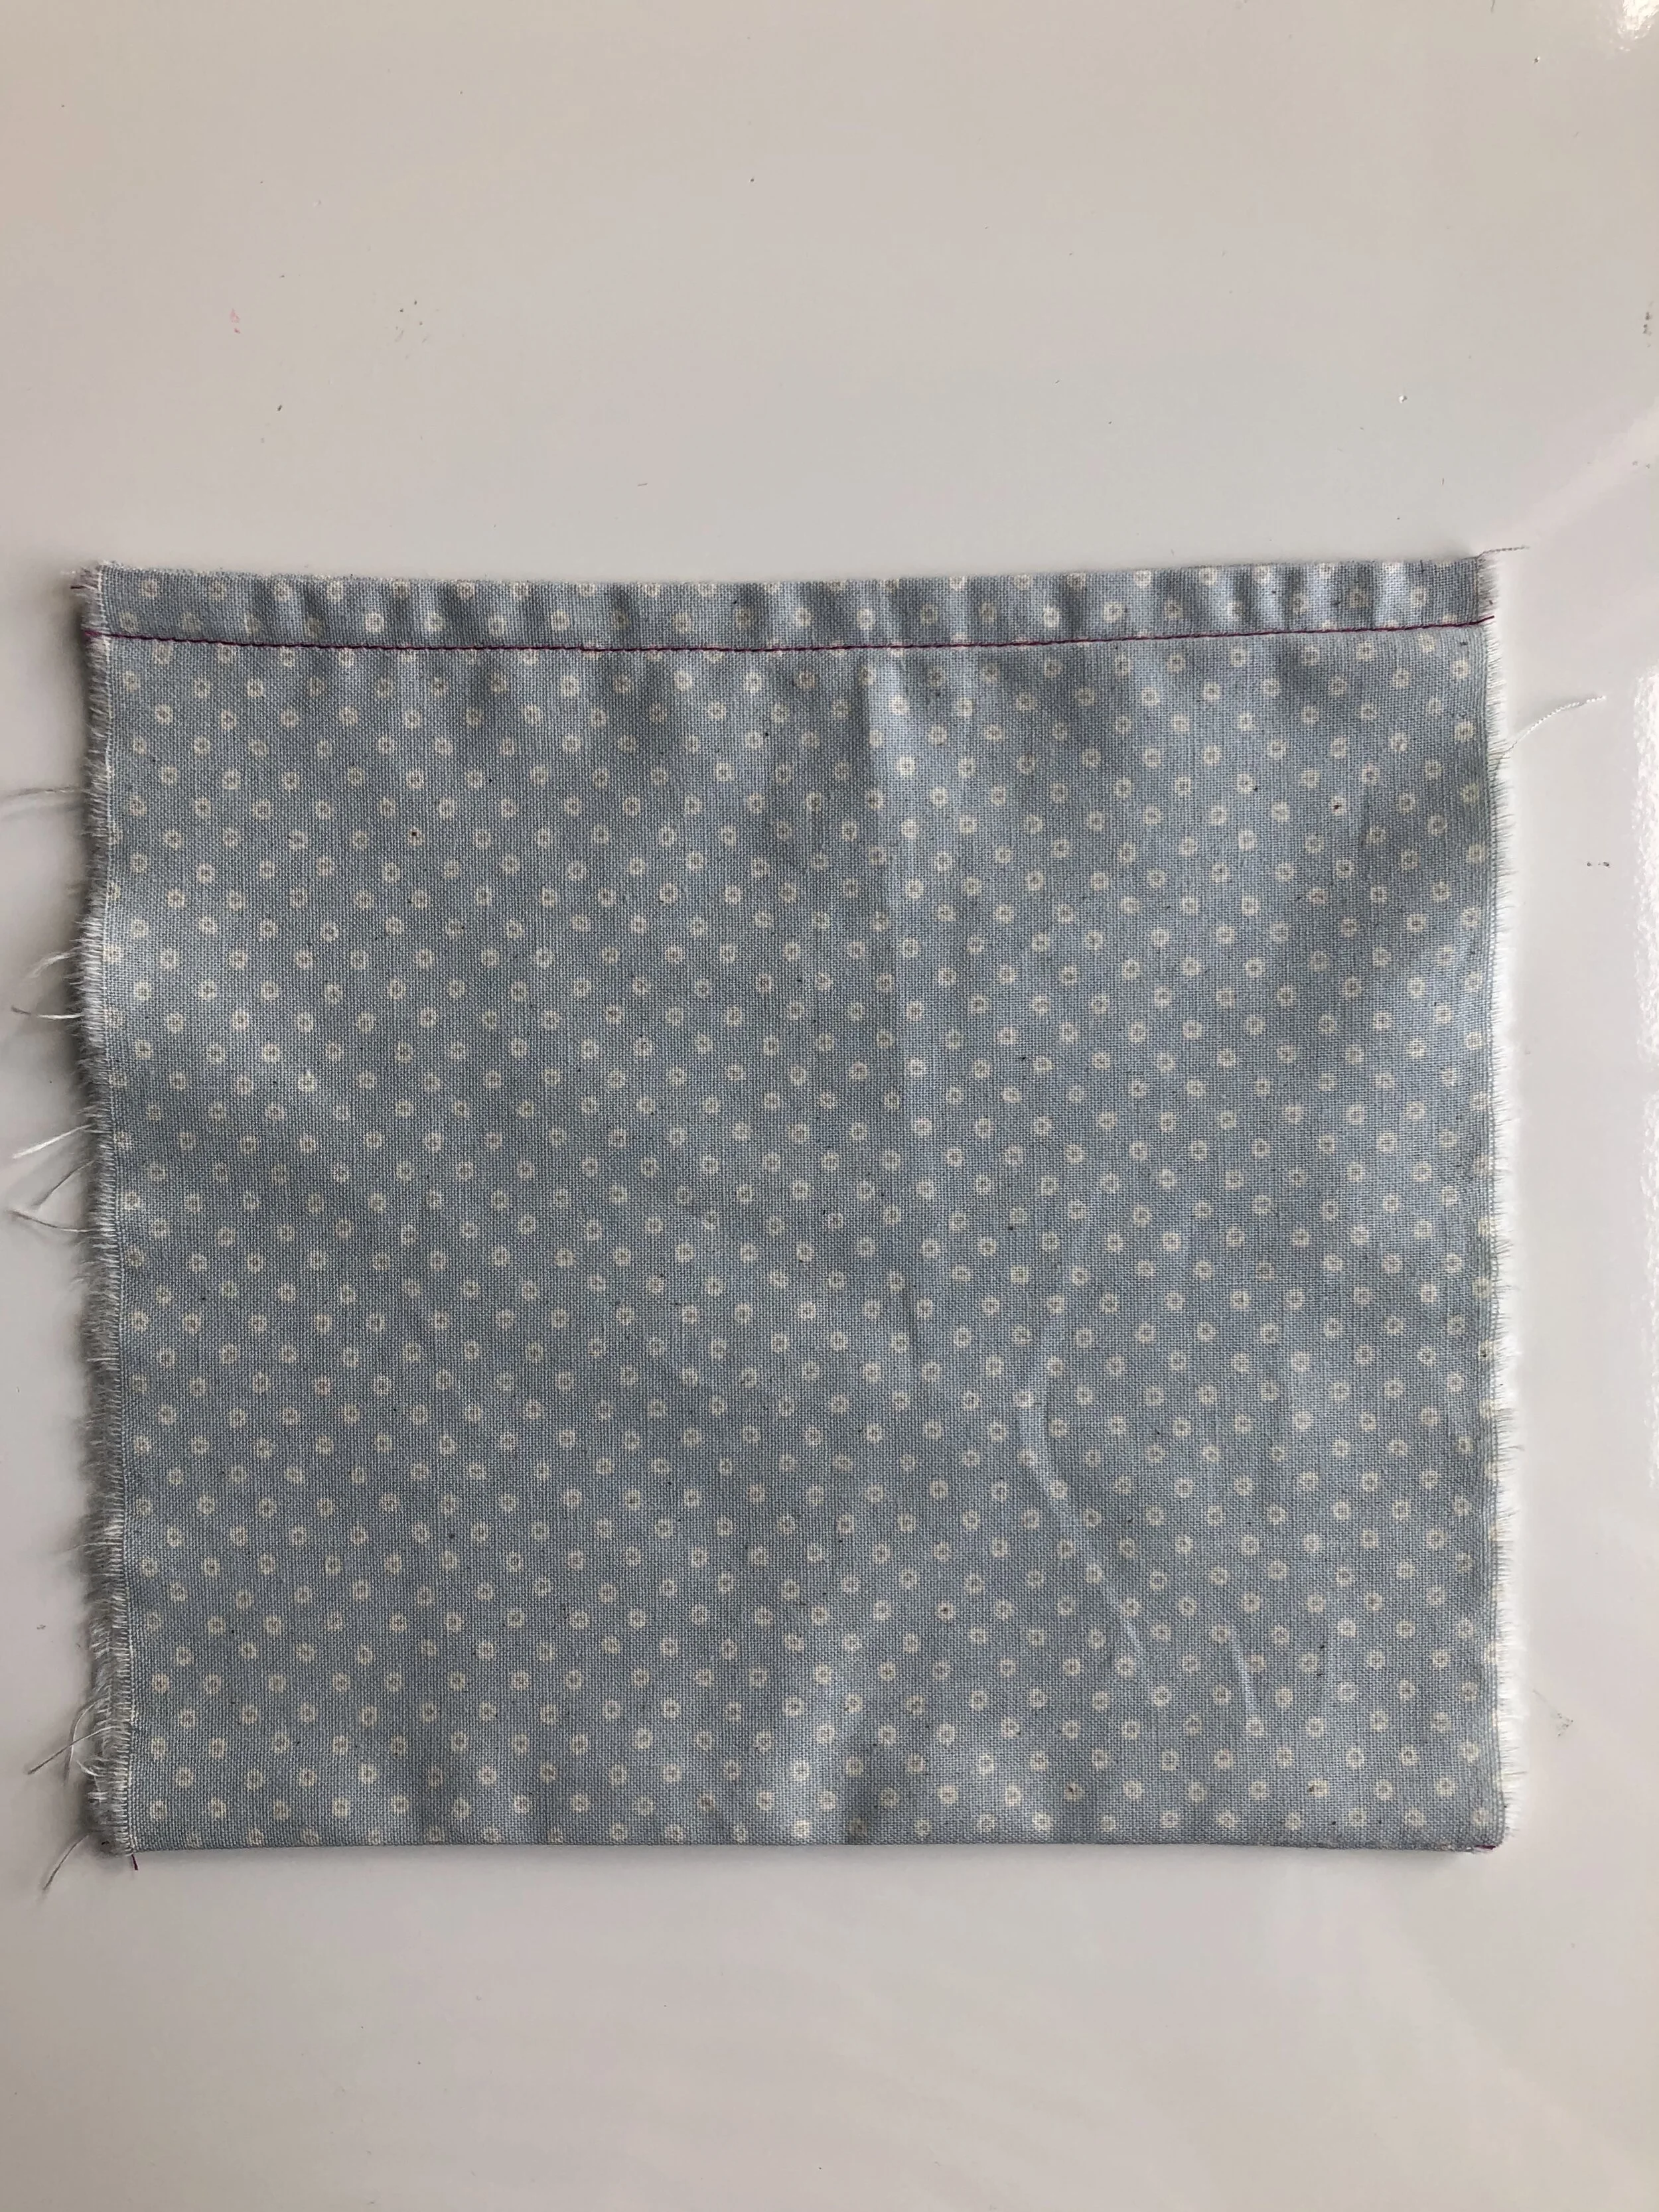
Trim the seam allowance, turn to the right side and press.
CASING
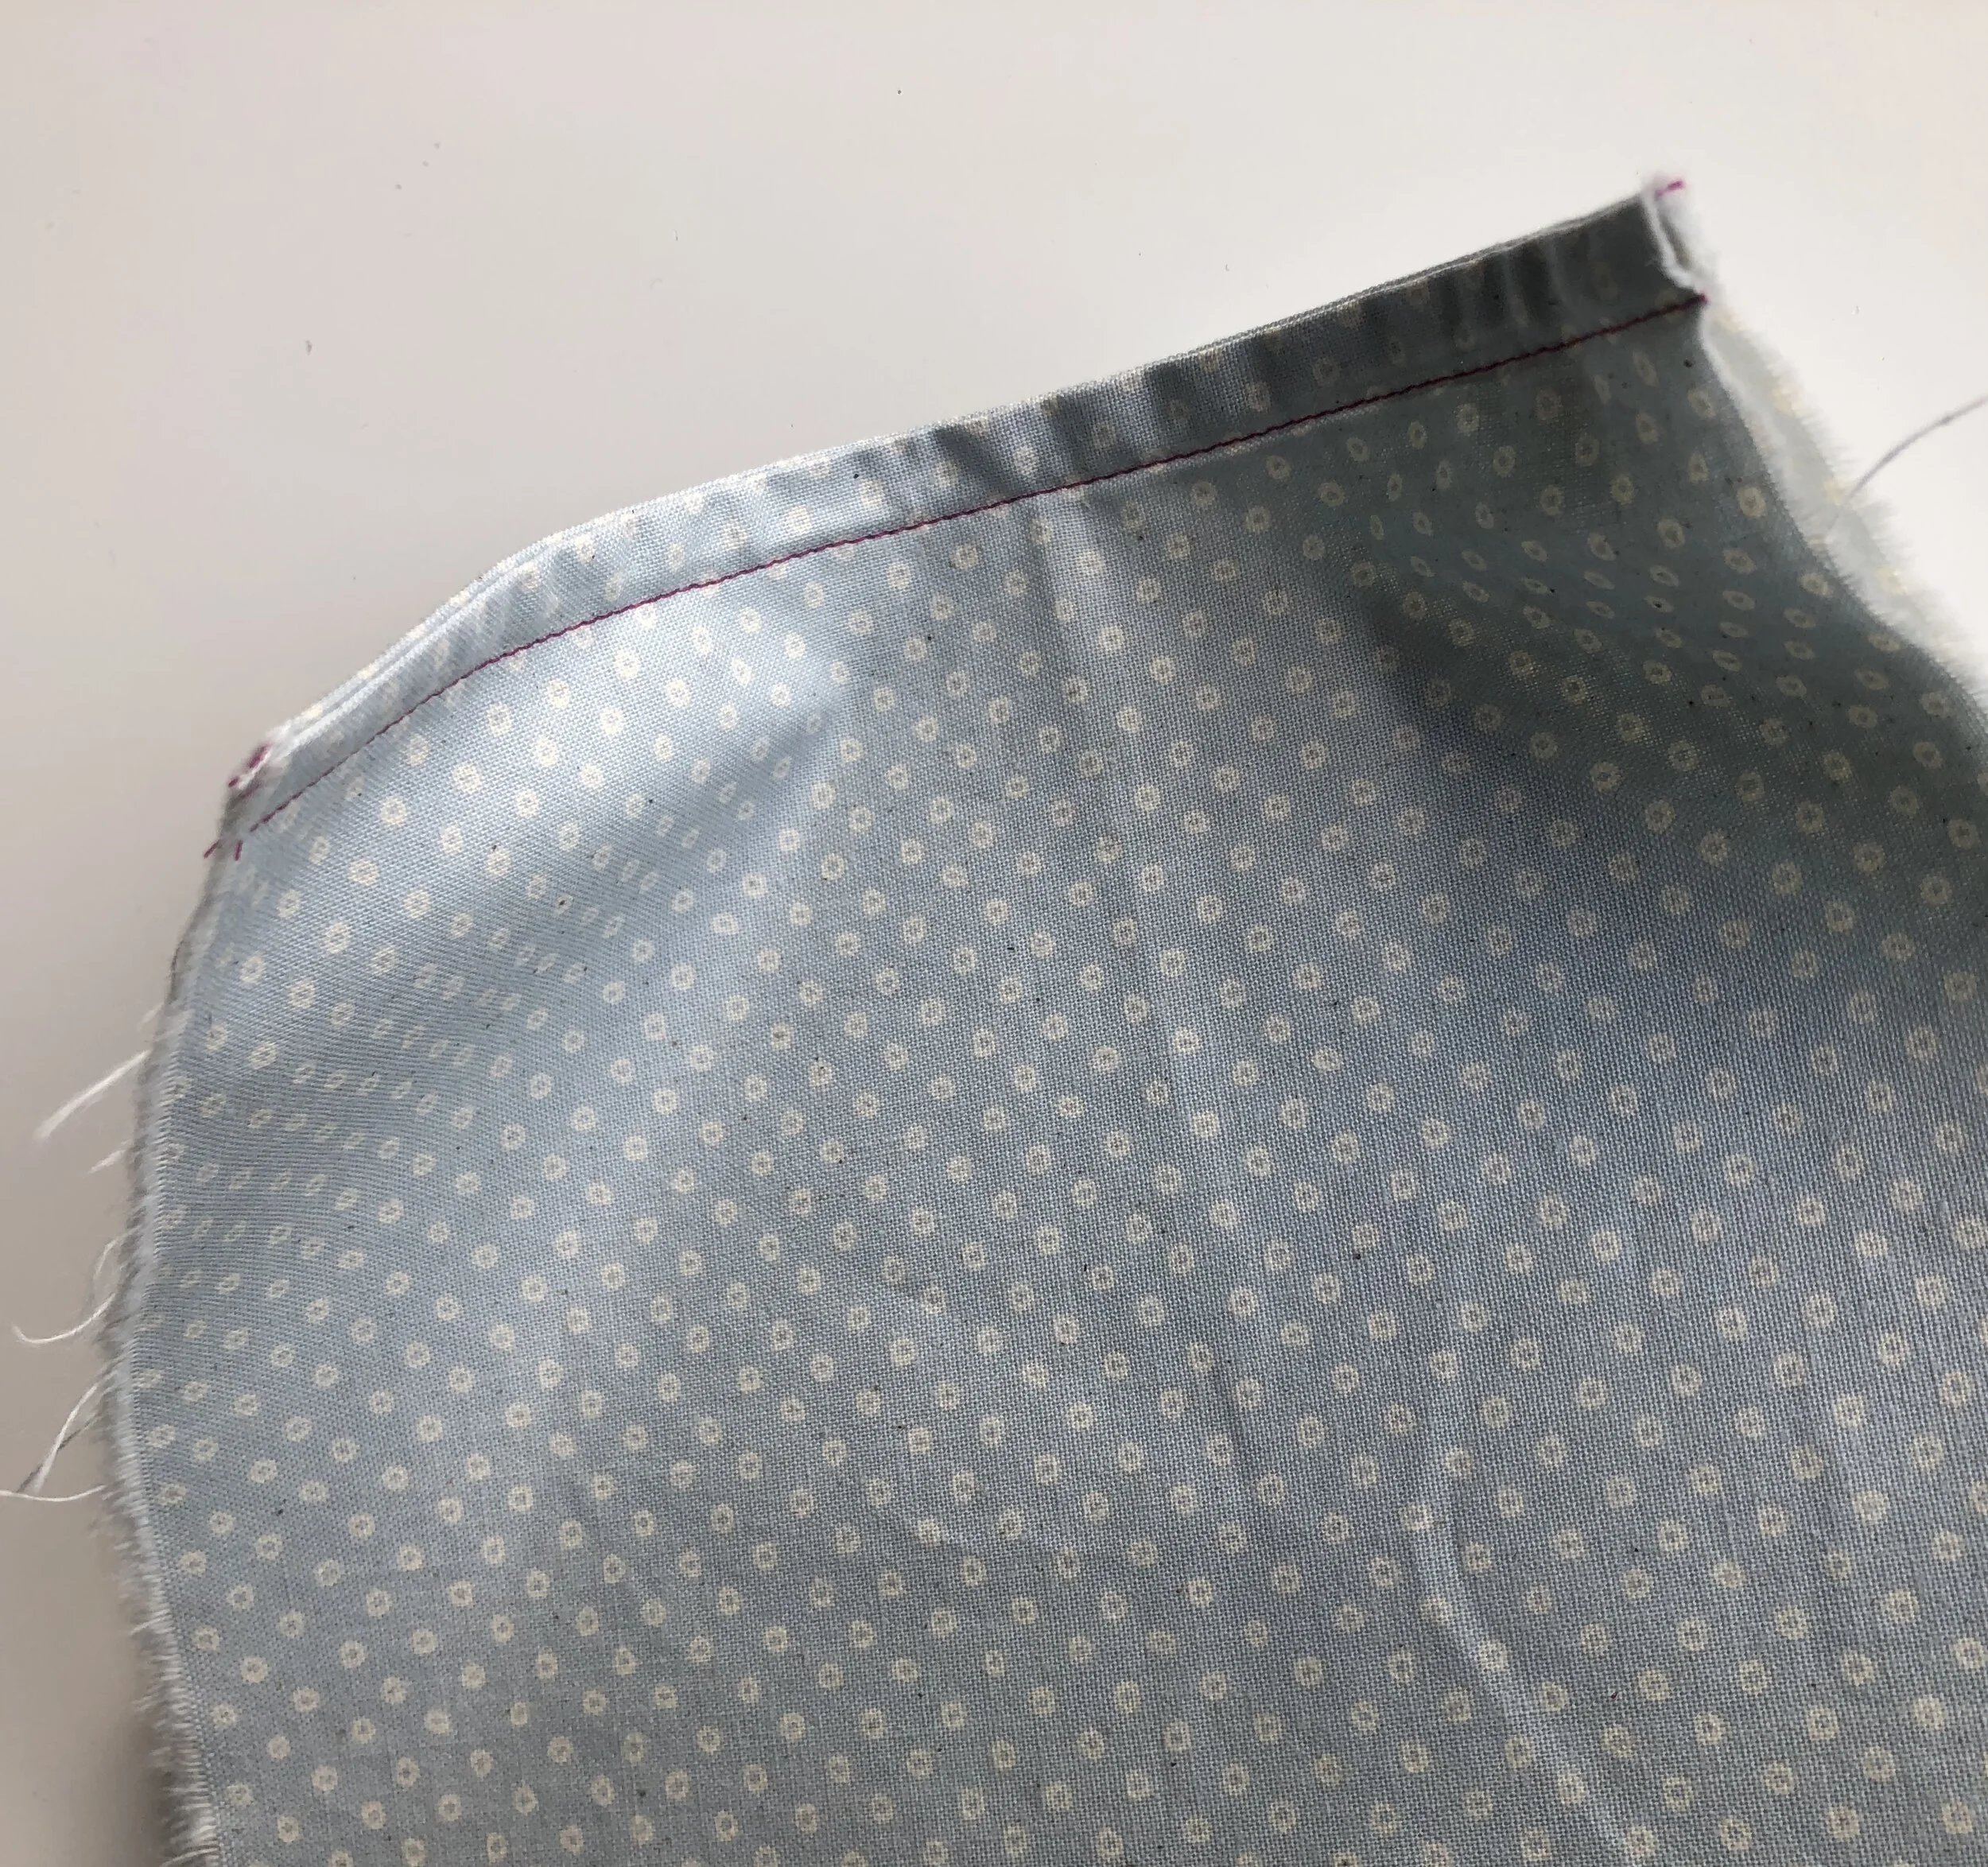
To form a casing, stitch through both layers along the top edge, again with a 1/2” seam allowance.
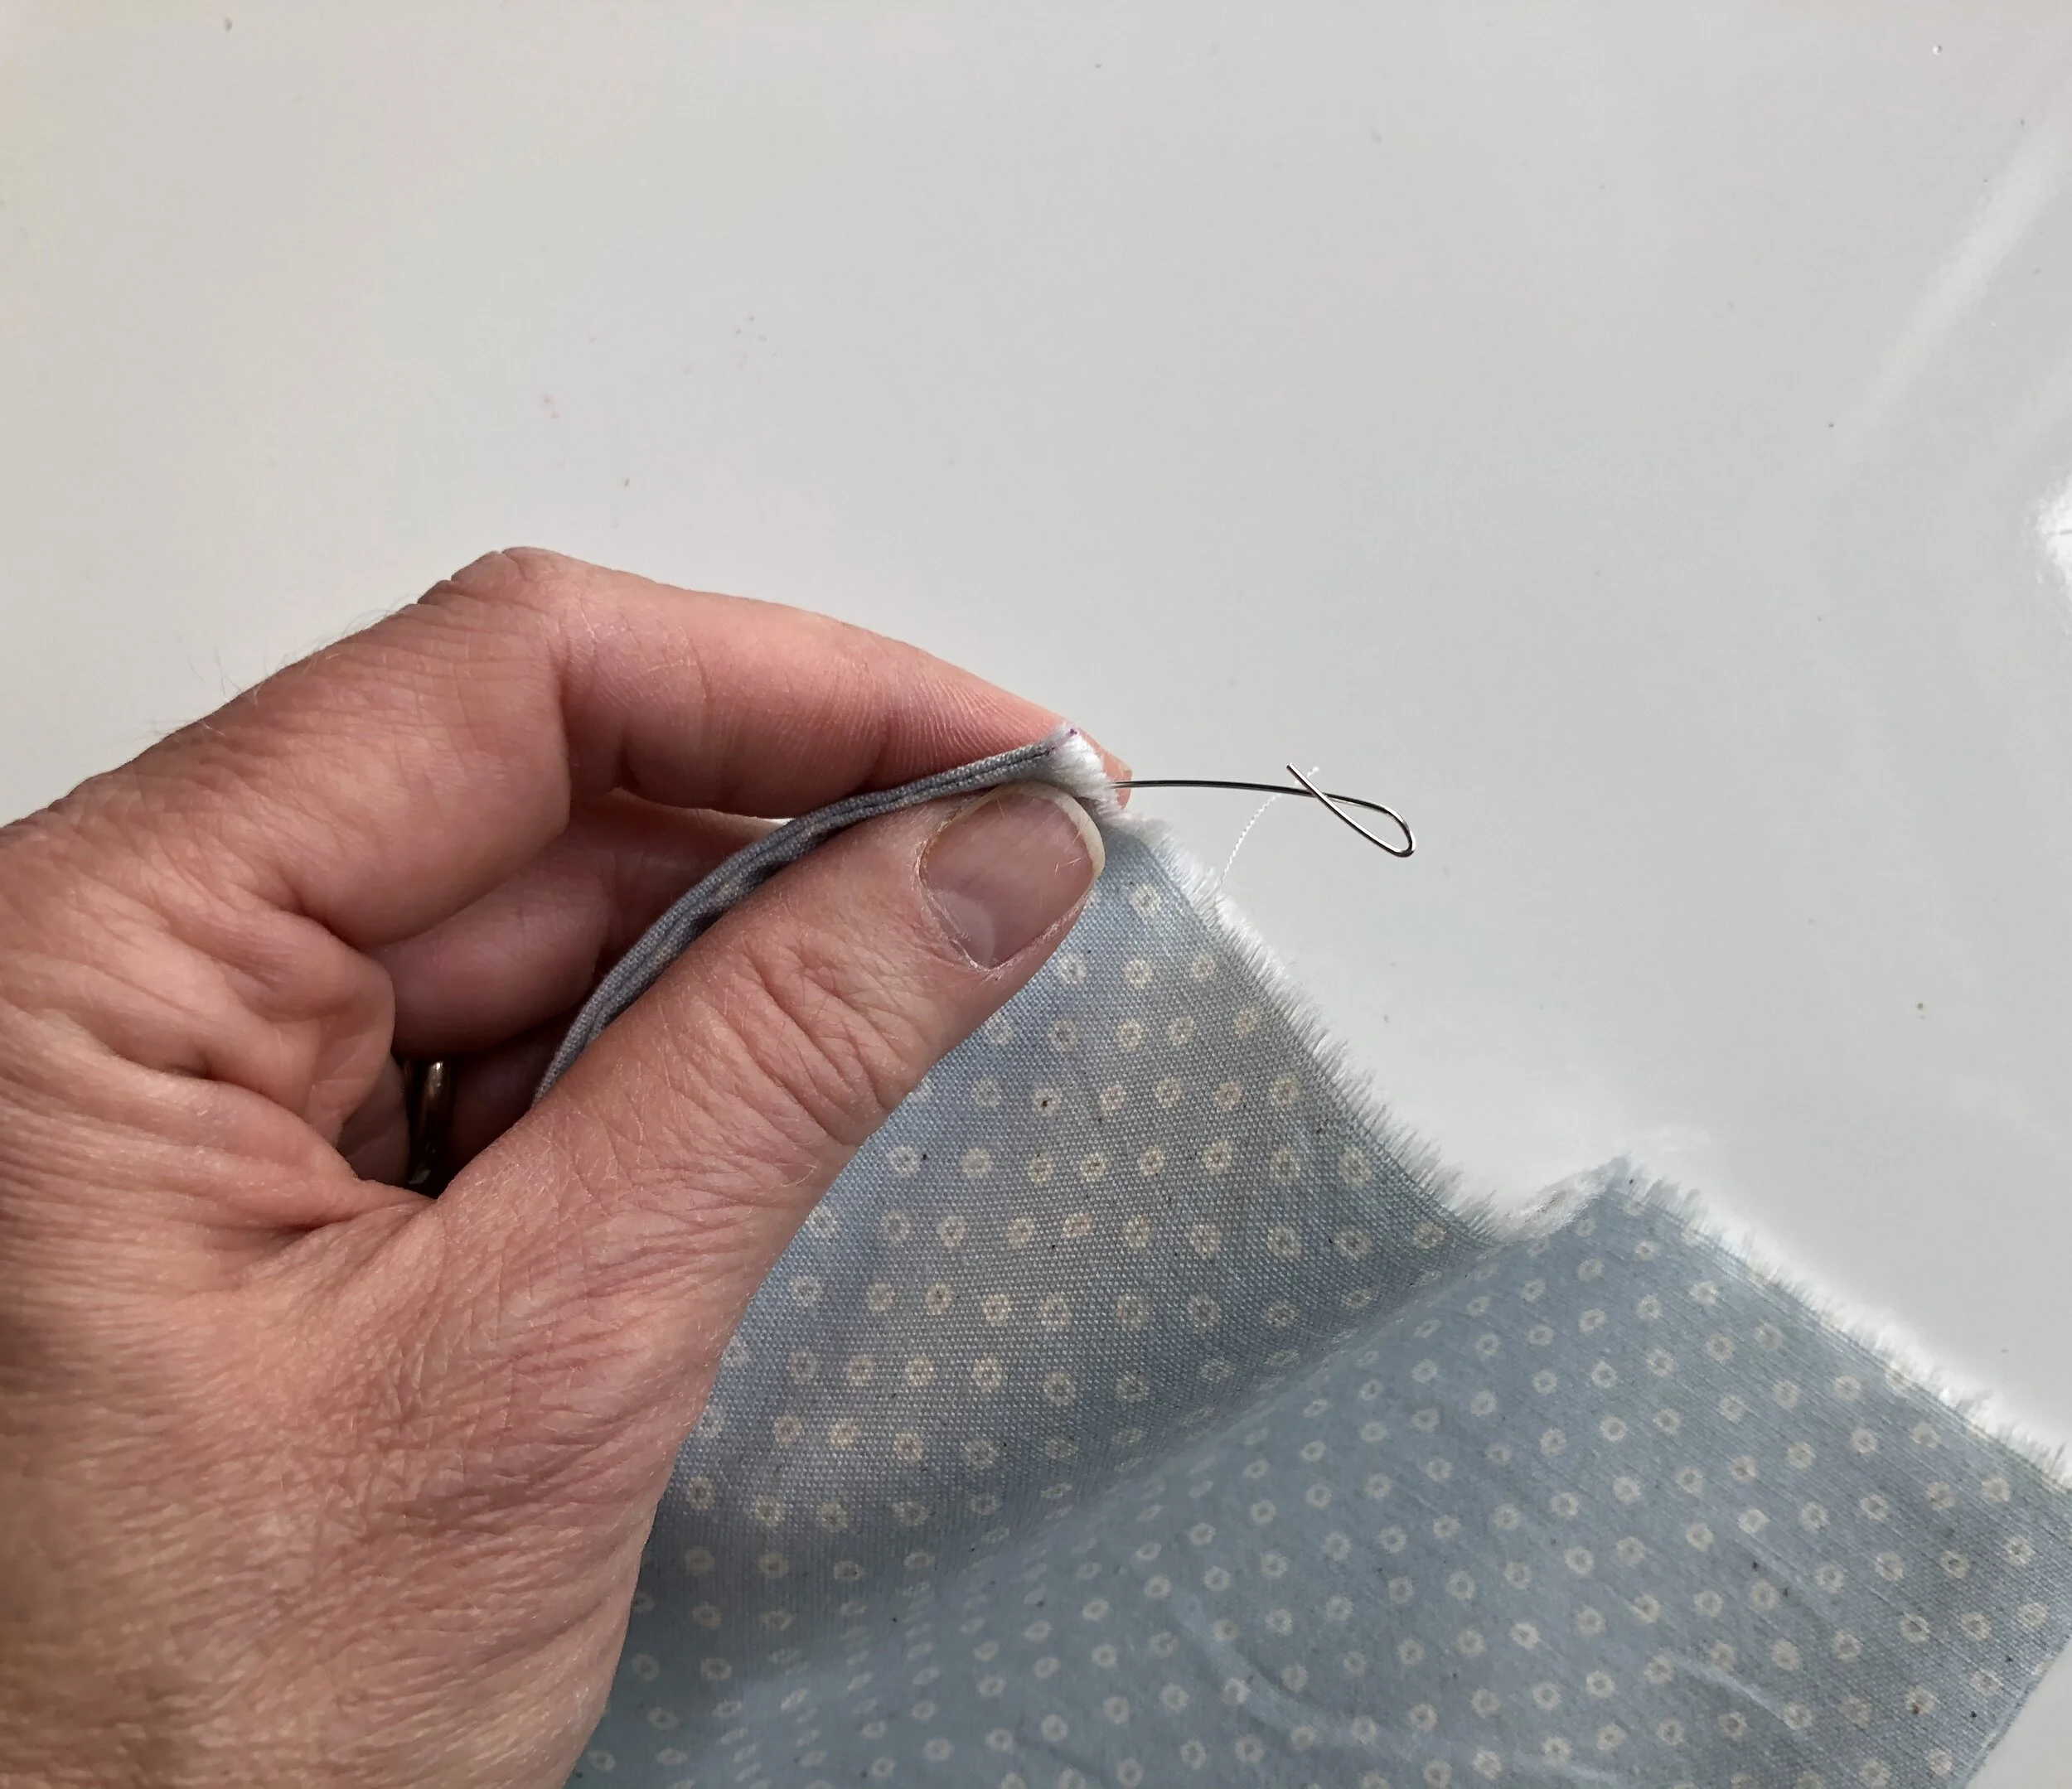
Fold the leading edge of the wire in just a bit so the it doesn’t poke through the fabric. Insert into the casing. Bend the opposite side.
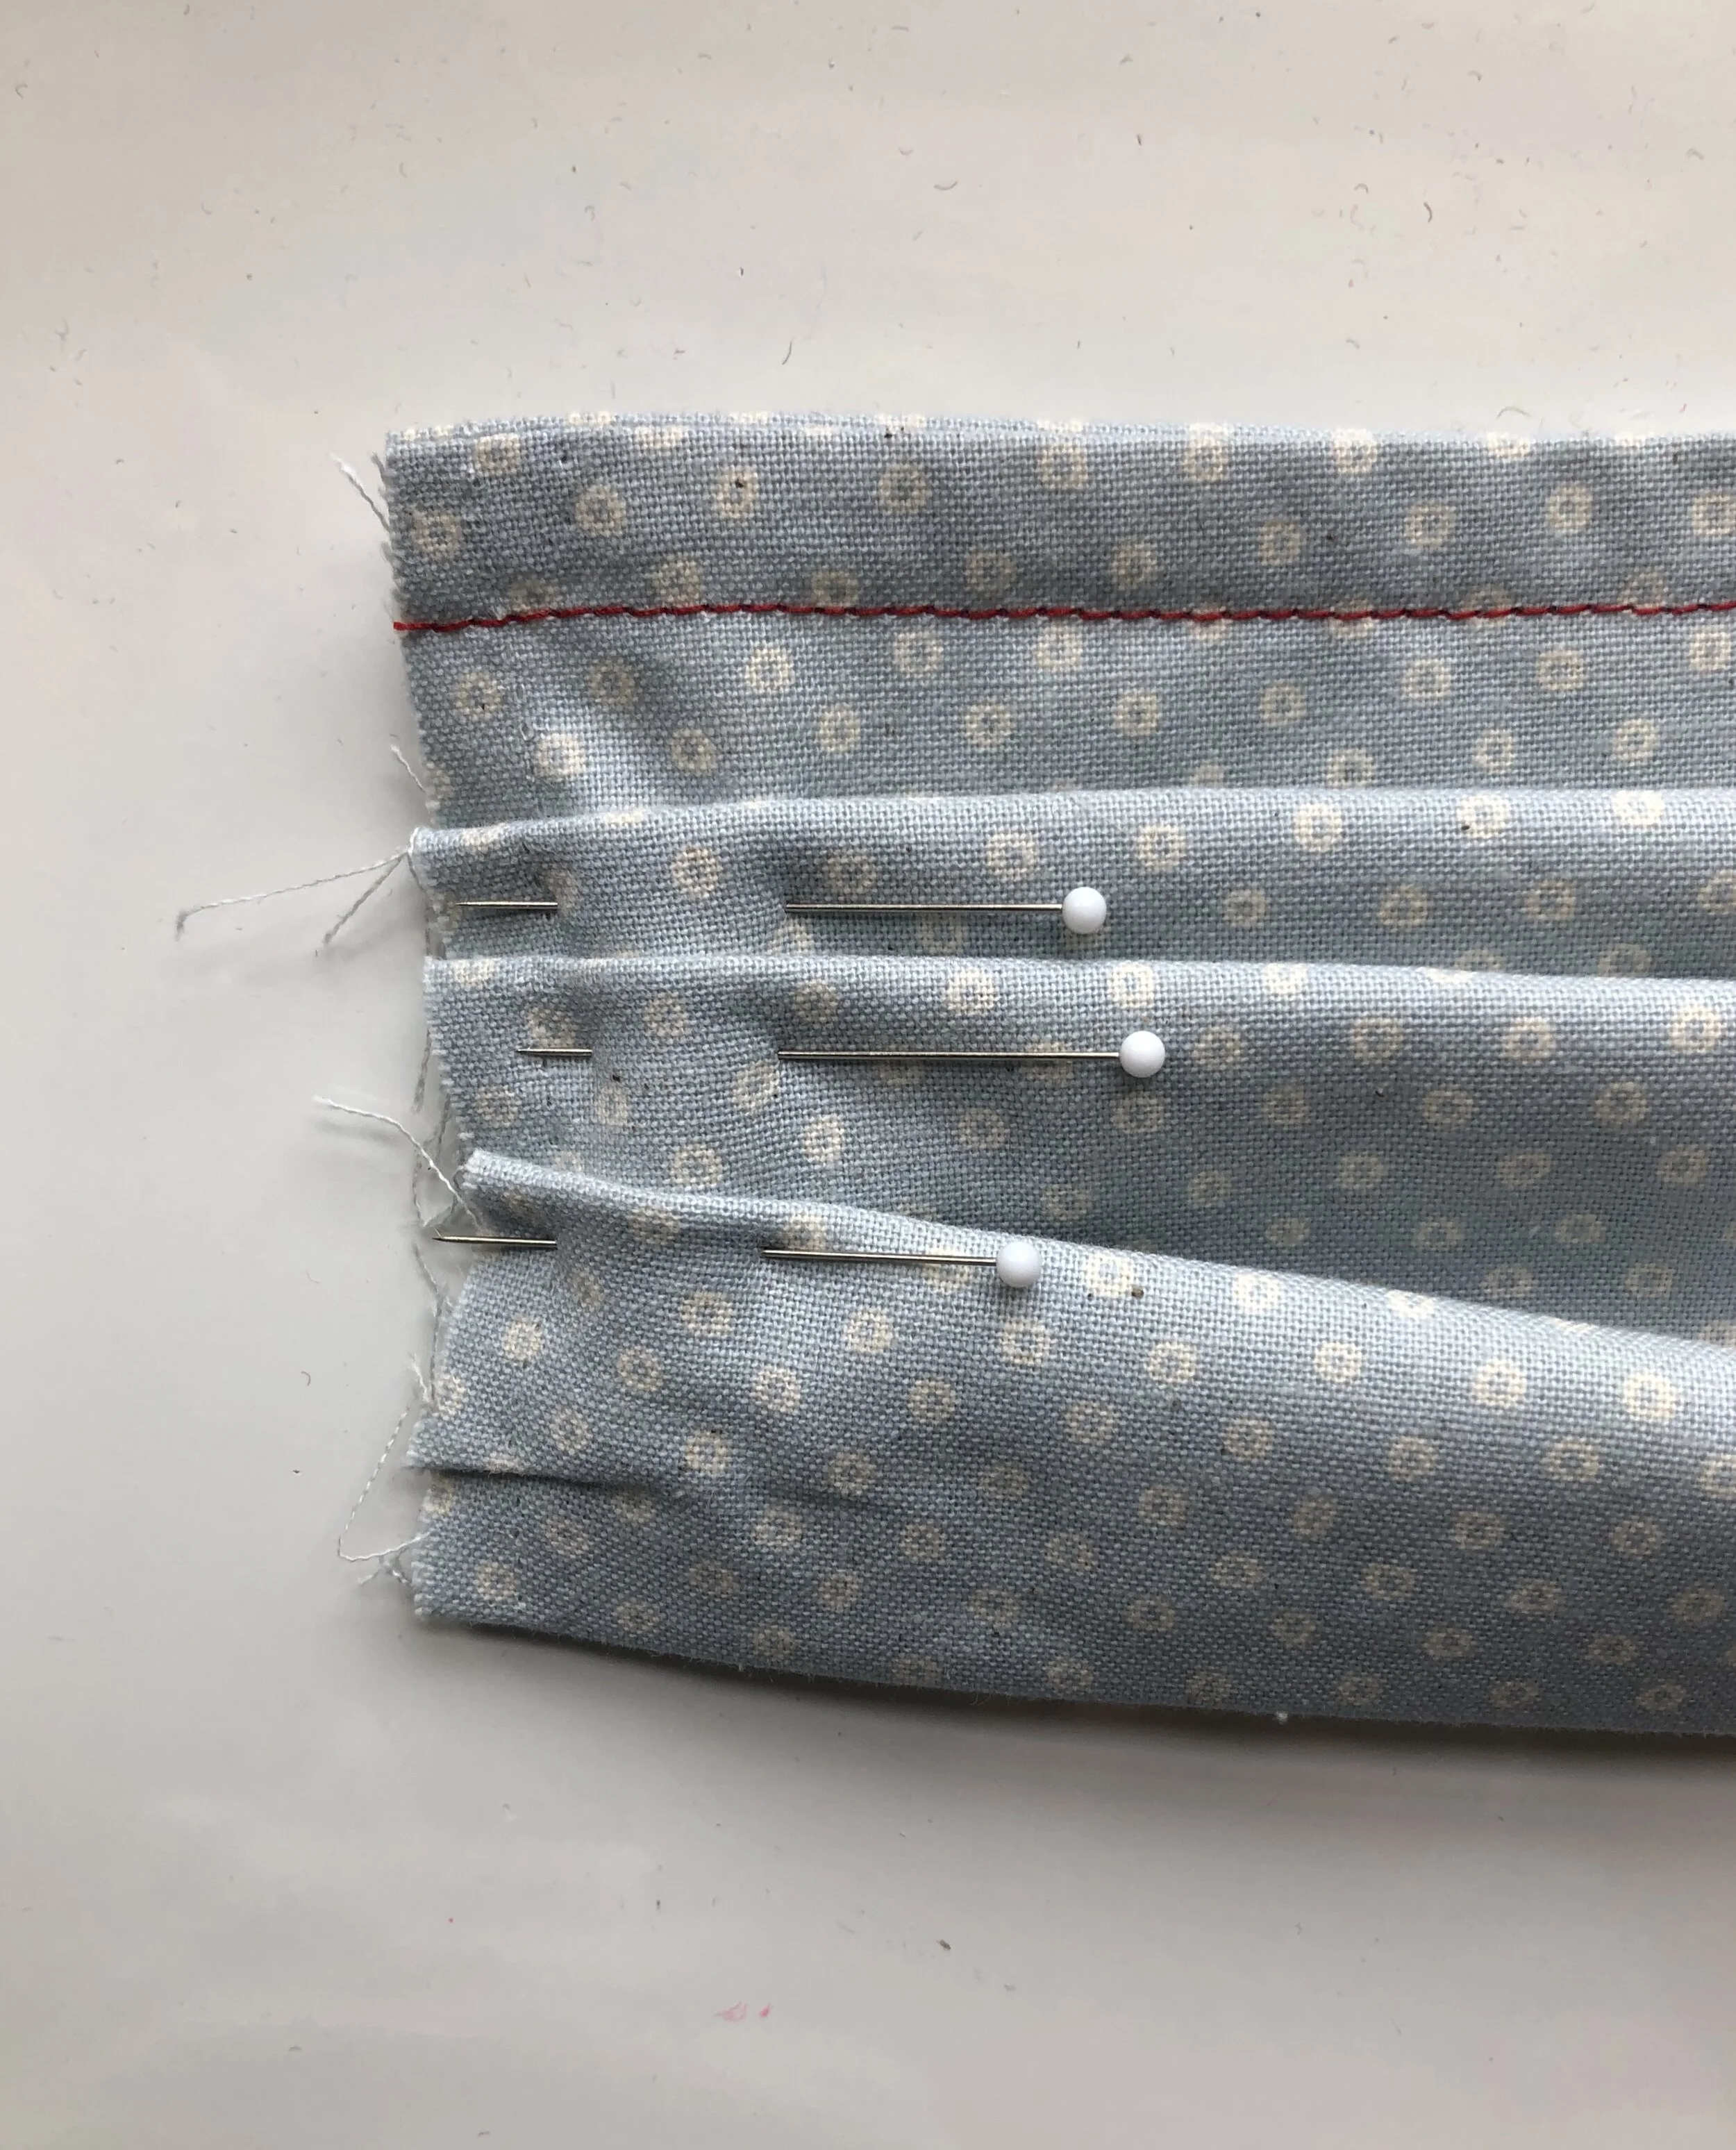
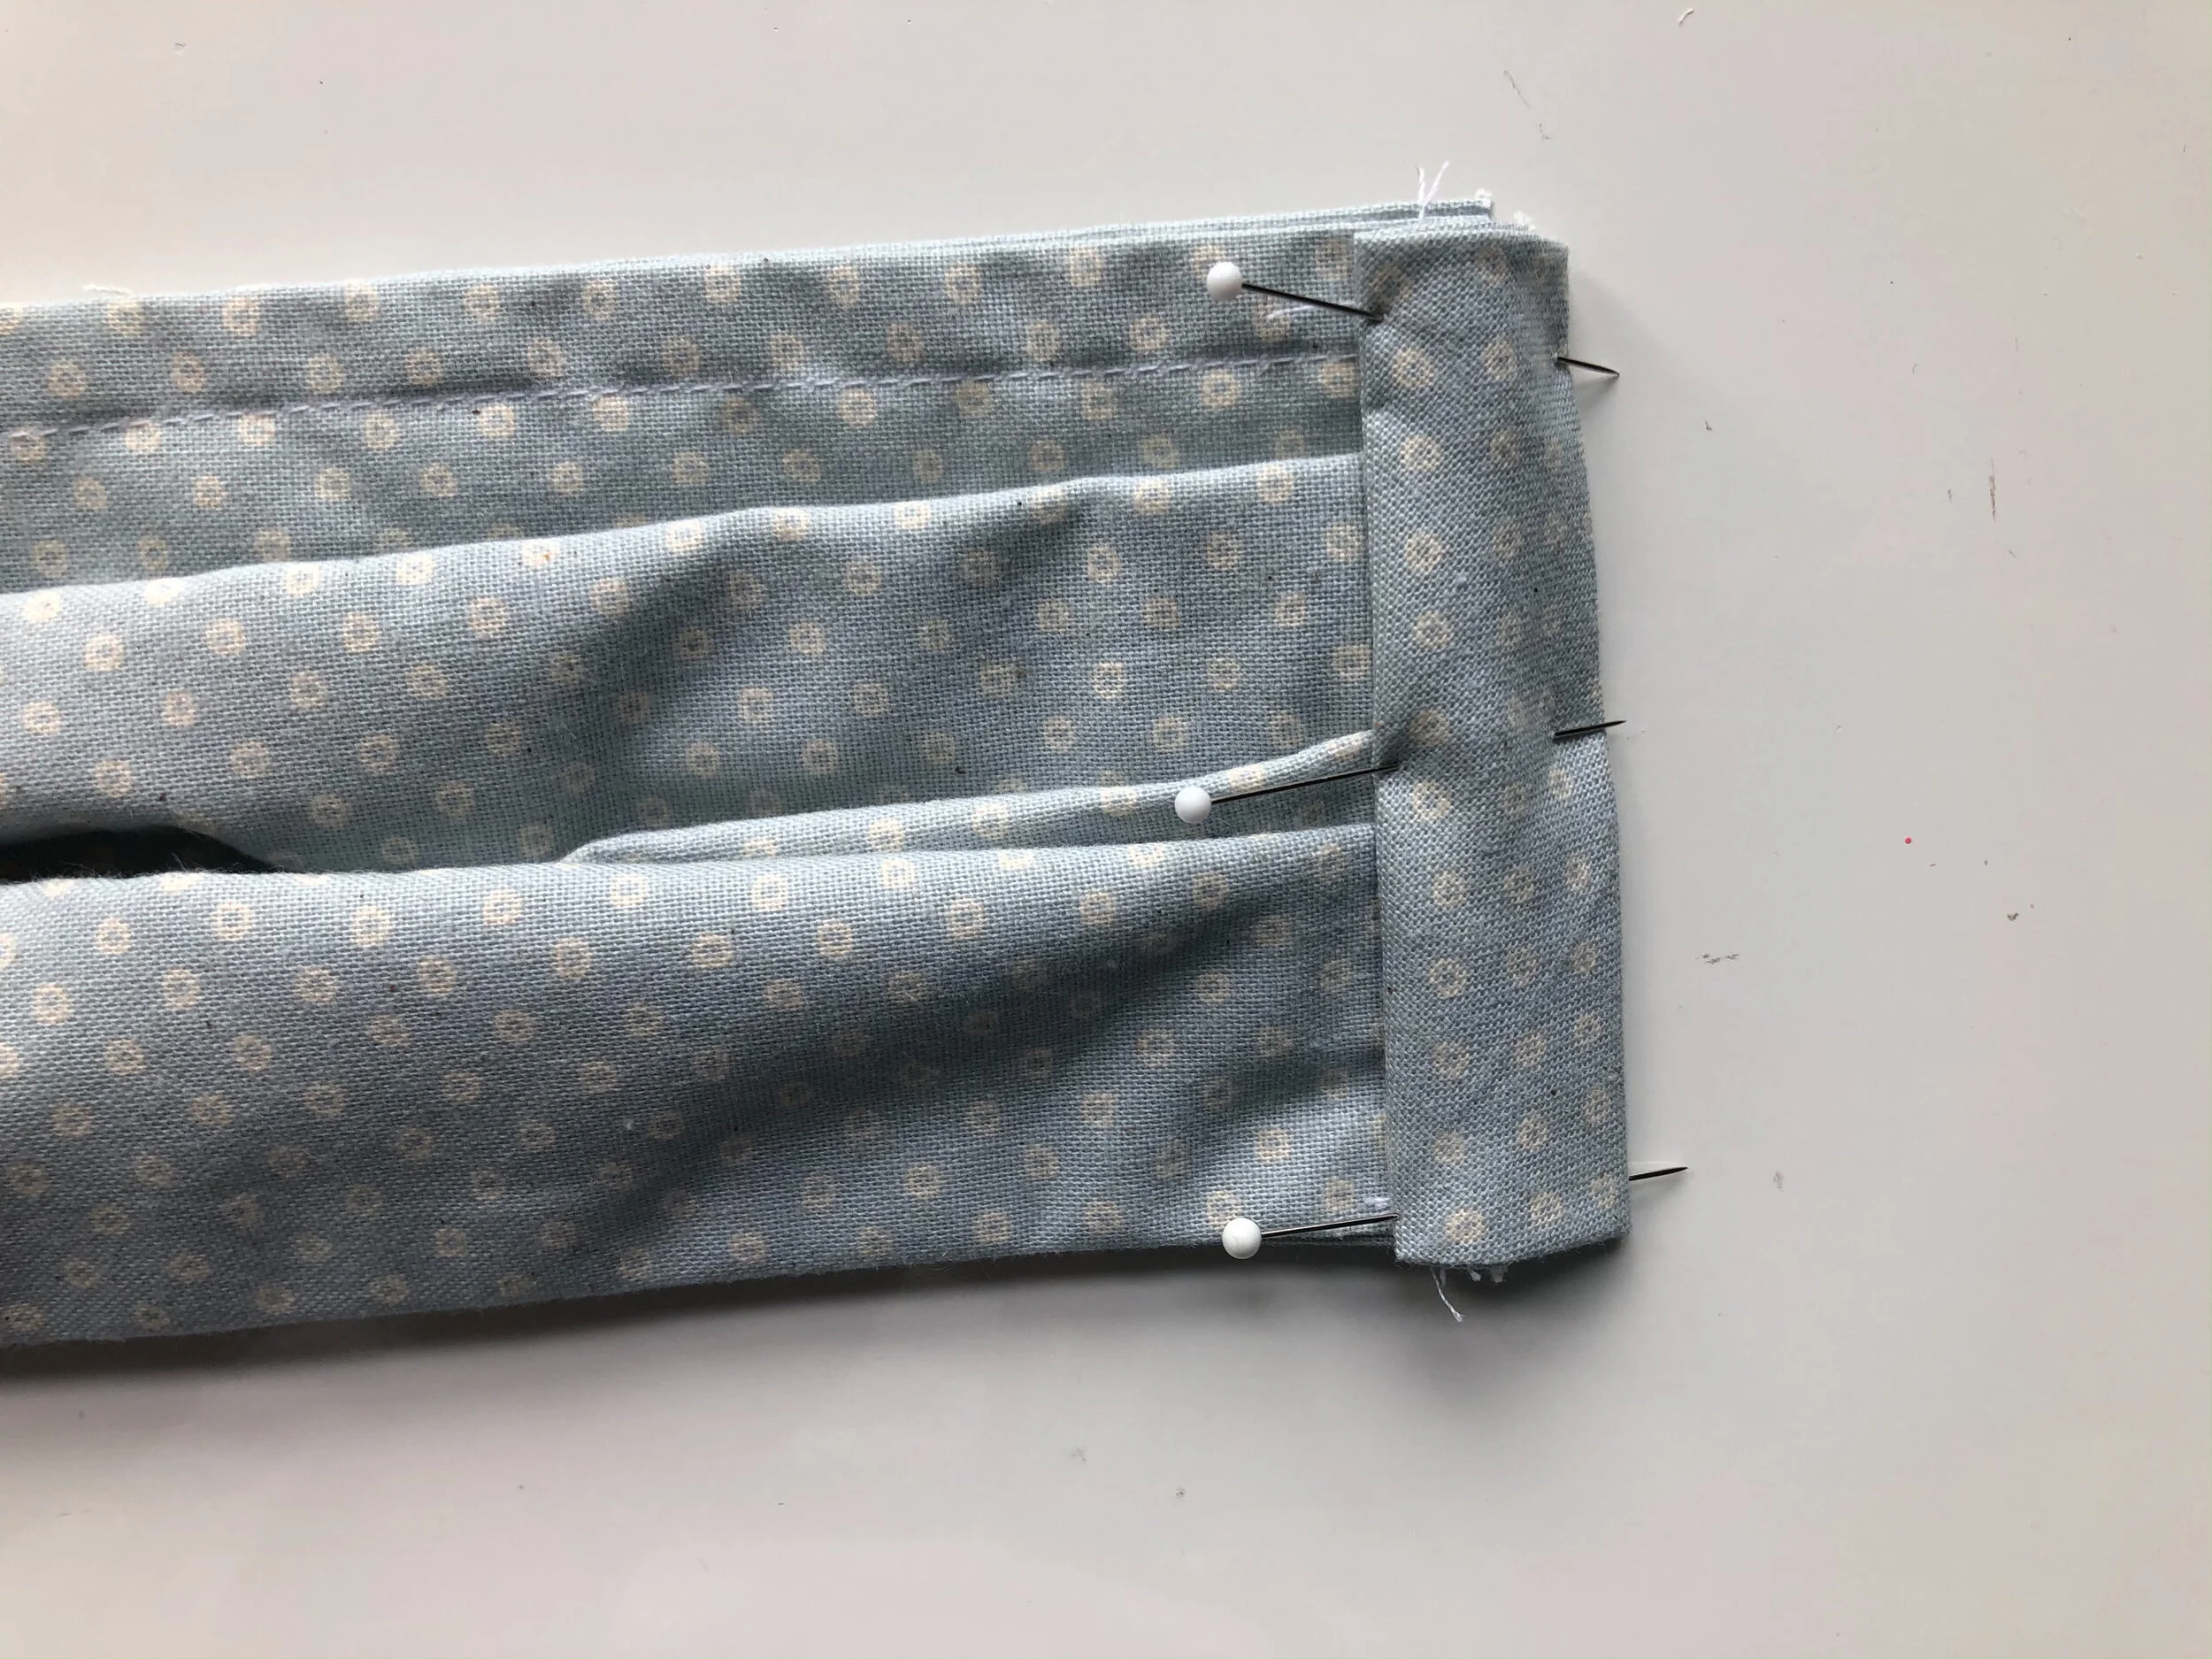
PLEATING THE MASK
To form the pleats, mark your mask at the 1 3/4”, 3 1/2” and 5 1/4” points from the top. This will be your guide to fold the pleats. If you aren’t the exacting type of person, just wing it. The mask needs to be pleated so that it is 3.5” tall.
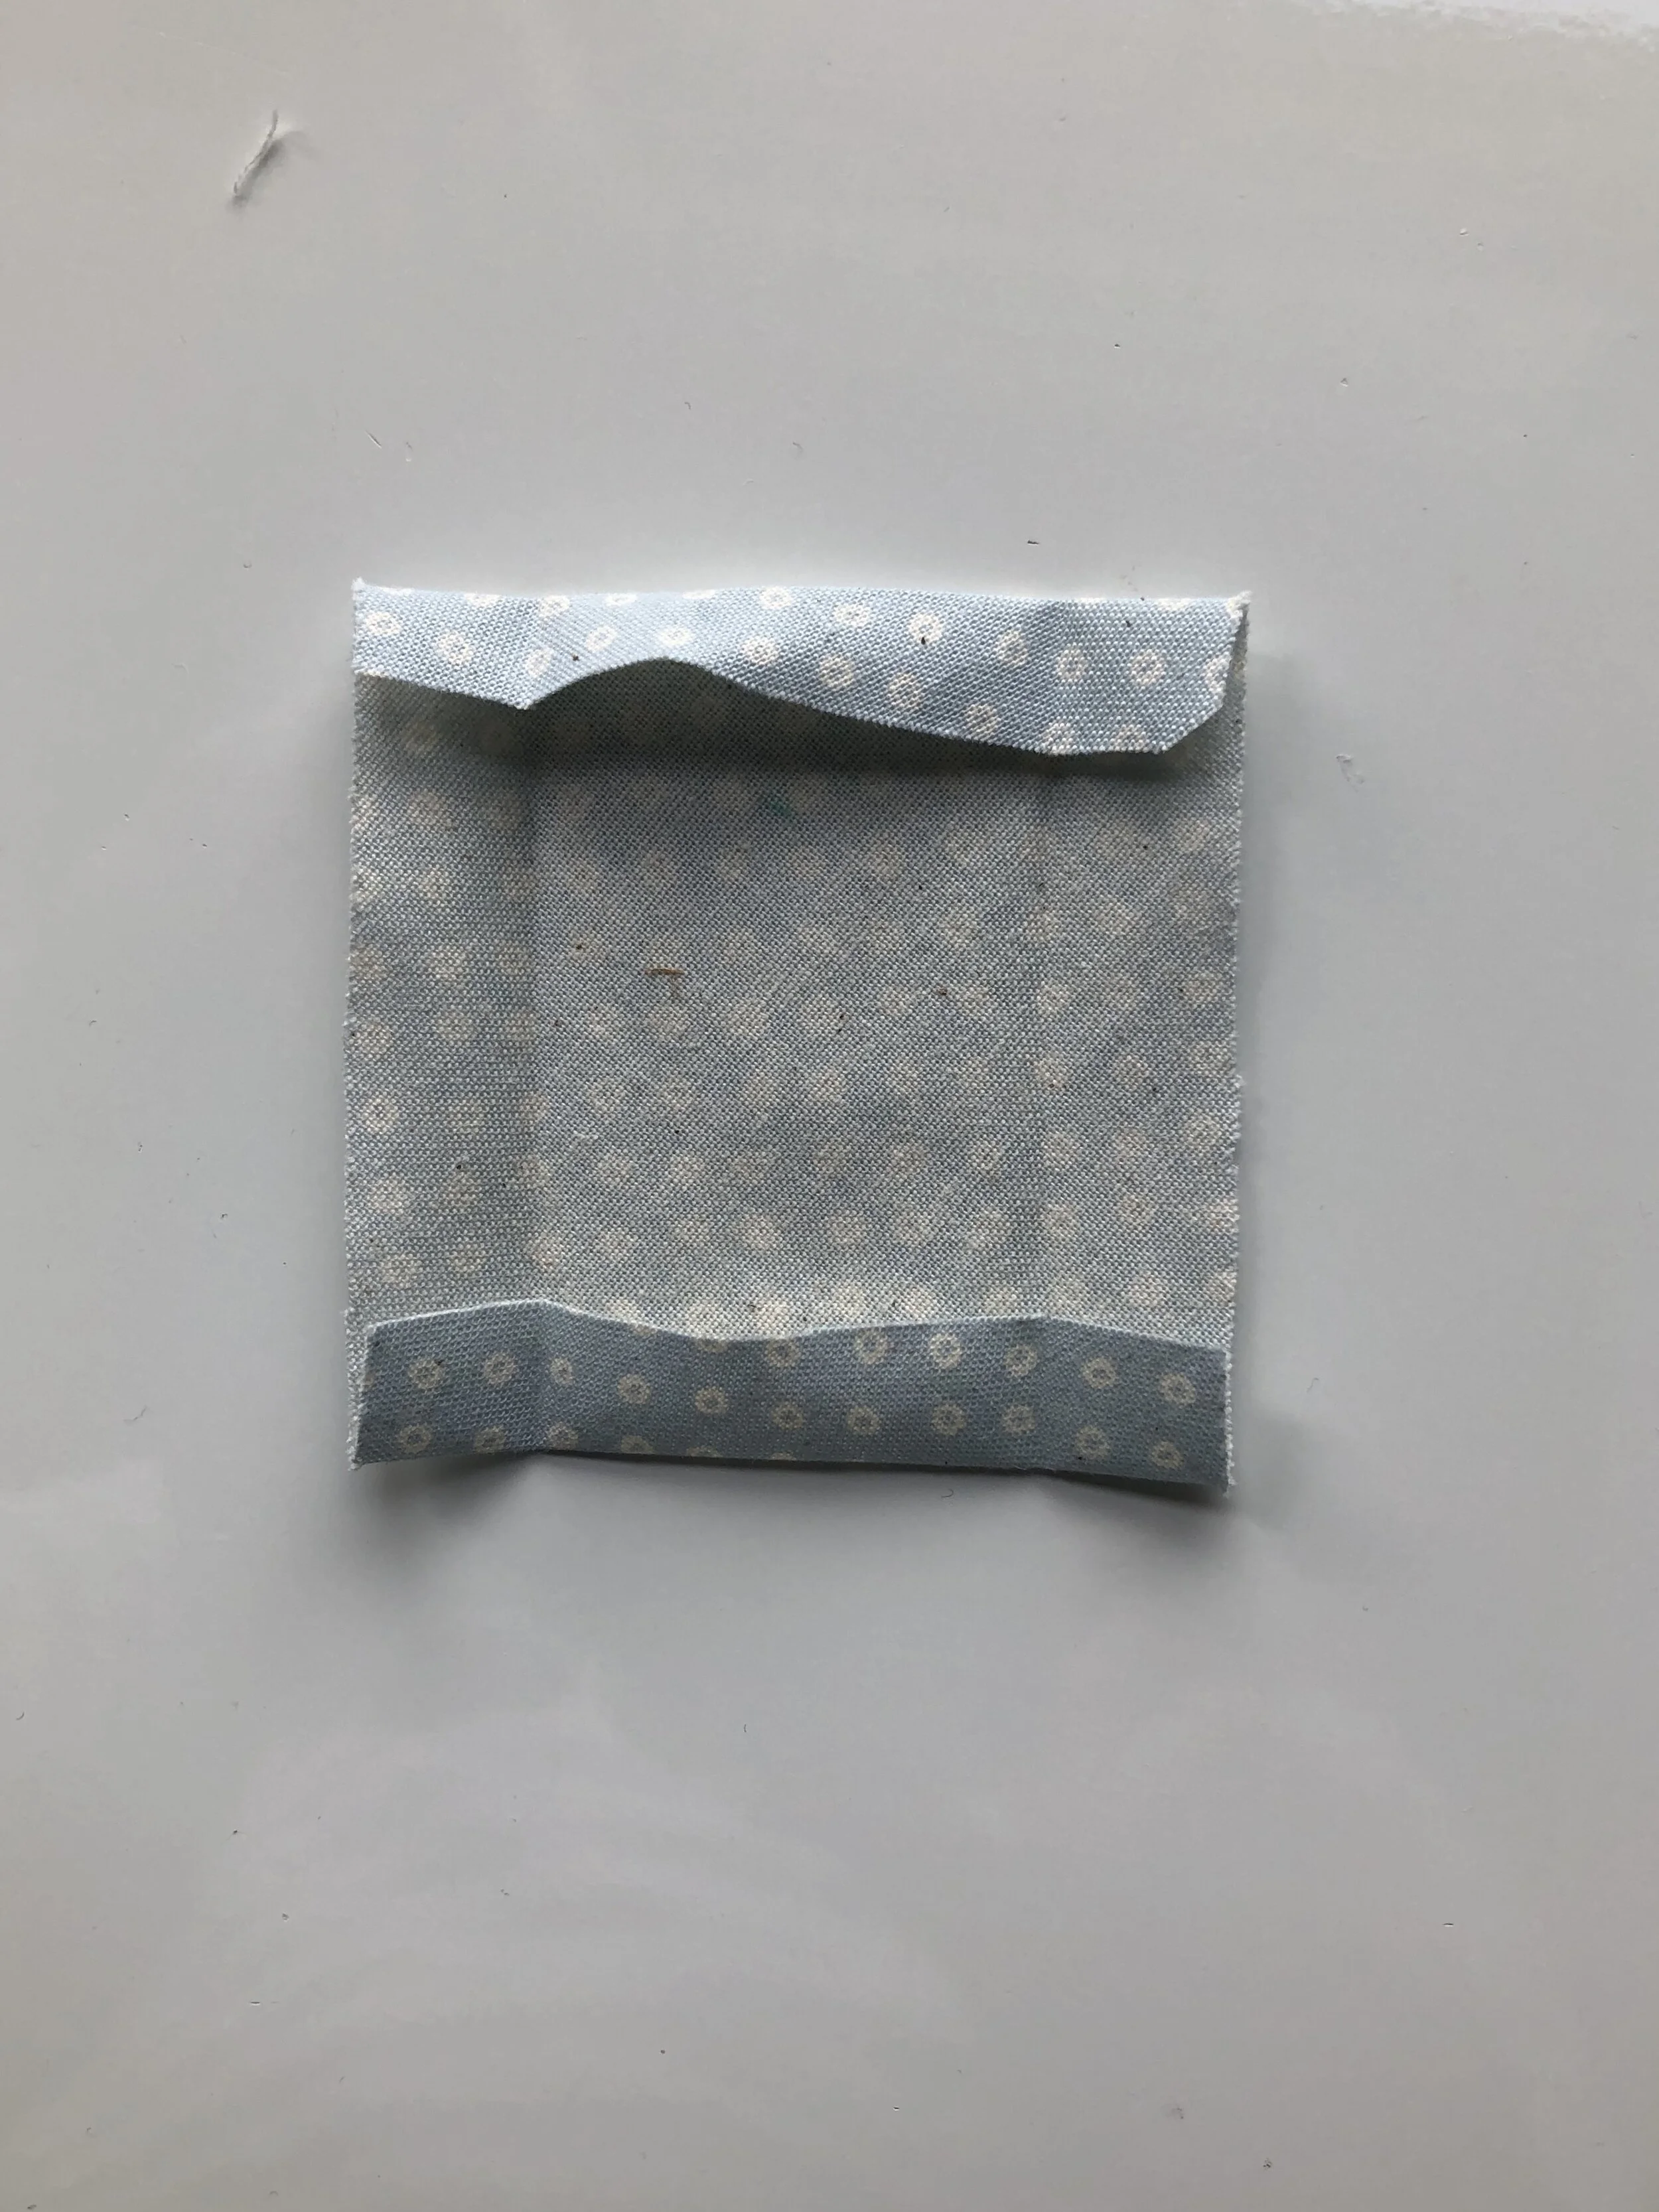
The image below is not sewn, however, it is cut to the same dimensions as if it were sewn with a 1/2” seam allowance at top and bottom.

Each pleat is 1/2” deep. Fold pleats up, toward the top of the mask and pin.
Stitch along pleats using a 1/2” seam allowance. Repeat for opposite side.

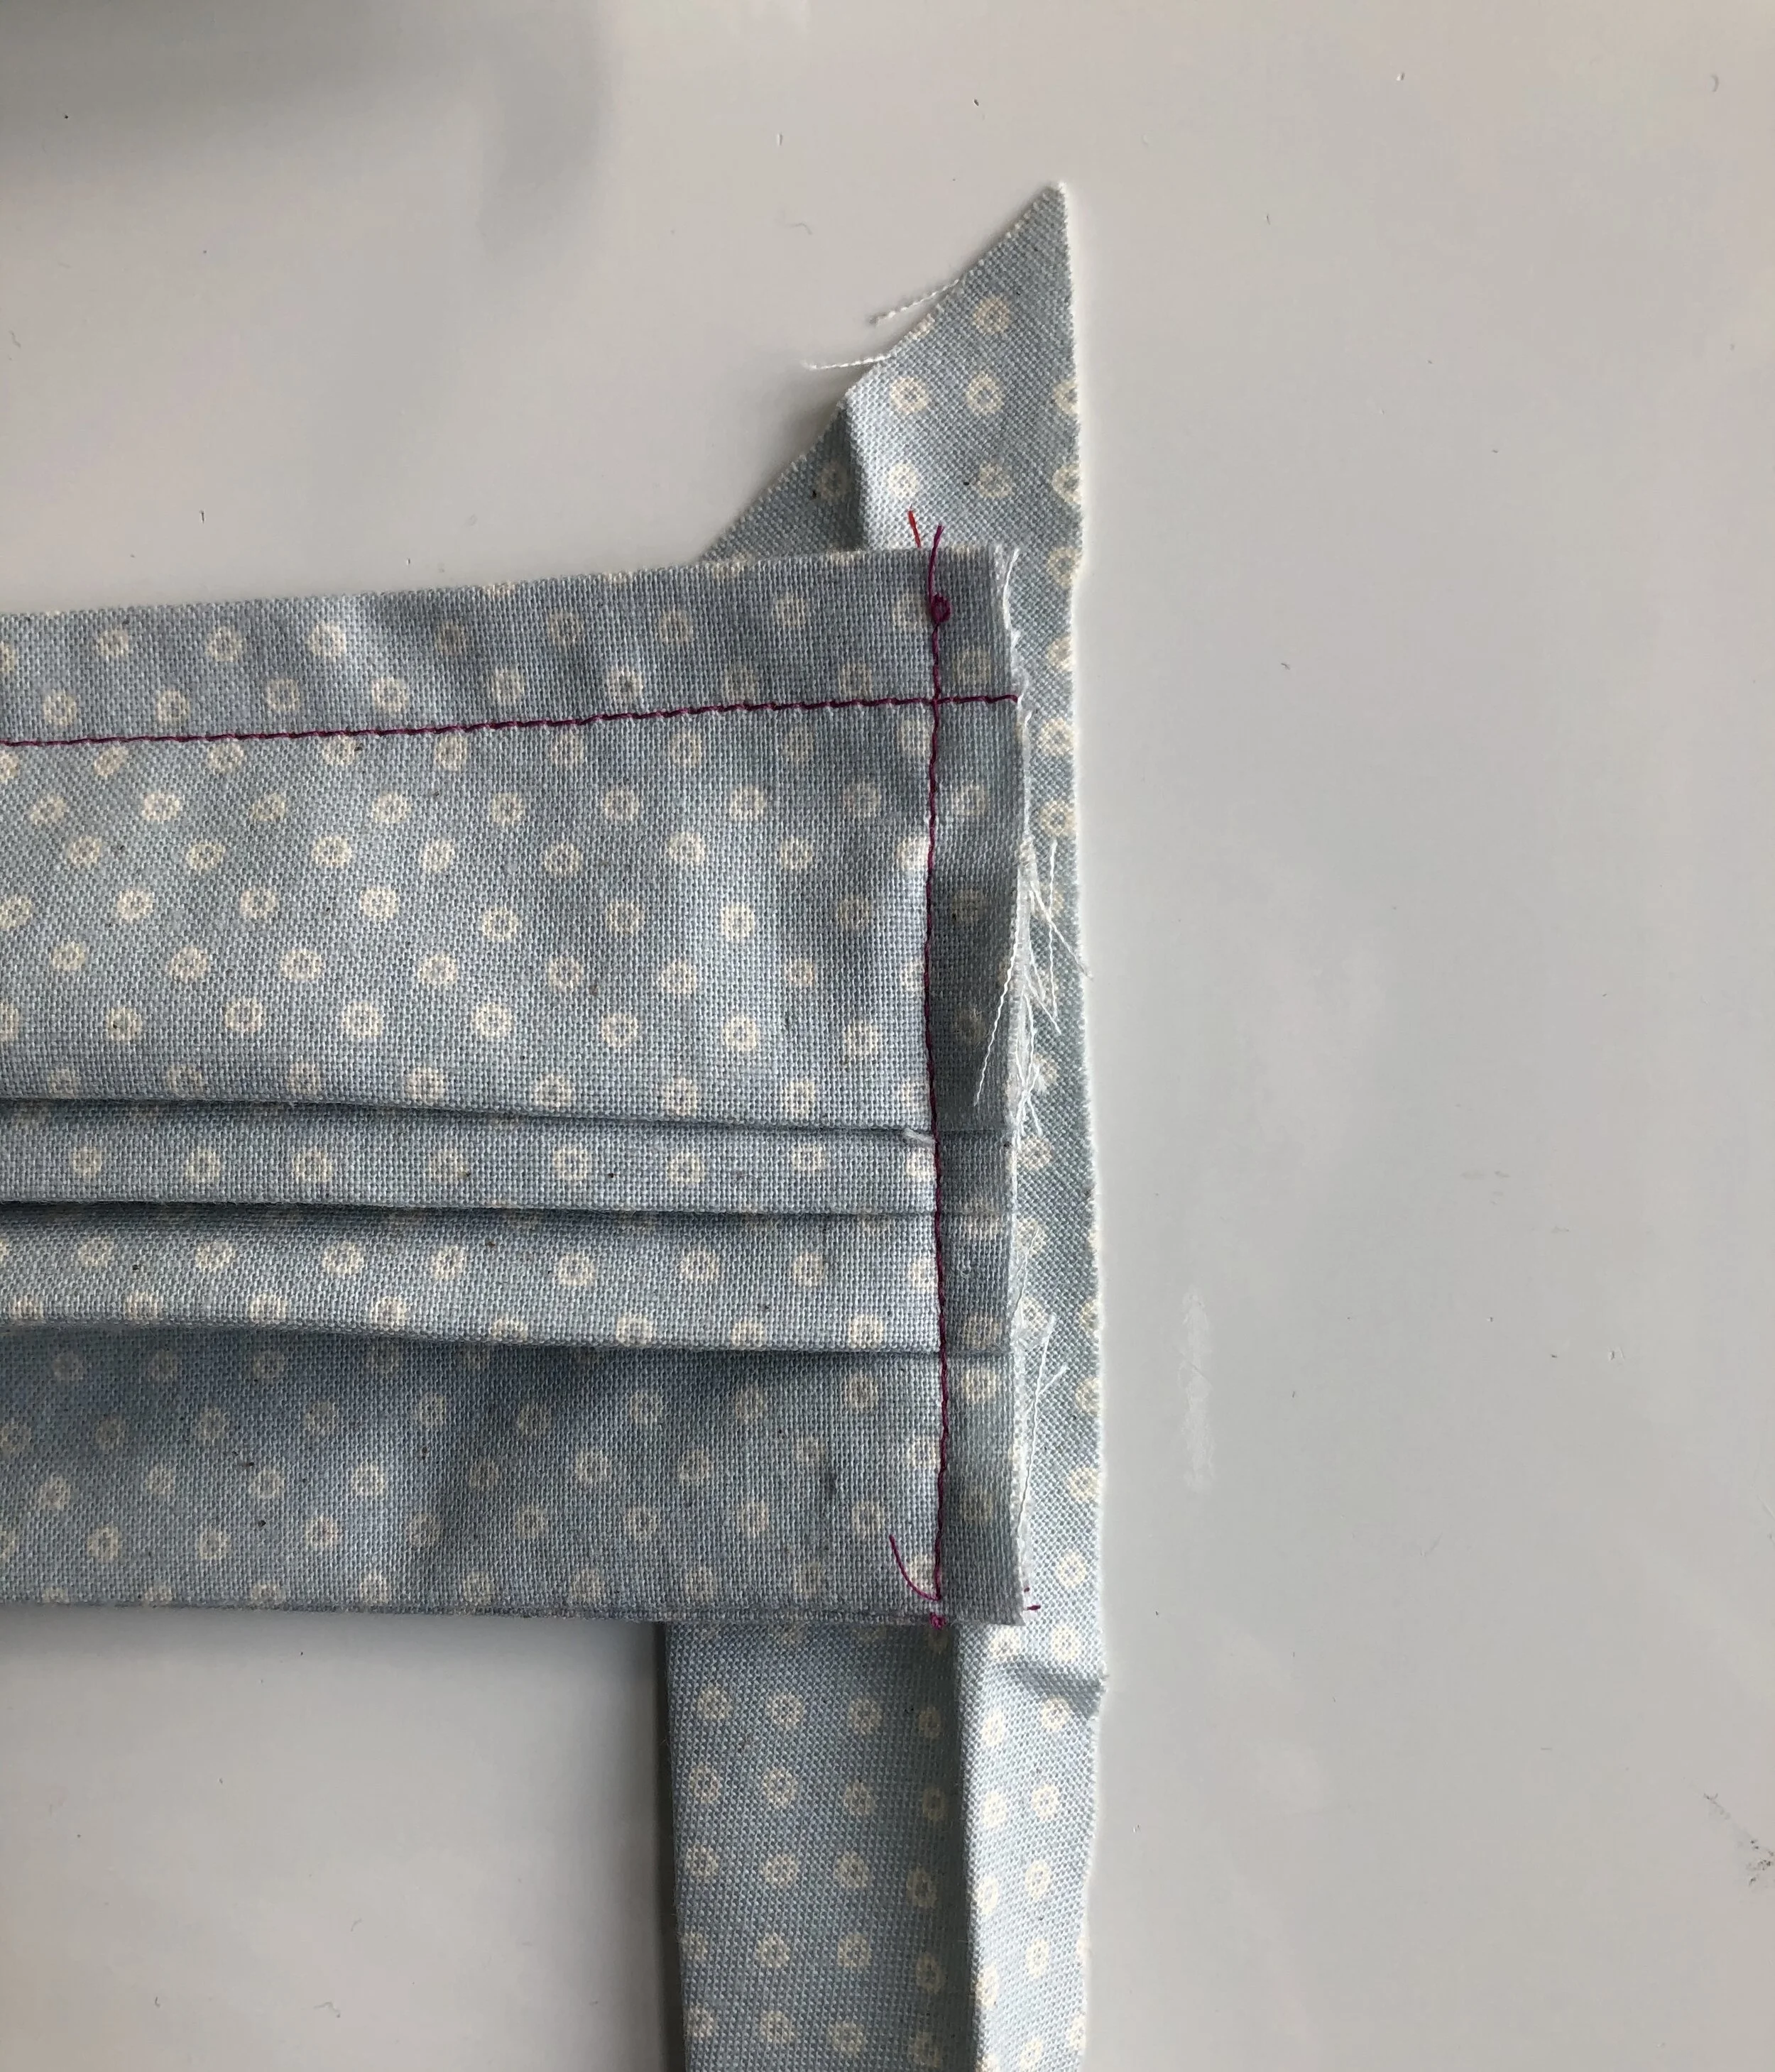
APPLYING BIAS
Align folded edge of bias tape along the line of stitching. Trim tape to 1” longer than the side of your mask. Fold and press edge of top and bottom of bias 1/2” toward the inside. Repeat for opposite side.

Pin and stitch right over the previous row of stitching. (If you do not want to make bias tape, keep reading. I have another option for you.)
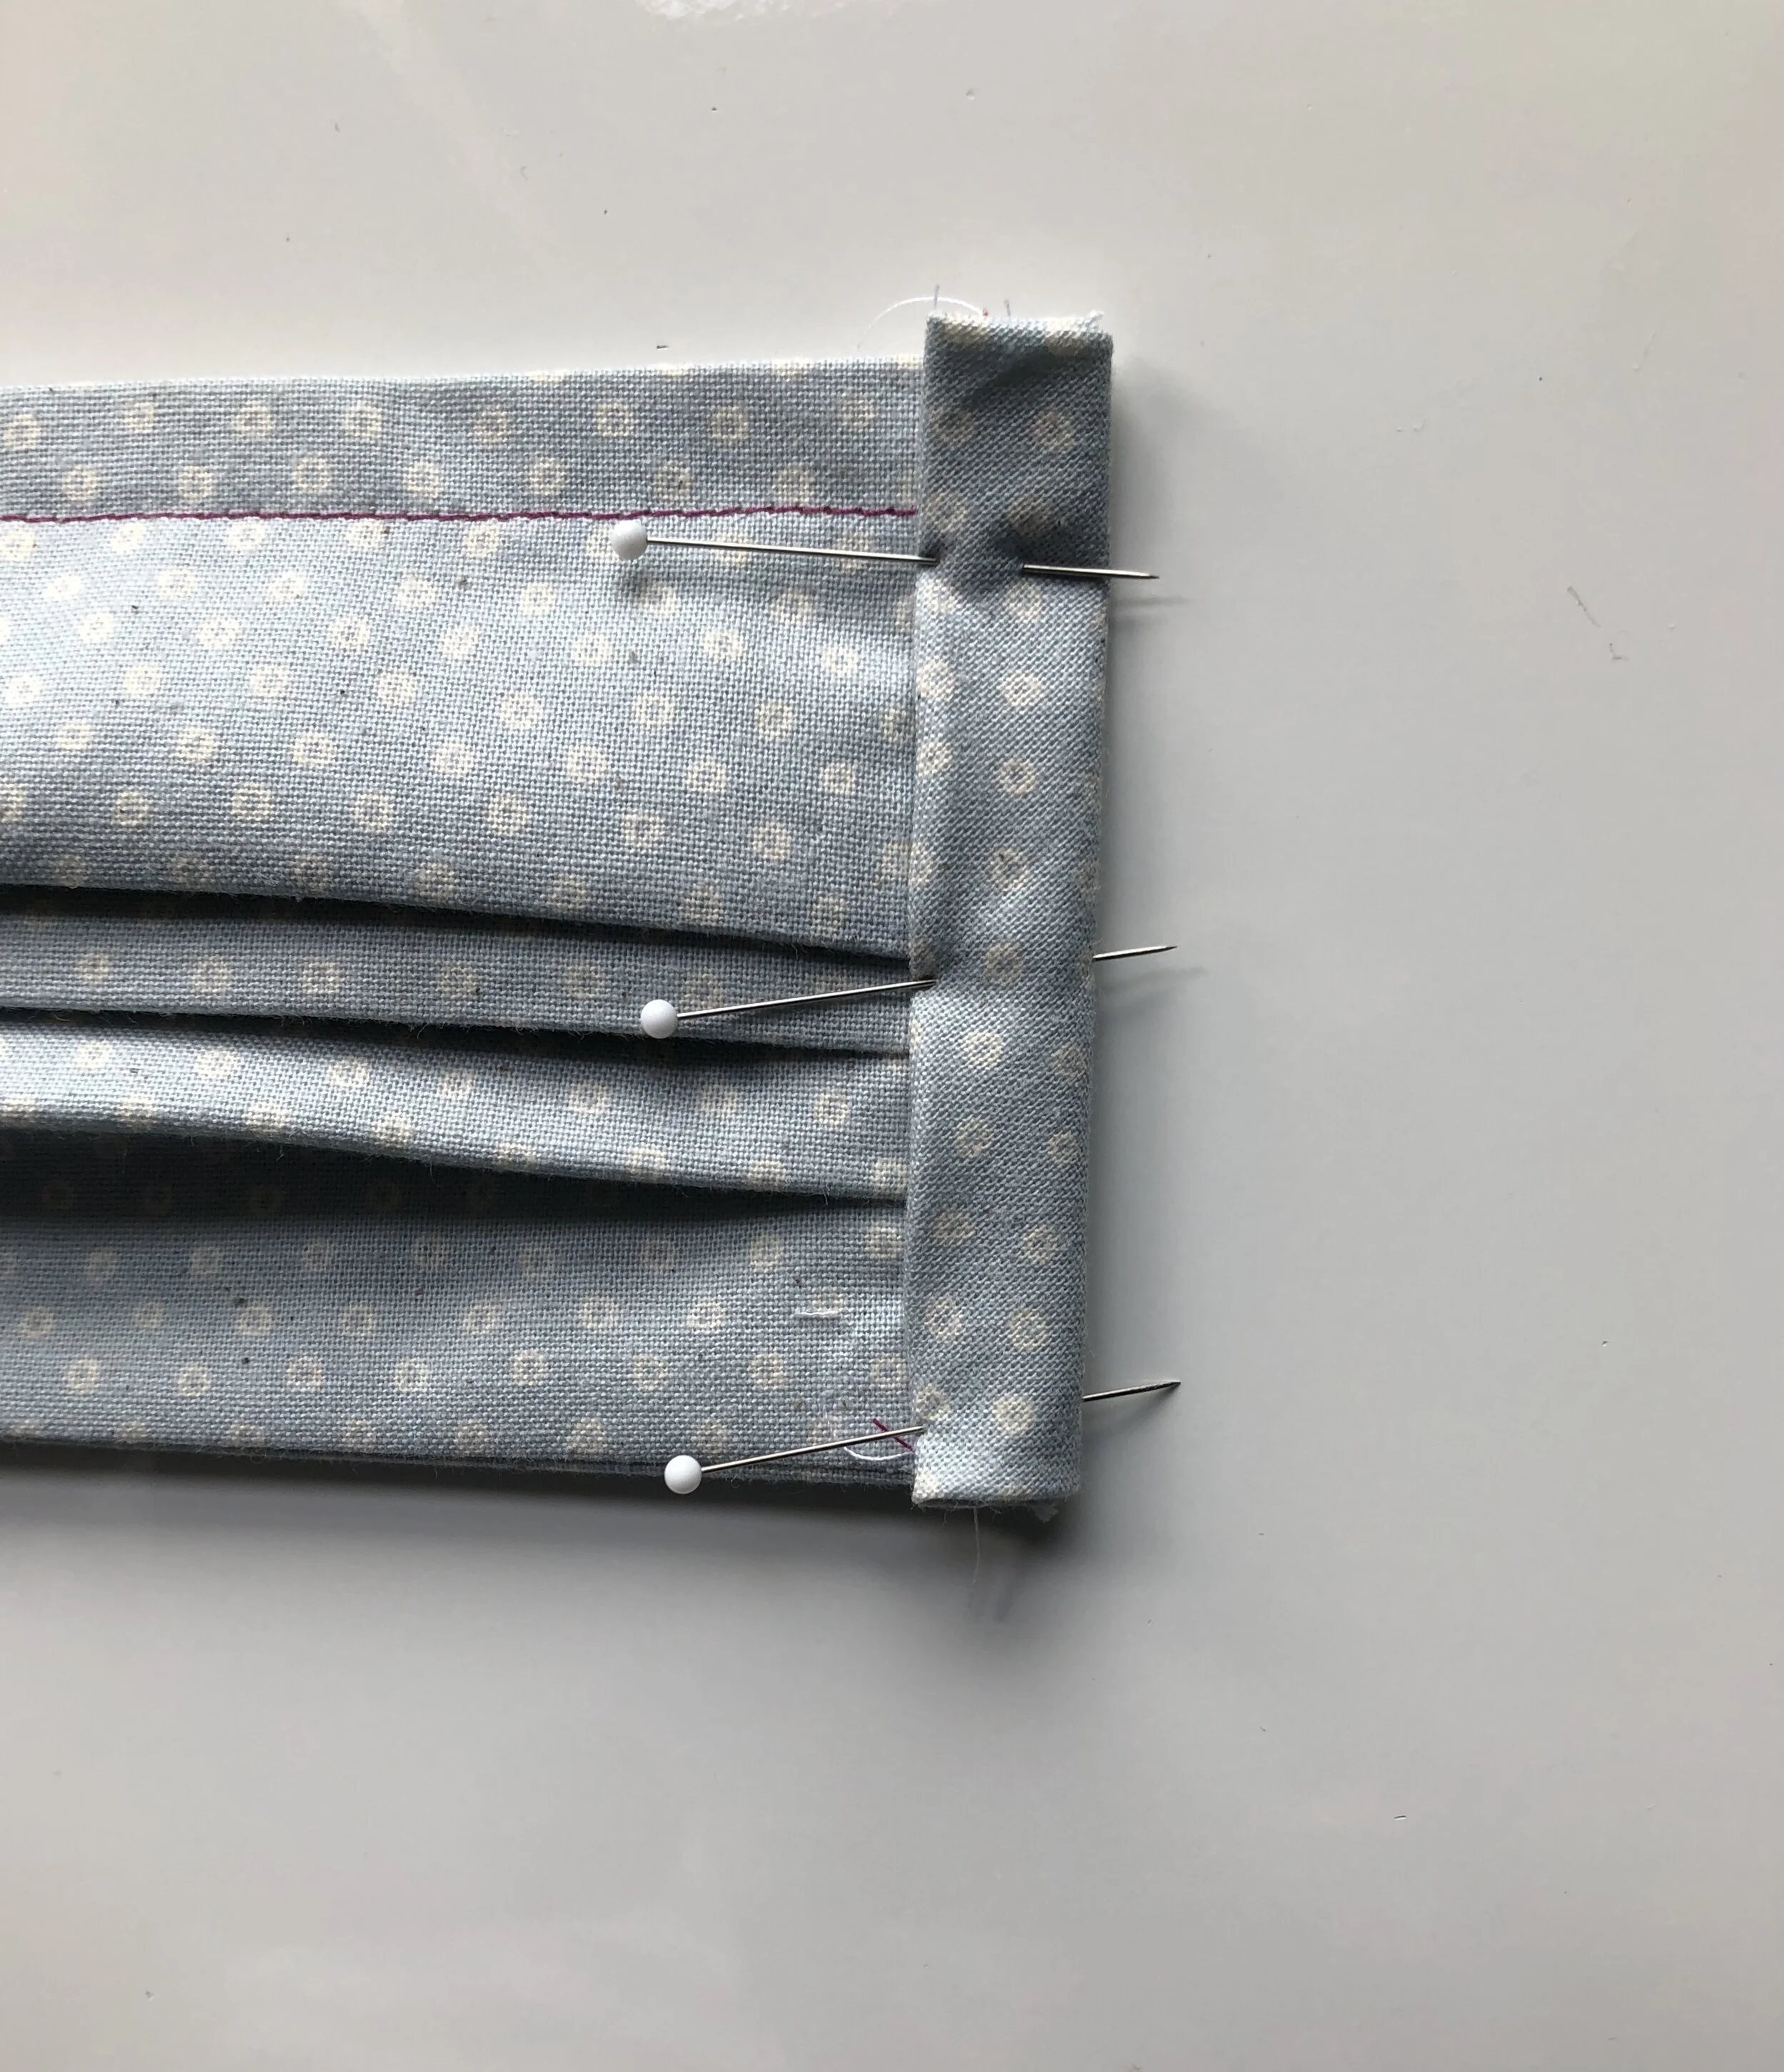
Fold bias inward along the fold line. Pin in place. Topstitch the edge of the bias.

FINISHING
Take one piece of elastic and using a safety pin, draw it through the mask side casing. Tie in a slip knot. Repeat for the opposite side.

Trim knot ends and pull through the casing to conceal. Repeat for the opposite side.
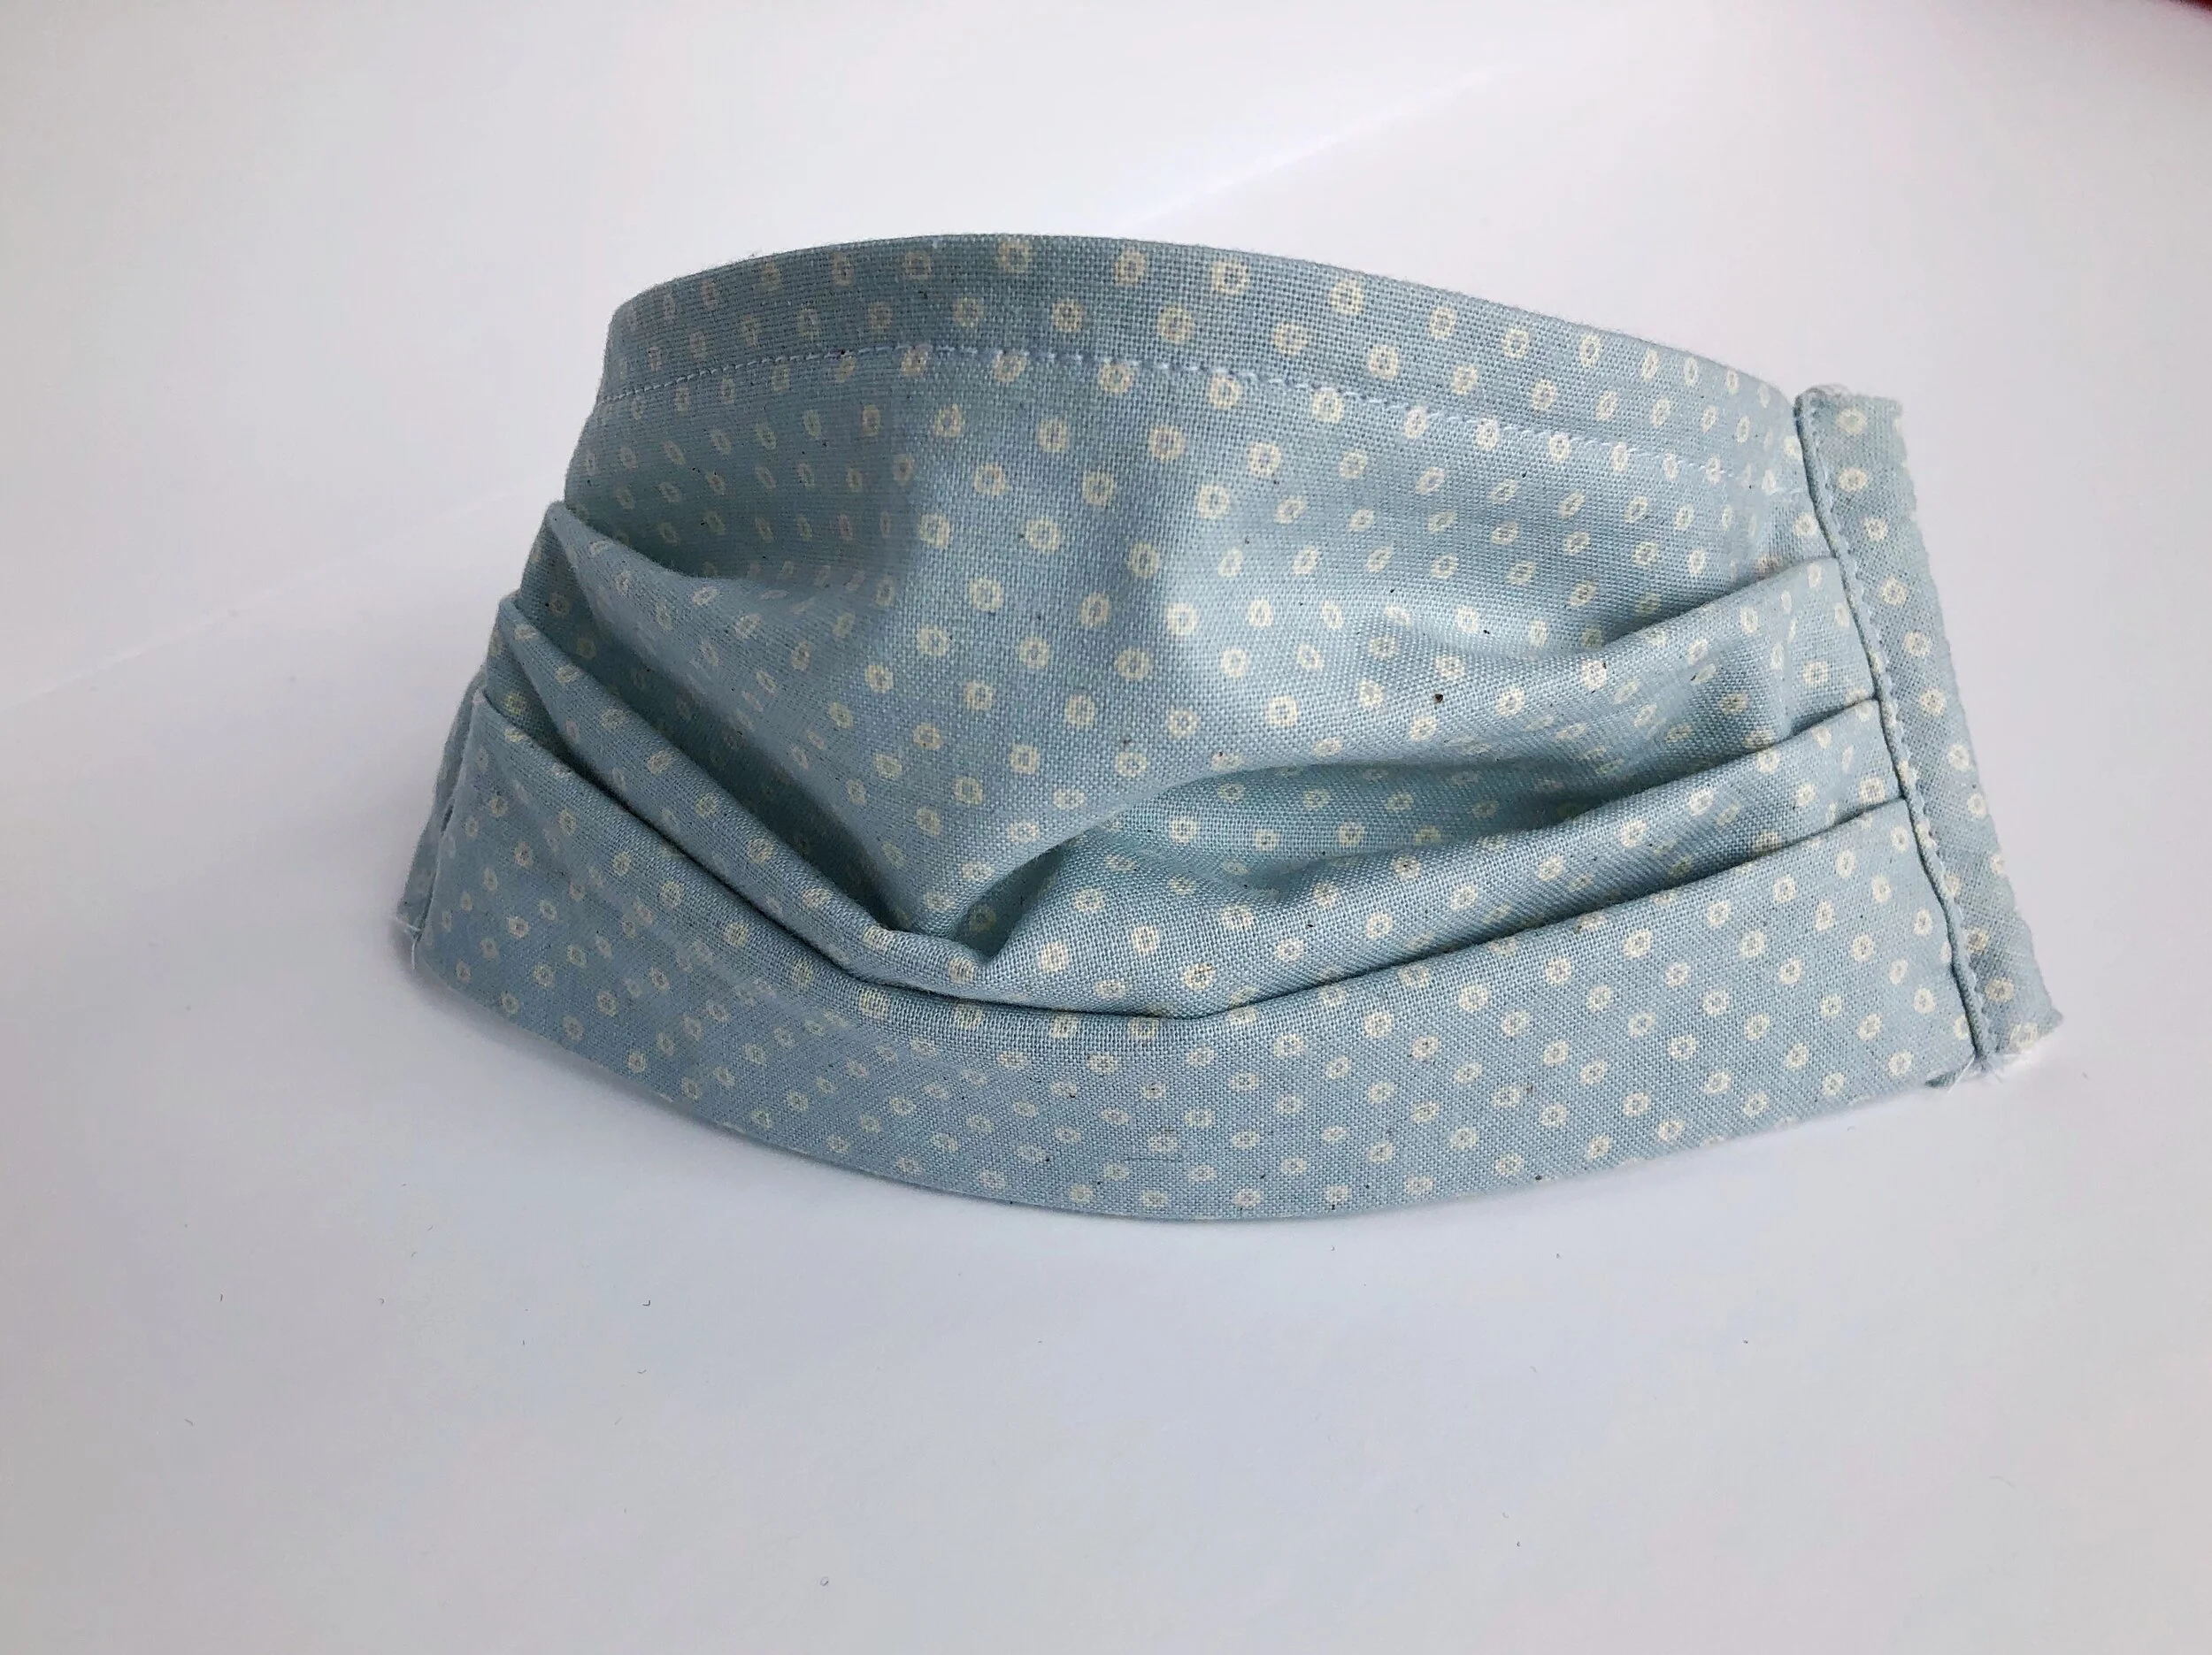
Your mask is complete! Try it on and bend the wire for a comfortable fit.
HOW TO SEW A FACE MASK WITH TIES
This pattern has a lot of flexibility as far as supplies and technique go.
The second variation involves just making the side edge casing a little wider to allow for ribbon to be drawn through.
SUPPLIES
Fabric, Refer to CDC Guidelines *Instead of recommending fabric to you, please read this article and decide for yourself which fabric you feel is best to use.
2 yards of 1/2” ribbon
7.5” of metal wire , I used 16 gauge wire, but would image that a straightened out paper clip would likely work in a pinch.
2 rectangles of fabric 3 x 4.5”
Filter for pocket option
SIZE
Finished Dimensions: Approximately 3.5” x 7”
Follow directions up until the bias tape application. Instead of bias tape, cut 2 rectangles of fabric 3” x 4.5”. Press the long sides in 1/2”. Press shorter sides in 1/2”.
Align the folded edge of the fabric along the line of stitching in the same manner as the bias tape application. Folding and press the edges of the top and bottom 1/2” toward the inside to conceal raw edges. Repeat for opposite side.
See section Applying Bias for step by step pictures. The fabric squares are applied exactly like the bias tape- just wider and a bit easier to handle for beginners.
Topstitch along the edge of the casing.
This casing is nice and wide and should easily accommodate a 1/2” wide ribbon or twill tape.
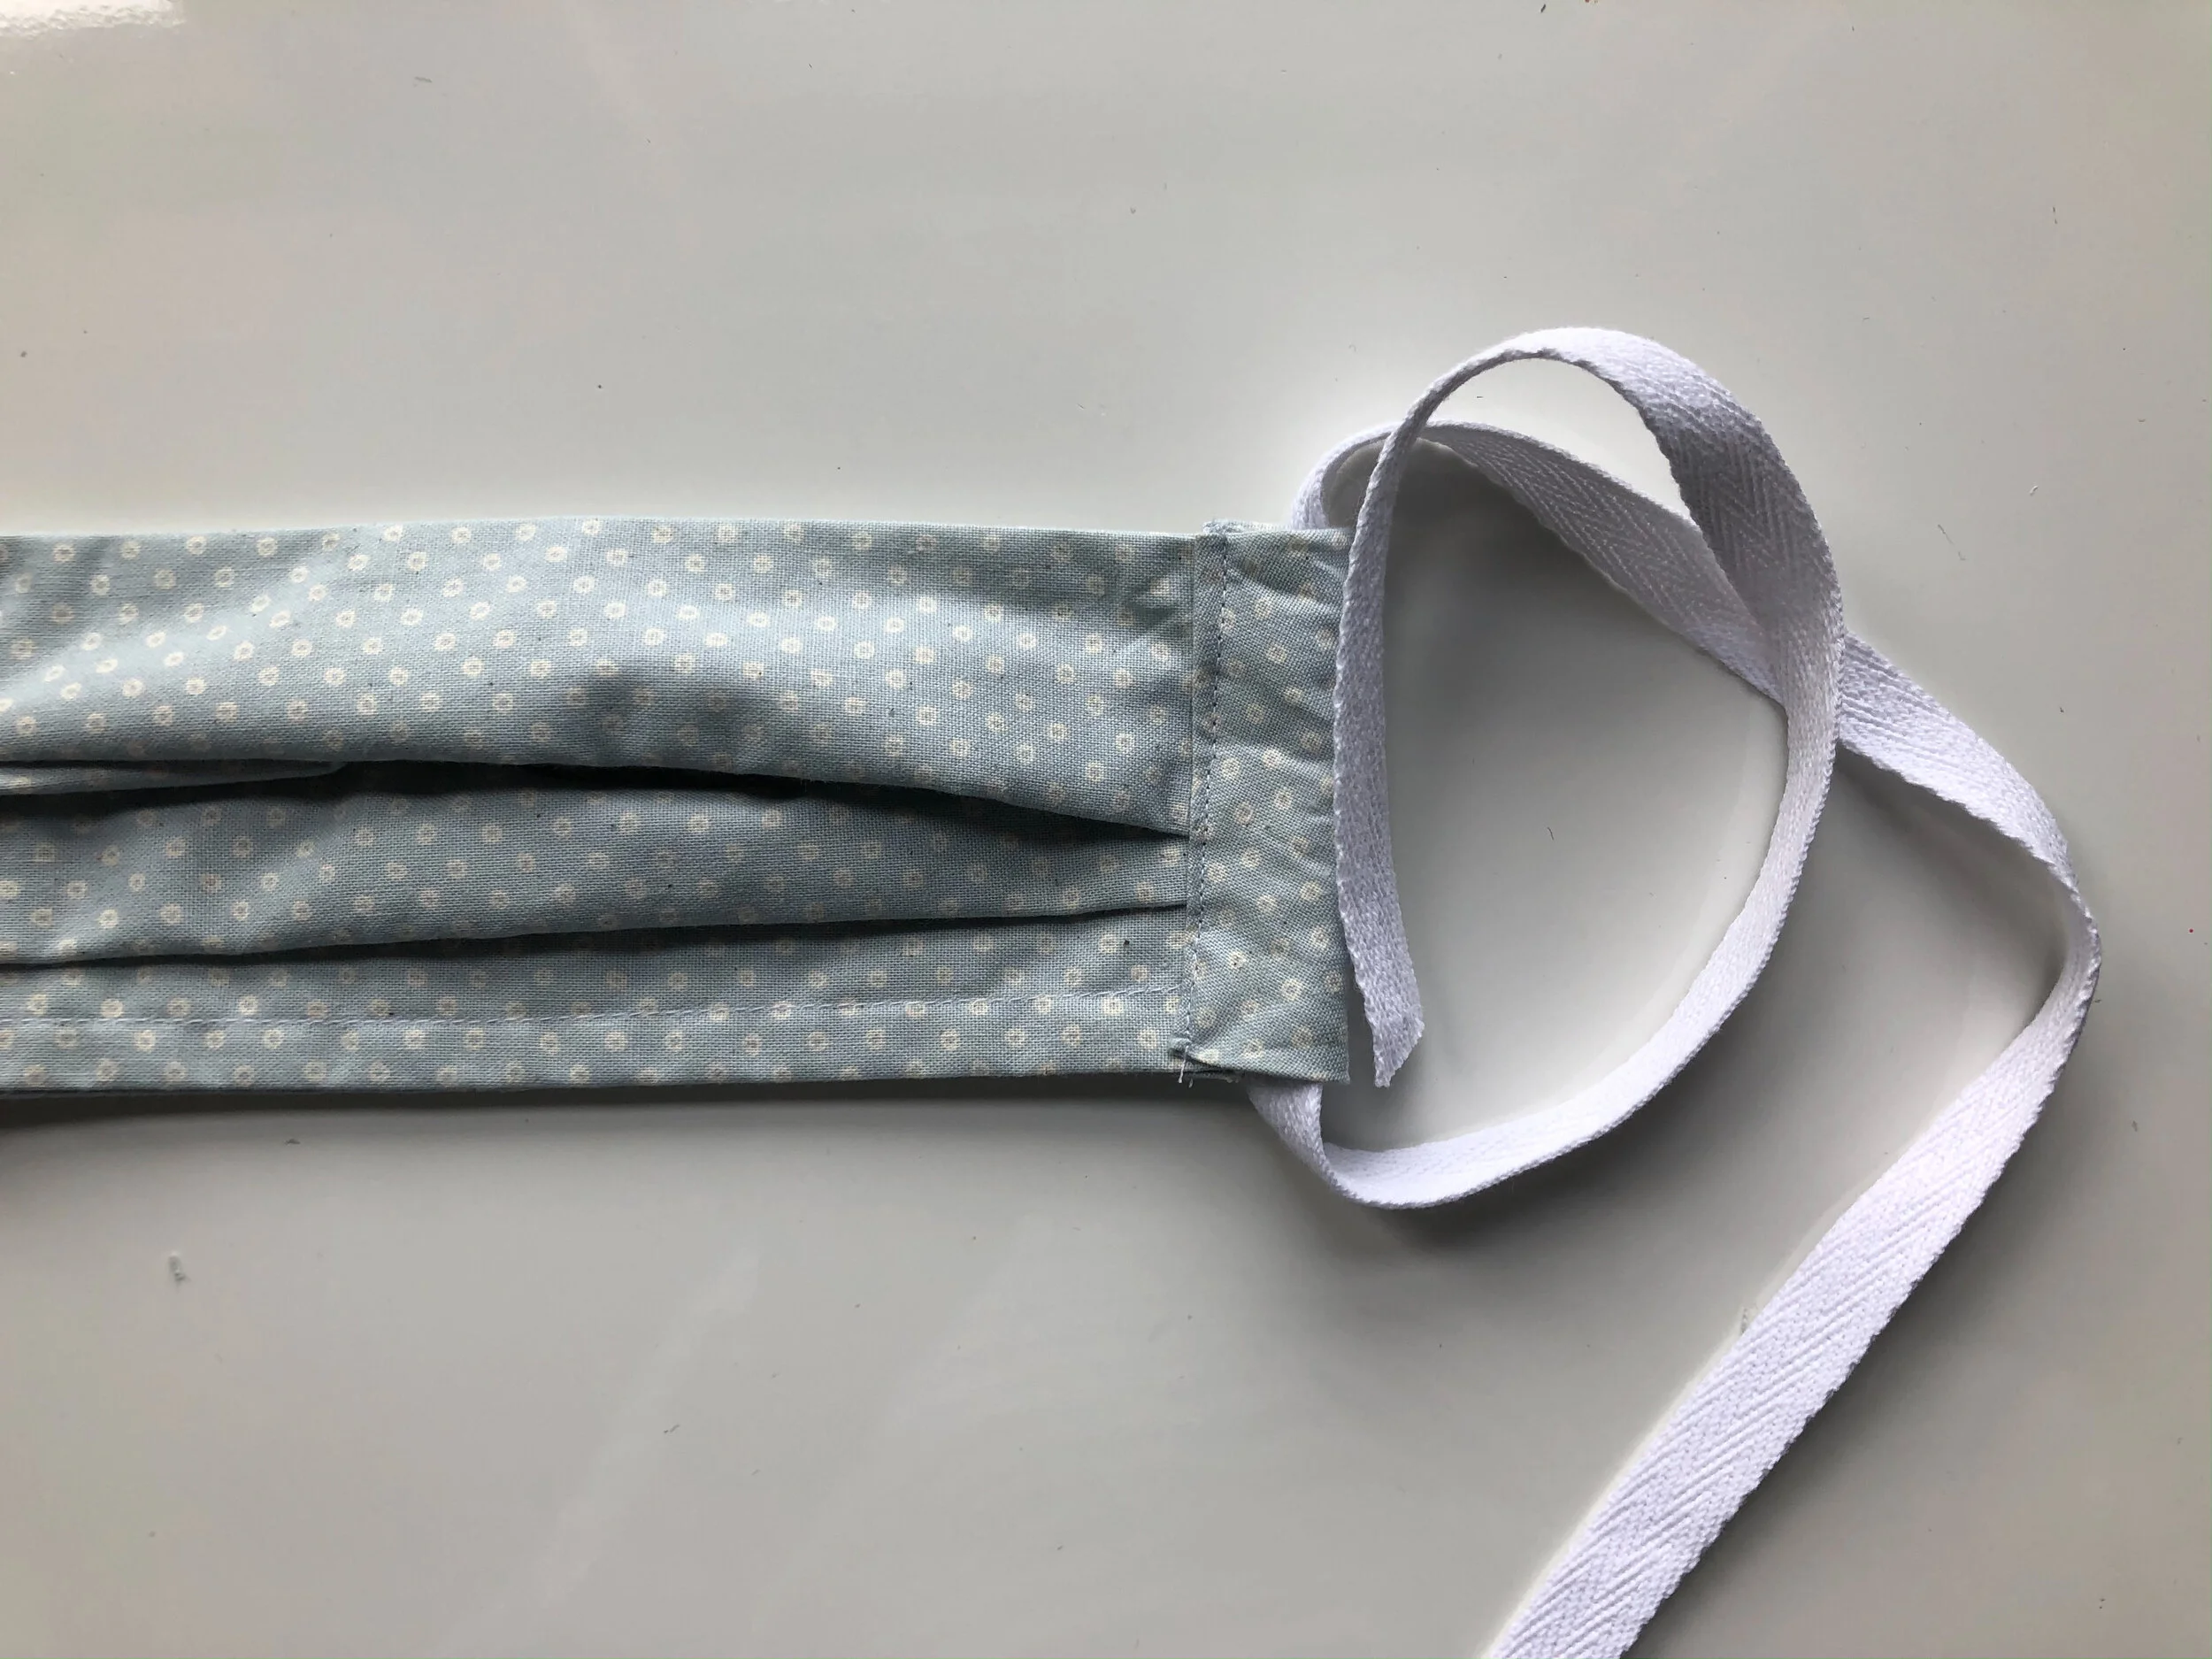
Pin the edge of a 36” long piece of ribbon or twill tape to a safety pin and pull through casing. Repeat for opposite side.
Try on and tie for fit. Feel free to use a longer or shorter length of ribbon.

UPDATE- HOW TO MAKE A FACE MASK WITH A POCKET FOR A FILTER OR SHIELD
For those of you who would like to make a mask with a pocket for a filter, here are the steps to create that variation.
Cut one square 7 1/2”
Cut 2 rectangles 7 1/2 x 4 1/4
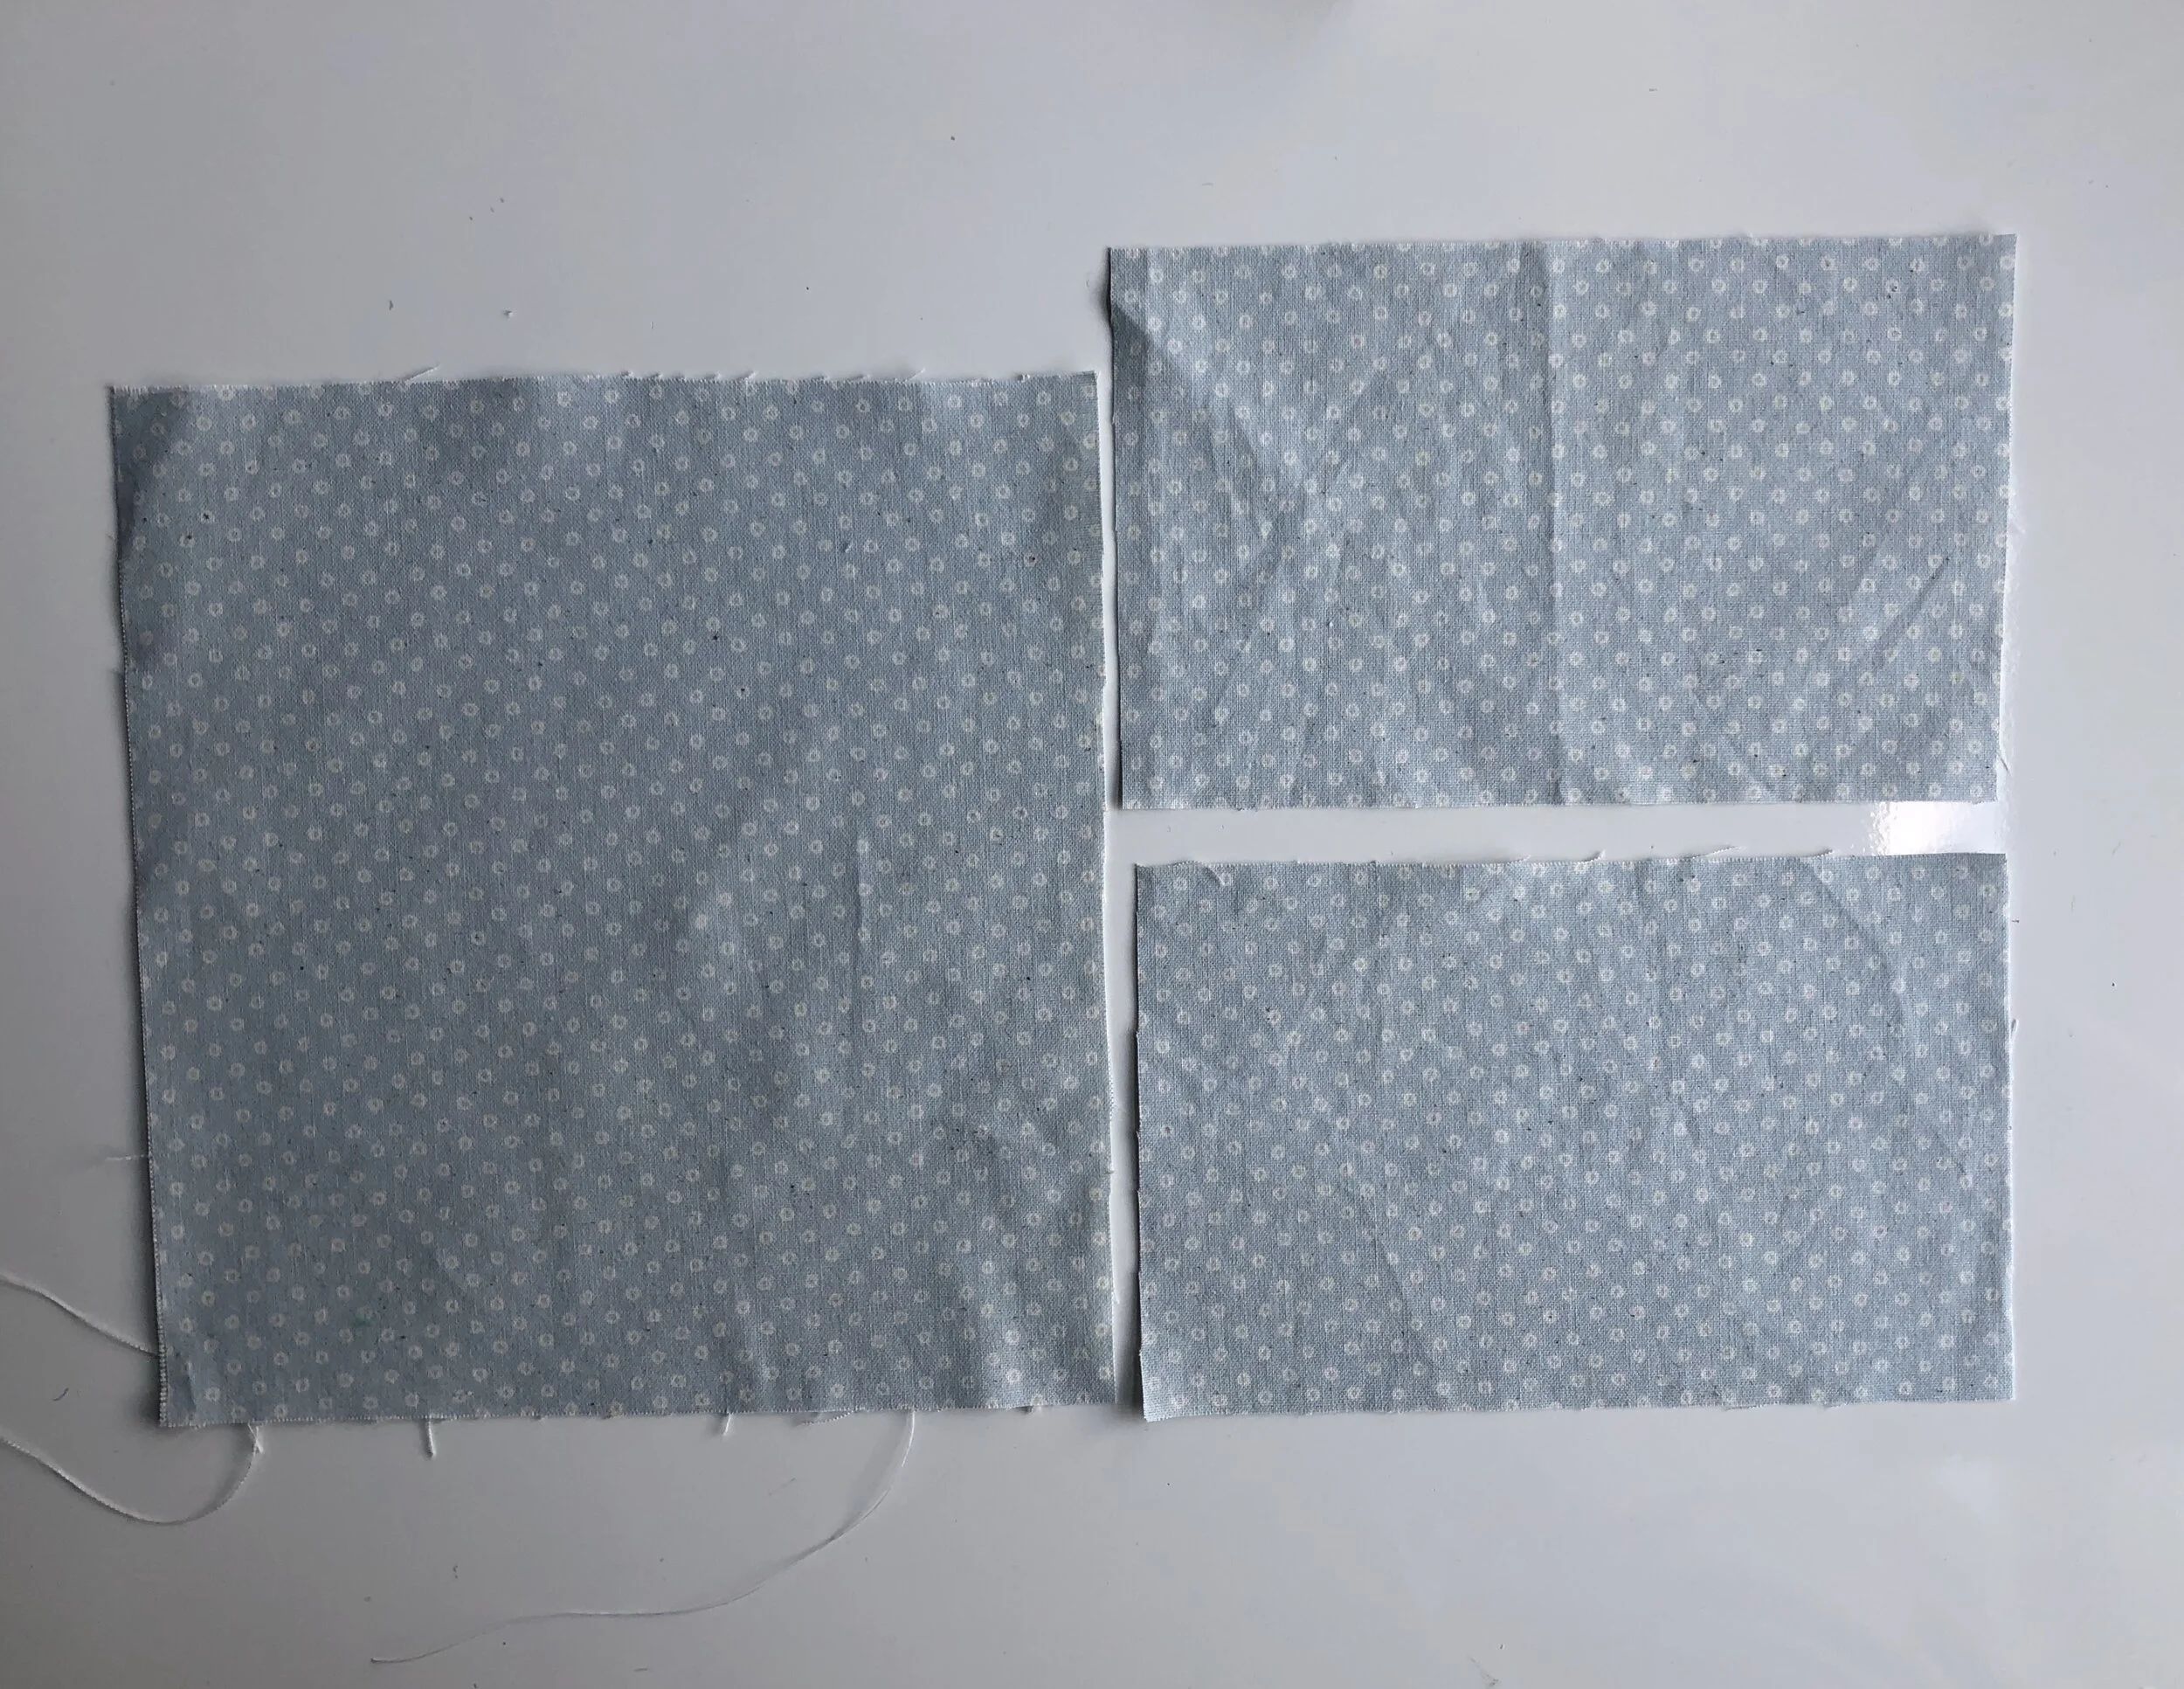
Take the two smaller rectangles and place them with their RIGHT sides facingtogether. Pin inward 1.5” in from each outside edge.
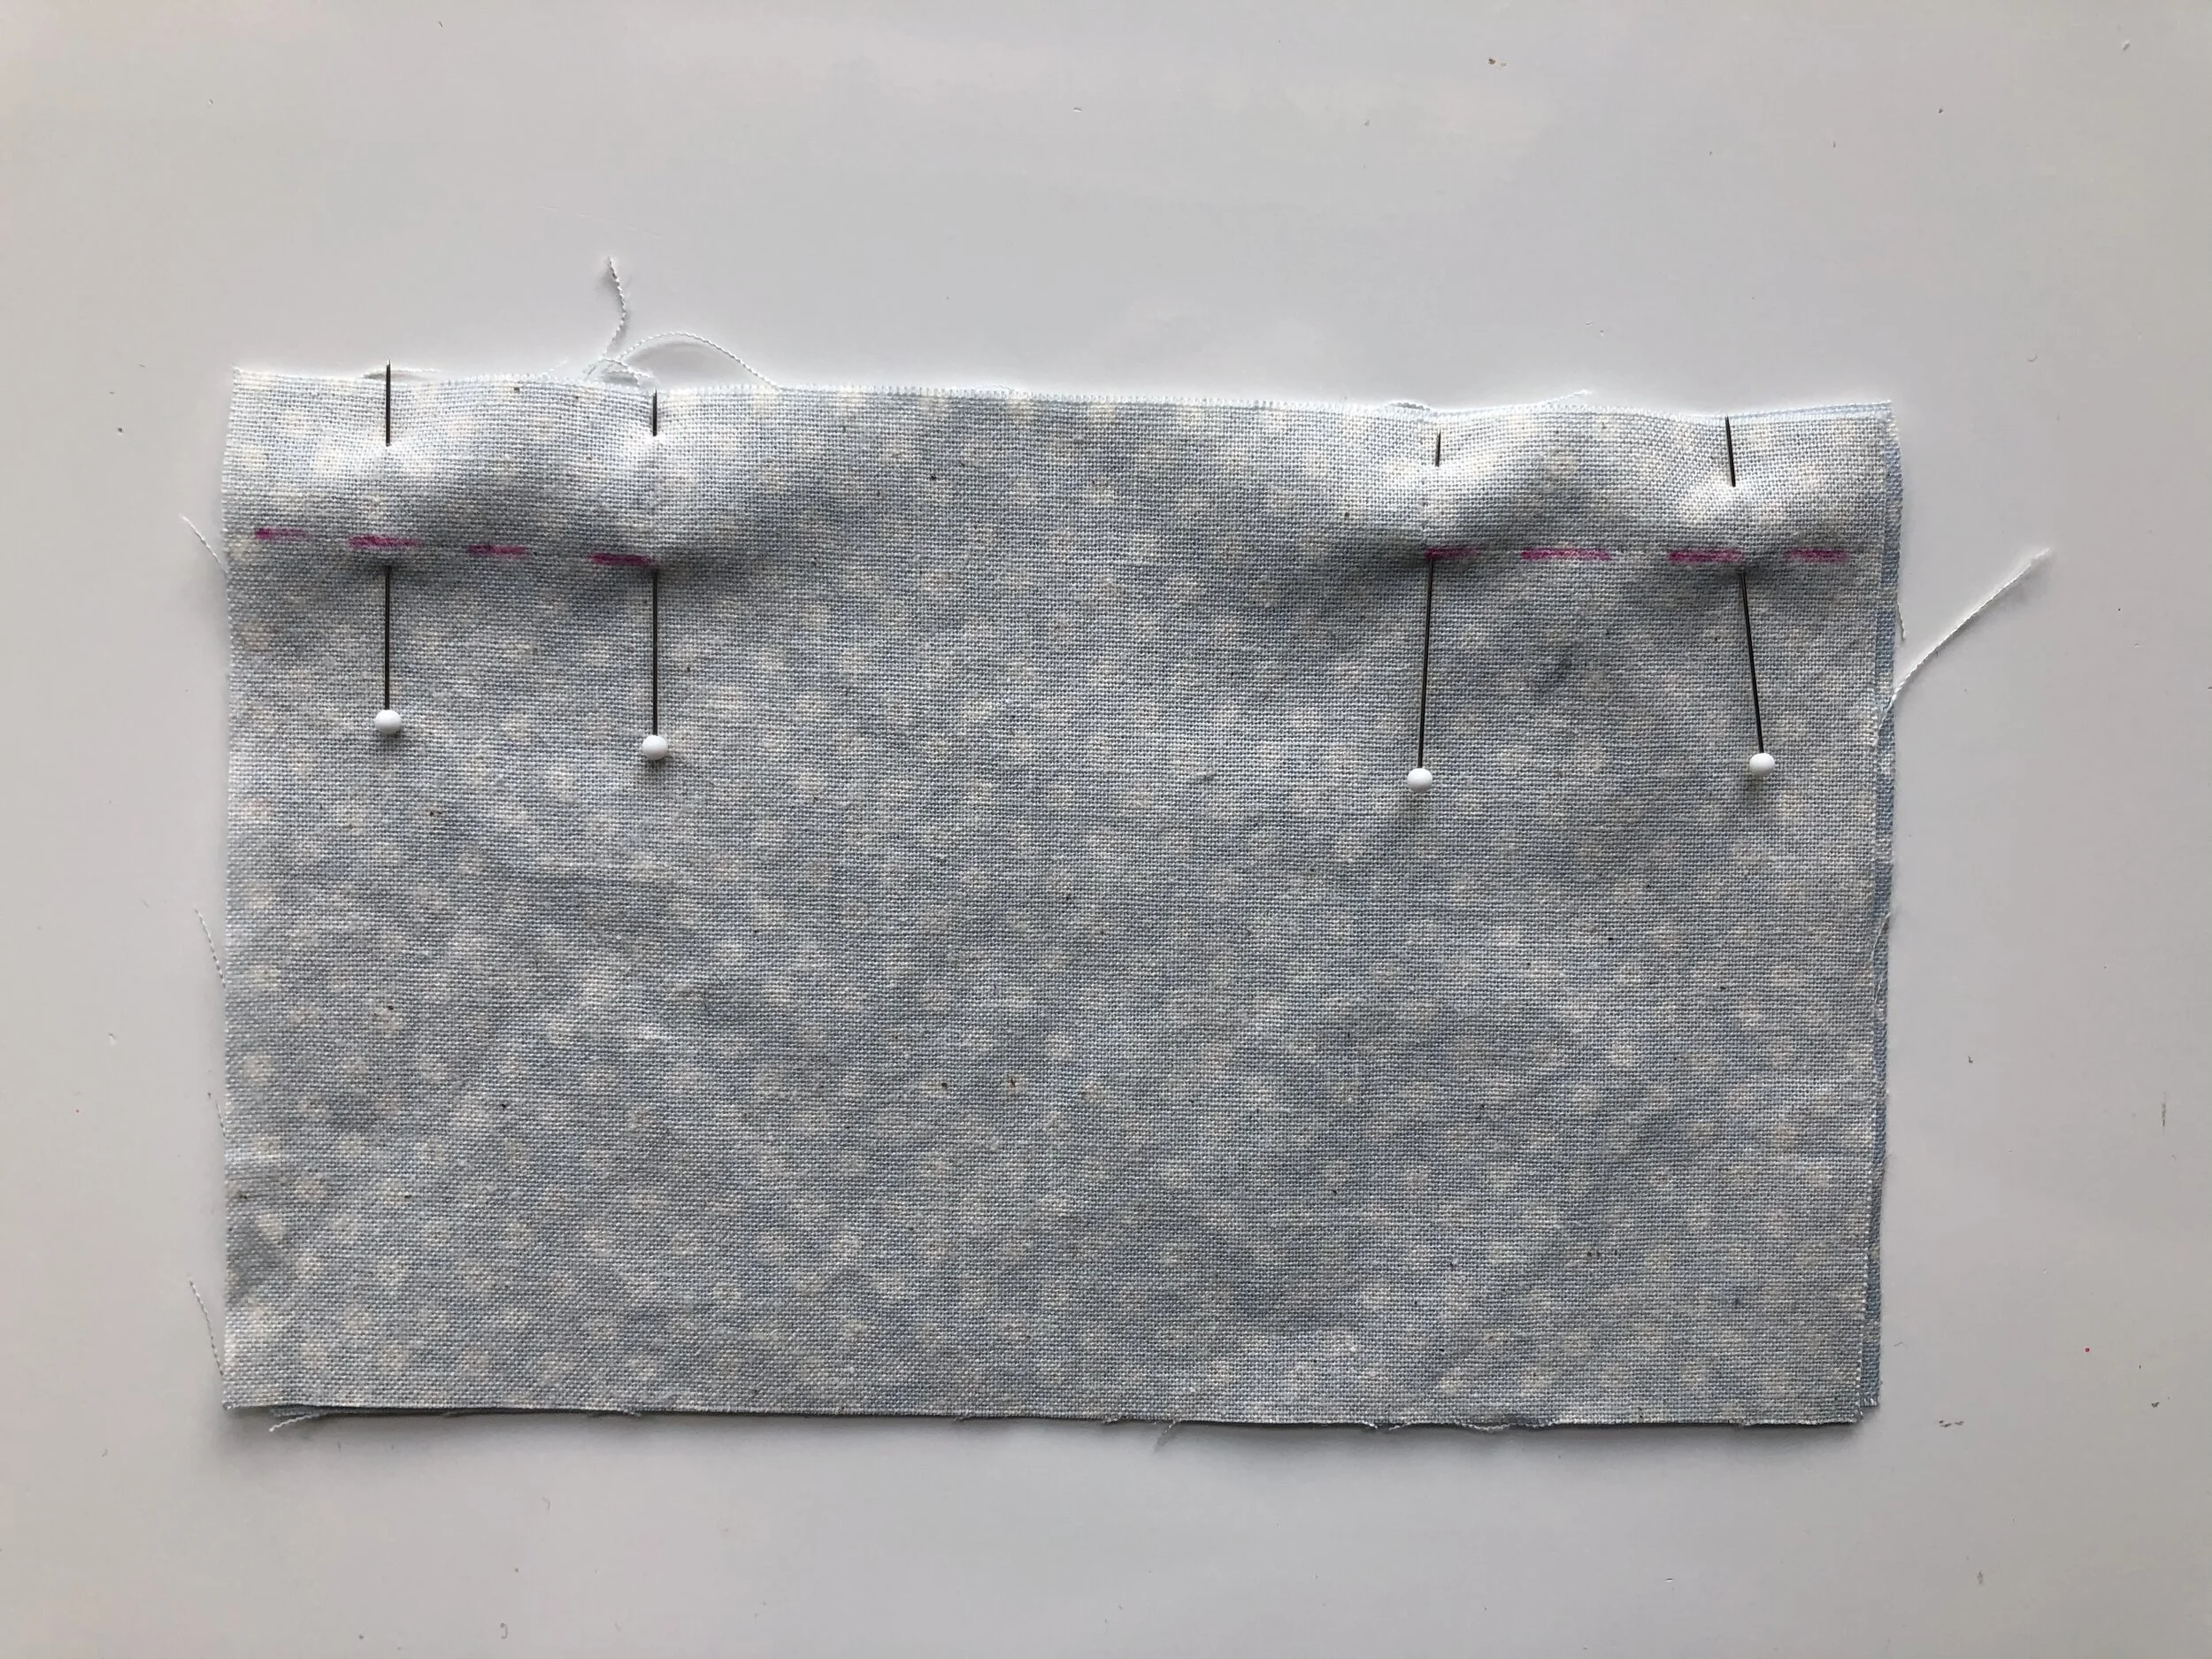
Stitch with a 1/2” seam allowance, leaving the center open.
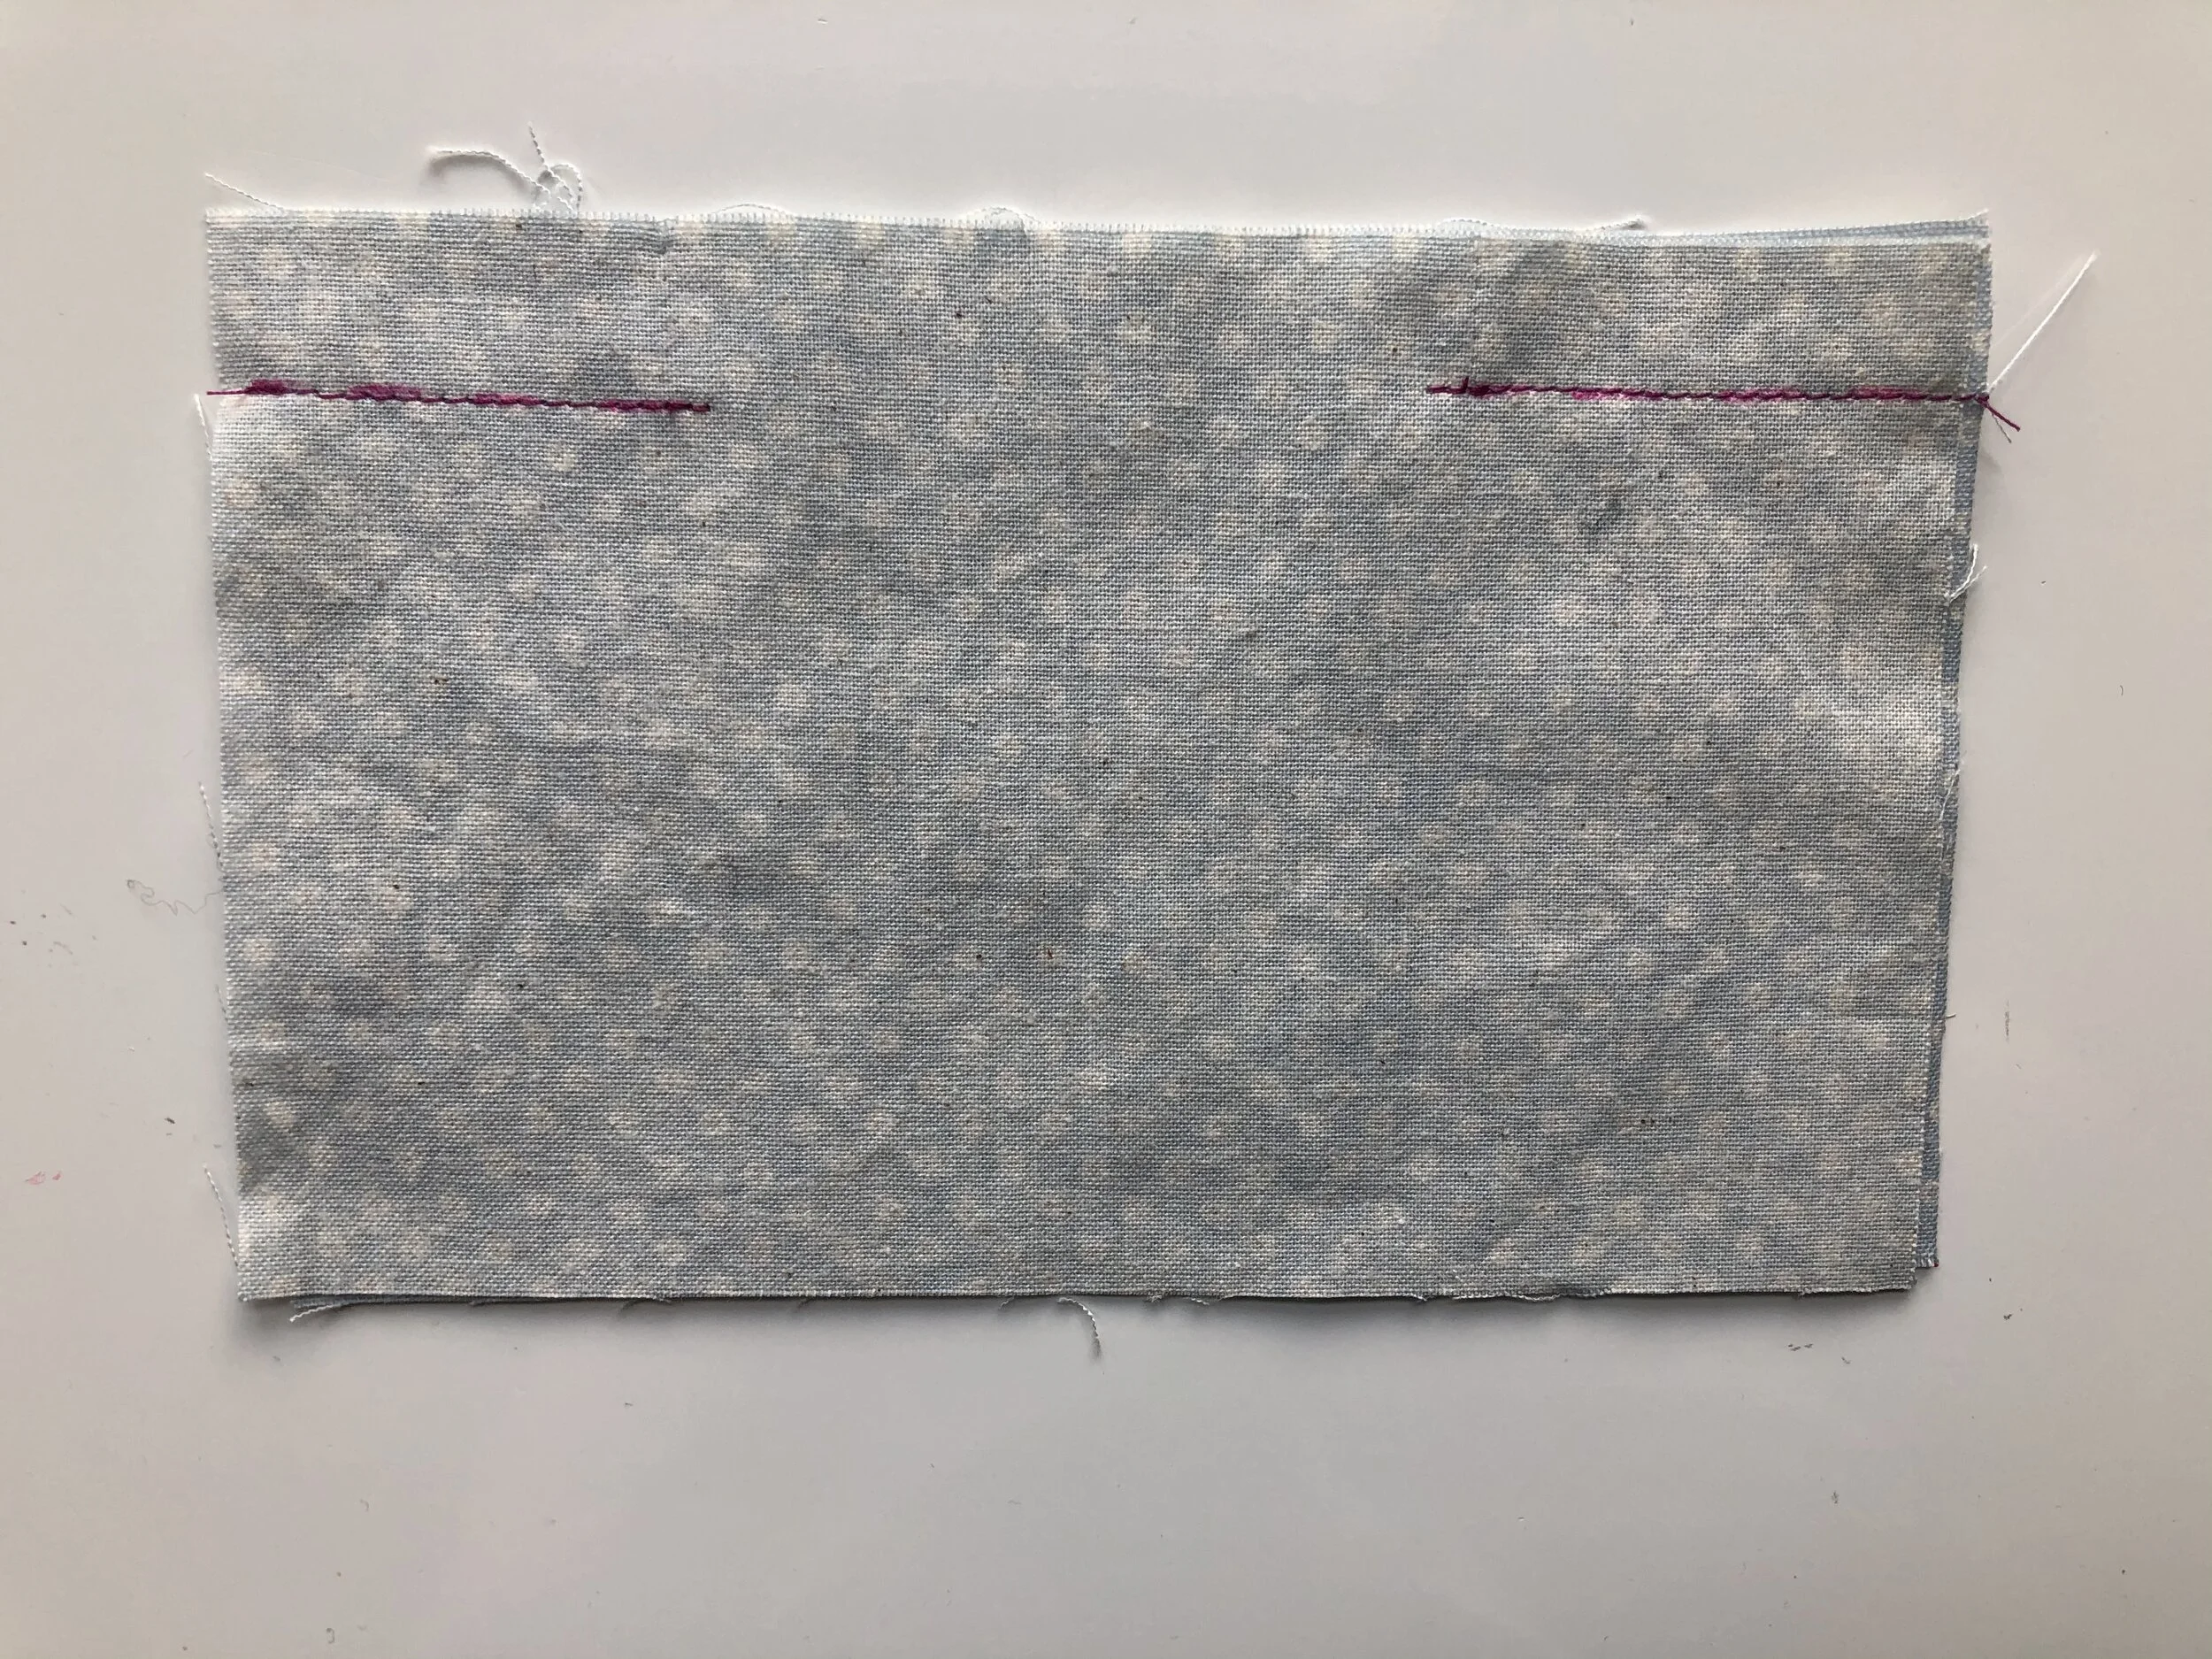
Press the seams flat.
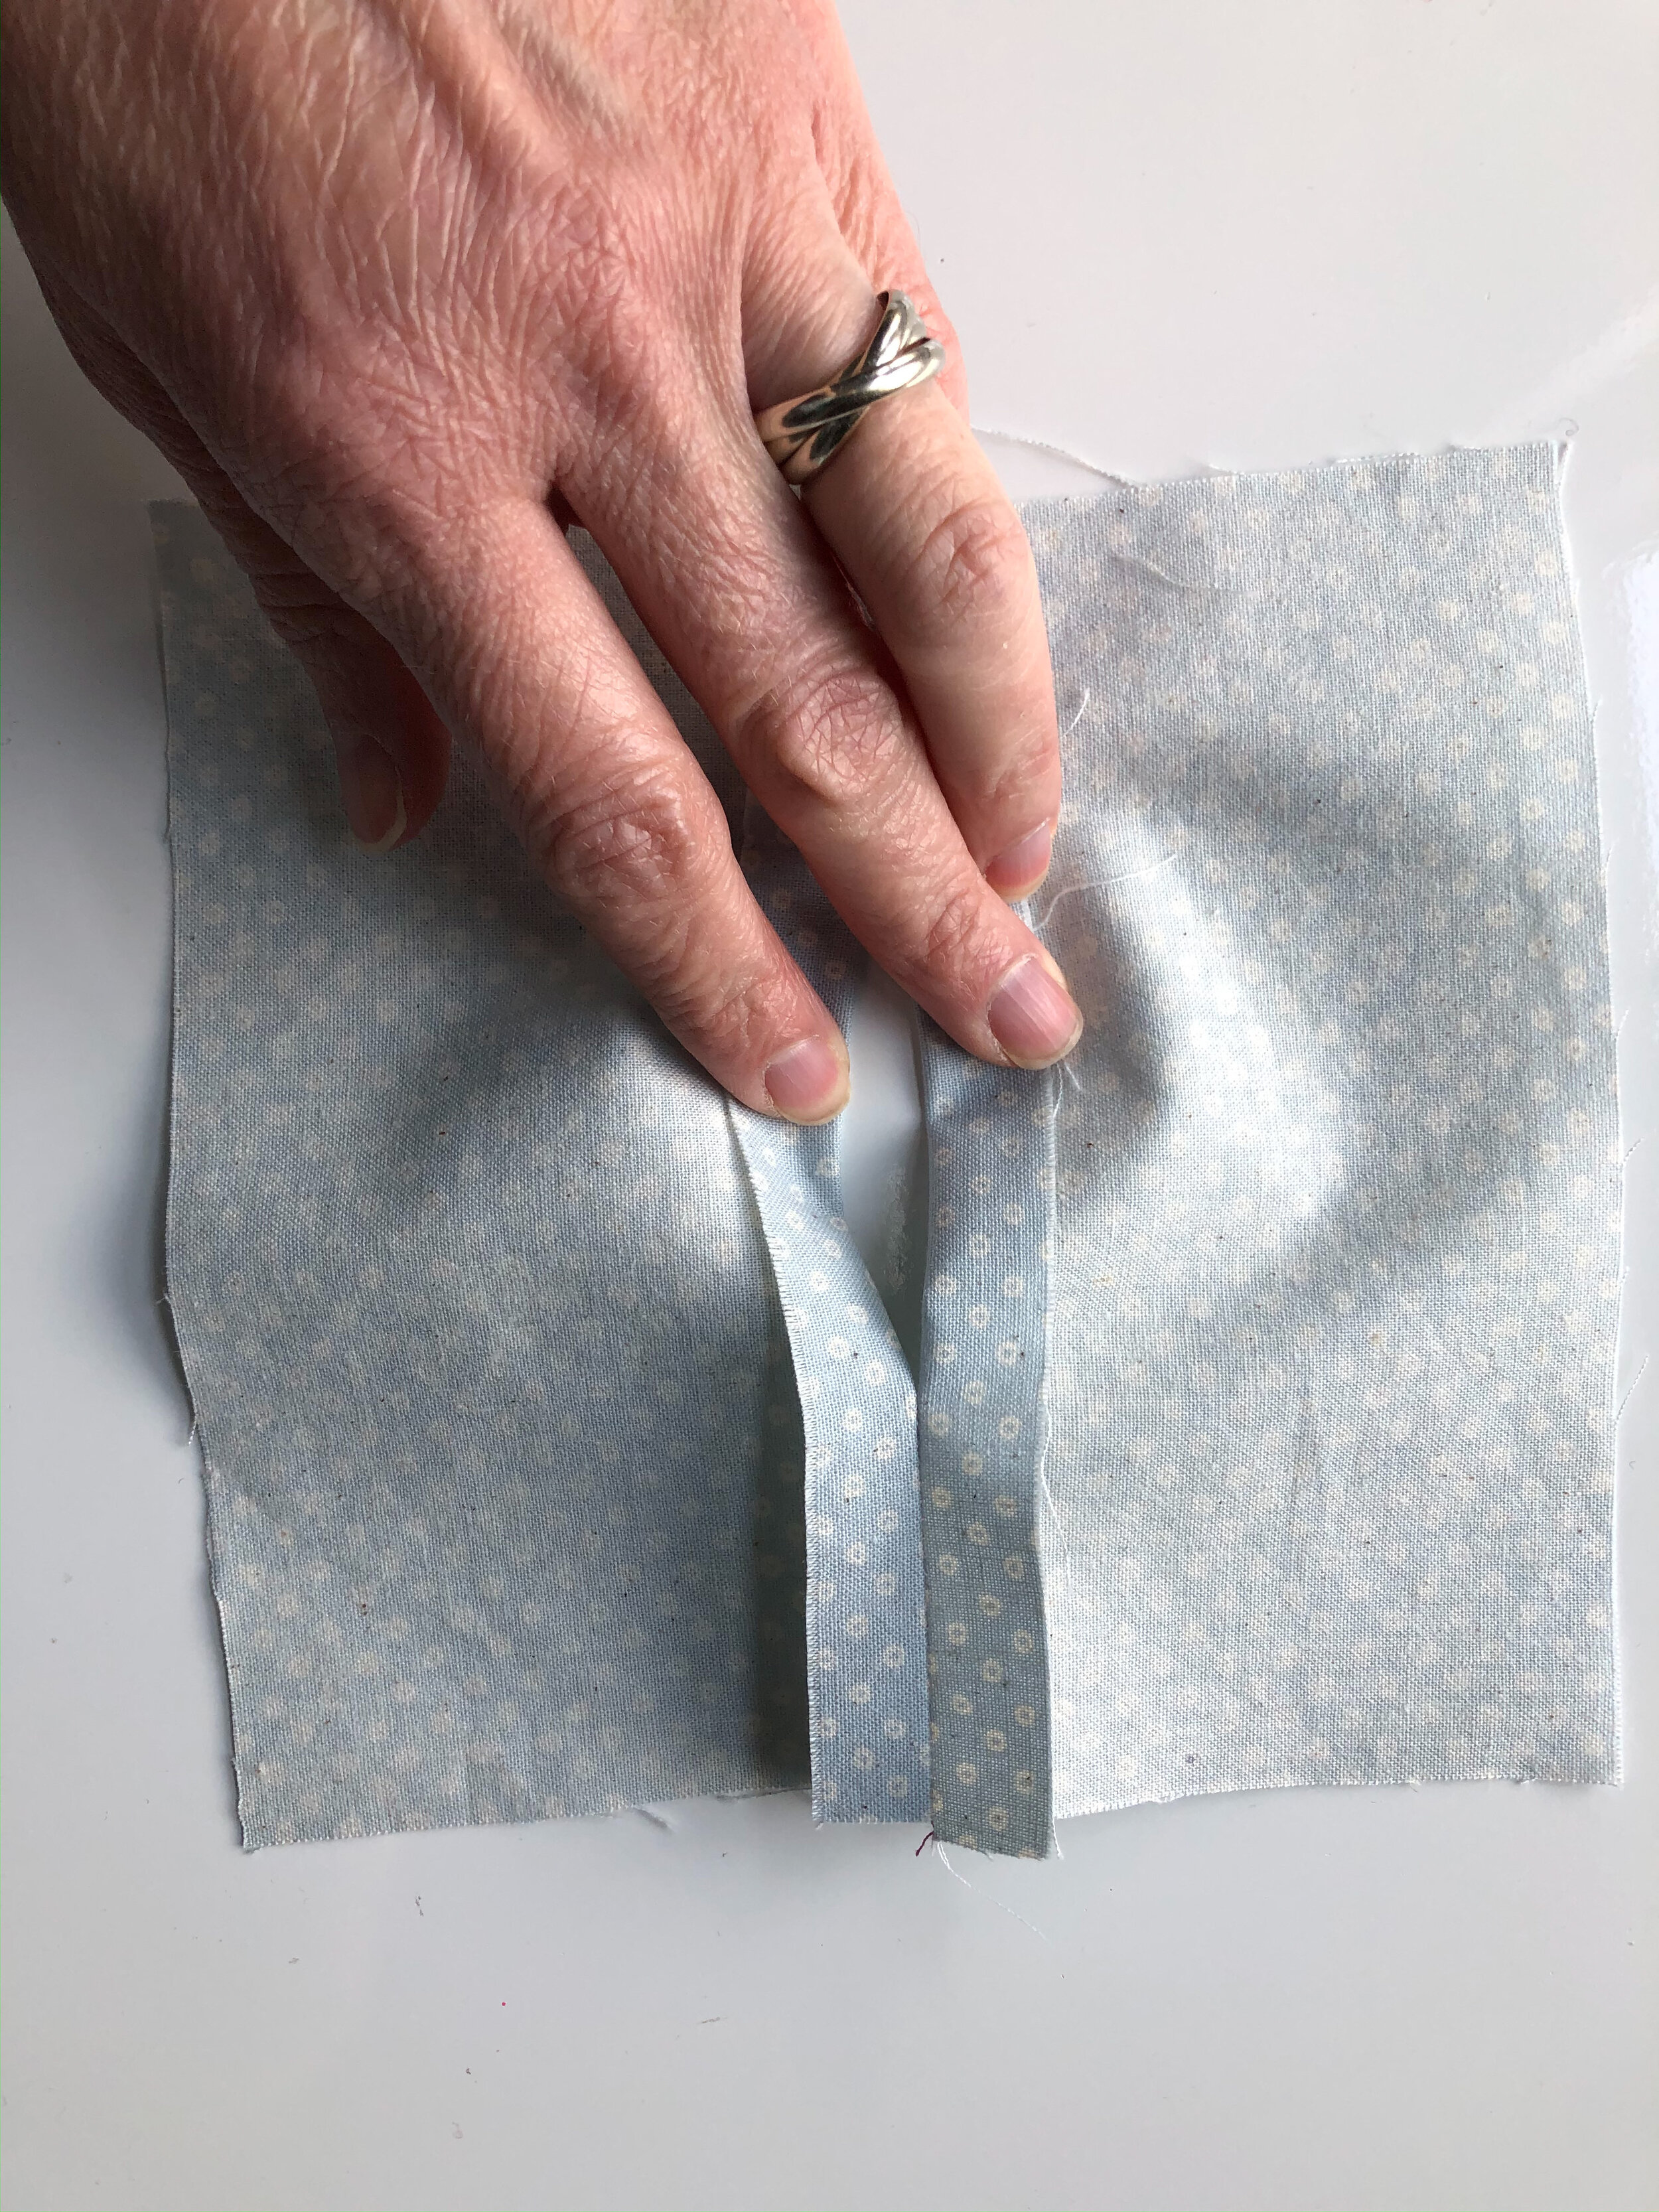
Top stitch along the seam line. This will help the fabric to lay flat.
Once you have pieced the fabric to make the pocket opening, if it is larger than 7 1/2”, trim to size.

Place the stitched piece with the split opening and the 7 1/2” square with their RIGHT sides facing together and continue as explained in step one of first tutorial.
The following picture is what it will look like after the casing is stitched.

Once complete, the opening should allow for a filter to be place inside. The split opening should fold nicely between the pleats.
Source from here

Source from here
Komentar
Posting Komentar