4 Cozy Reading Nooks You’ll Want in Your Home Right Now Constructing a reading nook doesn’t have to be hard. Sometimes all you need is lots of pillows and a little unused space. Reading nooks are also a great way to use dead, unused, or awkward space within a home. Nooks can help maximize living space and provide additional seating, along with providing a personal sanctuary. With these four easy DIY reading nook projects, it won’t be long before you find yourself dreaming of getting lost in a good book. 1. Make Use of Dead Space with a Corner Bench Do you have a dead corner in your house that’s just…there? A great remedy for that empty space is a corner bench. Creating an L-shaped bench will maximize your space. Not only will it provide additional seating, but it can also become storage. Create this bench with bookshelves, cushions, and pillows for the ultimate reading nook space. When the bookshelves are placed together, you can then determine what size cushion you will need to go on ...
How to Make DIY Tinted Lip Balm from Unused Lipstick
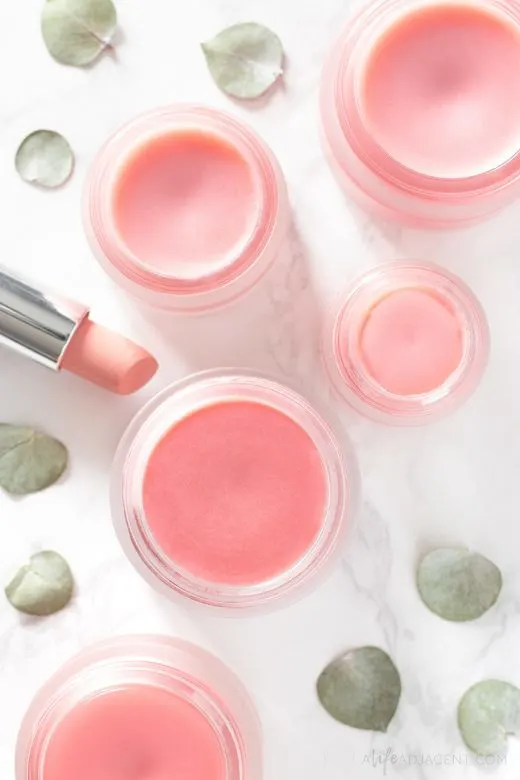
Learn how to make your own tinted DIY lip balm with lipstick! Don’t throw away broken or old lipsticks or that color that just doesn’t work for you anymore. Upcycle them with this easy homemade lip balm recipe.
Materials
- 2 tbsp coconut oil (or babassu oil)
- 2 tbsp shea butter (or other plant butter)
- 1 1/2 tbsp beeswax pellets
- A dollop or more of natural lipstick
- 10 drops natural cherry flavouring (optional)
- 2-3 drops of essential oils
Tools
- Turkish coffee pot or glass measuring cup with spout
- Shallow pan for water bath
- Small silicone spatula
- Small glass jars or tins for storage
Instructions
- Place shea butter, coconut oil and beeswax in a small saucepan or Turkish coffee pot. Fill a shallow pan with a few inches inches of water and turn the heat to medium to create a water bath. Bring to a simmer.
- Place your smaller pot in the bath and slowly melt the ingredients, mixing as you go. You can also use a glass measuring cup with a spout for this step as well. Take care not burn your ingredients or bring them to a boil.
- Once the ingredients are soft, you can add your lipstick. I added about a quarter inch off the top of my tube, but you can experiment with more or less colour. Add some lipstick, melt and stir. If you like the colour, you’re ready for the next step. If not, add more lipstick. Remember that the colour will lighten as it hardens, and it might even shift in tone. The colour in the pot will be darker than the final product.
- Once your lipstick has been melted and thoroughly mixed, turn off the heat and remove your pot from the stove.
- Allow to cool slightly, then add your essential oils or flavouring and again mix thoroughly.
- If your melting container doesn’t have a spout, use a tiny funnel to fill your glass jars, making sure to complete this step quickly before your ingredients begin to harden. If using a Turkish coffee pot or measuring cup with a spout, you can skip the funnel.
- Let your jars cool for approximately an hour.
- Put the lids on your cooled lip balms and store in a cool, dry place. Your tinted lip balm should last for about a year or more if stored correctly.
Notes
For a thicker, richer lip balm, you can add more shea butter or beeswax. If you prefer a thinner texture, you can up the ratio of coconut oil to shea butter.
If you lip balm turns out too hard or too soft, simply melt it down again and adjust your ingredients – adding more beeswax to make it firmer, or more coconut oil if it turned out too soft.
If you are using a block of beeswax, be sure to grate it before measuring.
If you lip balm turns out too hard or too soft, simply melt it down again and adjust your ingredients – adding more beeswax to make it firmer, or more coconut oil if it turned out too soft.
If you are using a block of beeswax, be sure to grate it before measuring.
Source from here
Komentar
Posting Komentar