4 Cozy Reading Nooks You’ll Want in Your Home Right Now Constructing a reading nook doesn’t have to be hard. Sometimes all you need is lots of pillows and a little unused space. Reading nooks are also a great way to use dead, unused, or awkward space within a home. Nooks can help maximize living space and provide additional seating, along with providing a personal sanctuary. With these four easy DIY reading nook projects, it won’t be long before you find yourself dreaming of getting lost in a good book. 1. Make Use of Dead Space with a Corner Bench Do you have a dead corner in your house that’s just…there? A great remedy for that empty space is a corner bench. Creating an L-shaped bench will maximize your space. Not only will it provide additional seating, but it can also become storage. Create this bench with bookshelves, cushions, and pillows for the ultimate reading nook space. When the bookshelves are placed together, you can then determine what size cushion you will need to go on ...
TUTORIAL HOW TO MAKE DIY MINIATURE WOOD CASE SOFA
TUTORIAL HOW TO MAKE DIY MINIATURE WOOD CASE SOFA
MATERIALS & TOOLS FOR MINIATURE WOOD CASE SOFA
1/16″ basswood sheet for the frame
The sofa frame consists of two layers of 1/16″, to make 1/8″ thickness on each side.
If you are using materials other than basswood, make the necessary quantities of each shape to achieve 1/8″ thickness on each side.
Finishing options: stain, primer + paint, varnish or seal
Tips for cutting the trapezoids for the back cushions:
This chart shows you the steps to cut multiple trapezoids efficiently.
At step 3, after you already have one trapezoid, you can use that one to trace and cut the rest of them.
ASSEMBLY OF THE SOFA FRAME
Step 0: Stain and/or varnish first!
If you plan to stain and/or varnish, do it before assembling. Glue spots prevent stain and varnish from being absorbed by the wood, resulting in splotchy, uneven finish.
Painting or sealing can be done after assembly.
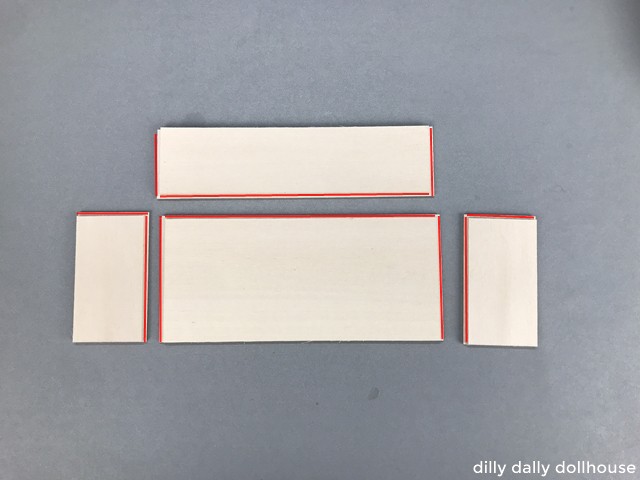
Step 1: Layer all the frame pieces
Glue the two layers of each side of the sofa frame: base, back, and two sides. There is a 1/16″ overlap on some edges. This is designed for “corner lap joint” so that there is more surface for the glue to grip on, resulting a stronger overall piece. The red lines on the picture show where the 1/16″ overlaps are.
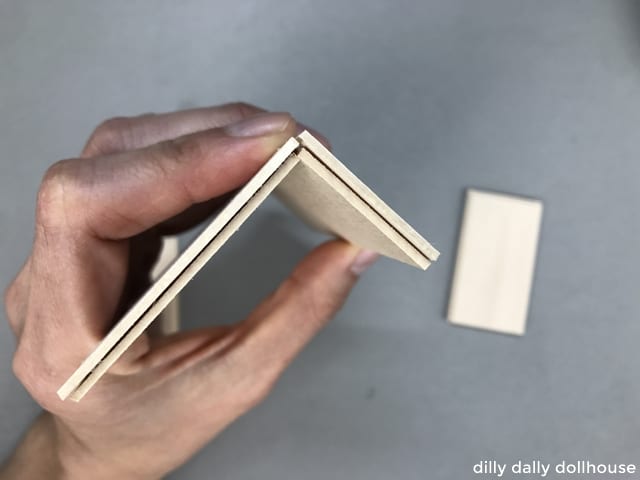
Step 2: Attach the back to the base
The back should cover the edges of the base.
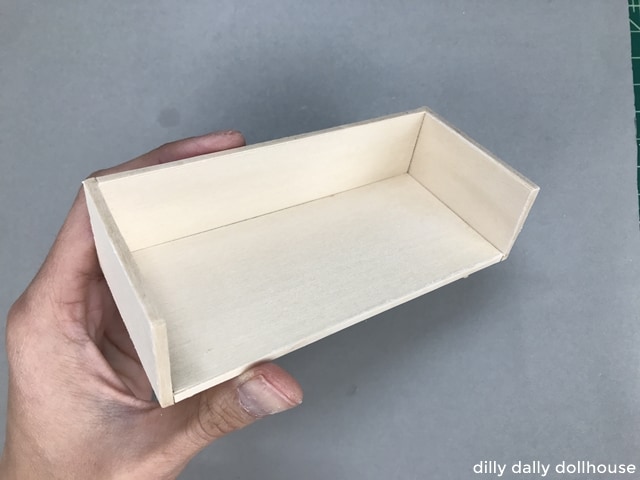
Step 3: Attach the sides to the base and back
The sides should cover the edges of the base and back. The top of the sides and back should all be at the same height. Make sure all corners are square.
(Pardon the visible cutting mat — picture fail! 😳 )
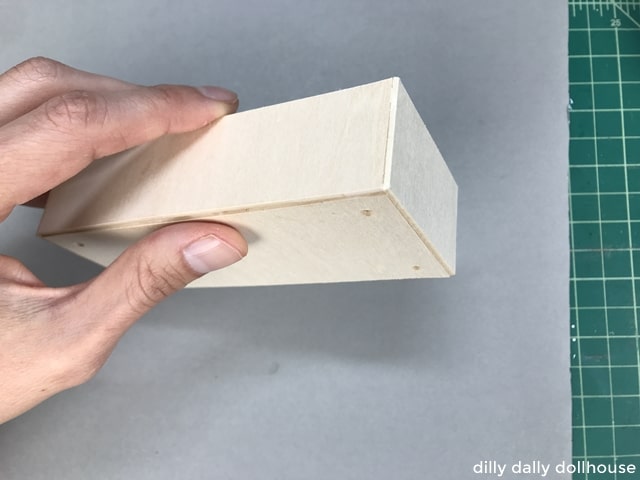
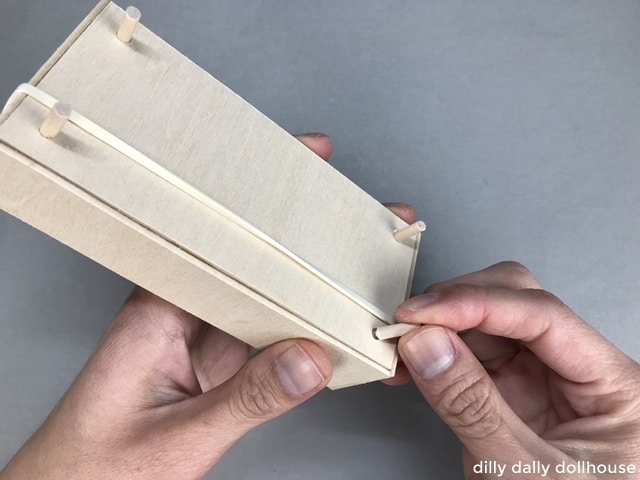
Step 4: Insert the legs
If you skip the leg holes, mark positions of the legs on the underside of the sofa base. Mine are 1/4″ from the edges. Dab a bit of glue at the end of the legs and insert the legs into the holes. Make sure all the legs are straight and even.
Step 5: (Optional) Cover edges with veneer
If desired, apply 1/8″ strips of iron-on veneer (if using basswood) or cardstock (if using matboard) to cover the edges. This really lifts up the piece to a whole-nother-level.
Step 6: (Optional) Prime, paint, and/or seal
I left my frame unfinished since it’s my favorite look, though I may seal it later with Mod Podge.
ASSEMBLY OF THE CUSHIONS
BACK CUSHIONS
Step 1: Prepare the insert
Glue the trapezoids side by side until you have *almost half* the sofa seat width. You want to have a little wiggle room for the bulk of the fabric. The bulkier the fabric, the more wiggle room you will need.
For 1:16 scale with seat width of 4-3/4″, each back cushion should be just under 2-3/8″ each. I recommend 2-1/4″ and adjust from there. Stack as many trapezoid foam core pieces to get this width, and adjust.
For 1:12 scale with seat width of 6-1/2″, each back cushion should be just under 3-1/4″ each. I recommend 3-1/8″ and adjust from there. Stack as many trapezoid foam core pieces to get this width, and adjust.
Make two of these, and dry fit into the frame. Sand off any bumps and unevenness (I skipped this part and the bumps kind of show through).
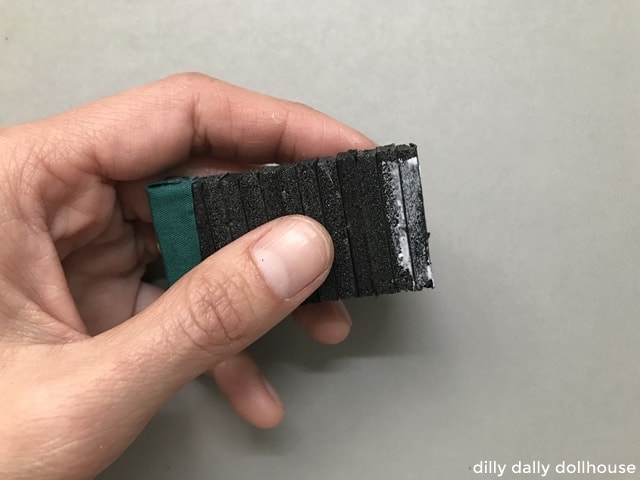
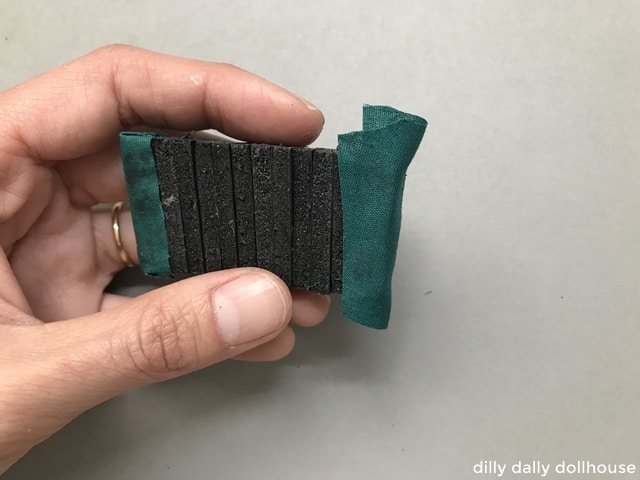
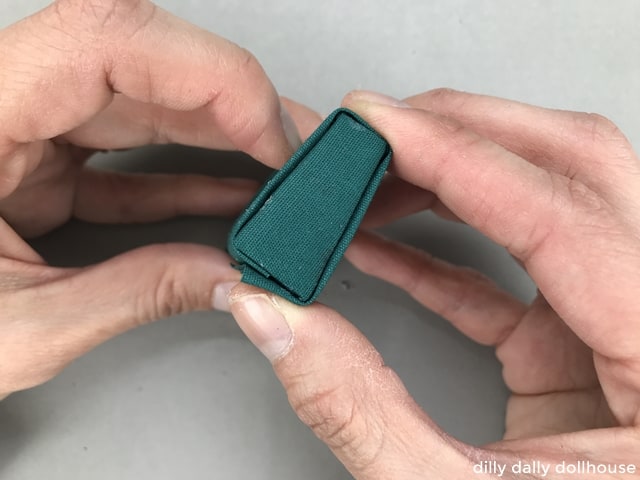
Step 2: Cover the sides with fabric
(I took these pictures during a practice run, using green fabric)
Apply glue on the foam core. Attach the fabric on the long sides first, then the shorter sides. Snip off excess fabric at the corners, then flatten to the foam core.
Repeat on the other side, and for the other back cushion
Step 3: Cover the back cushion
Fold the width of the fabric so that the edges meet in the middle. The fabric should span the width of the cushion. Iron the folded fabric to neaten. Then glue the fabric on the foam, making sure the seam ends at the bottom so it won’t be visible.
Repeat for the other back cushion.
SEAT CUSHION
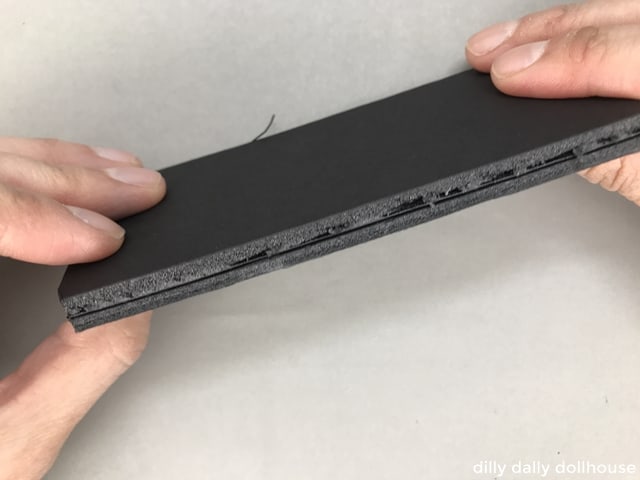
Step 1: Prepare the insert
Stack the two foam core rectangles. Dry fit into the frame. Make sure there is about 1/16″ to 1/8″ wiggle room for fabric bulk
Step 2: Cover the sides with fabric
Following the same method as with the back cushion, wrap the cushion sides with fabric. Apply glue on the foam core. Attach the fabric on the long sides first, then the shorter sides. Snip off excess fabric at the corners, then flatten to the foam core.
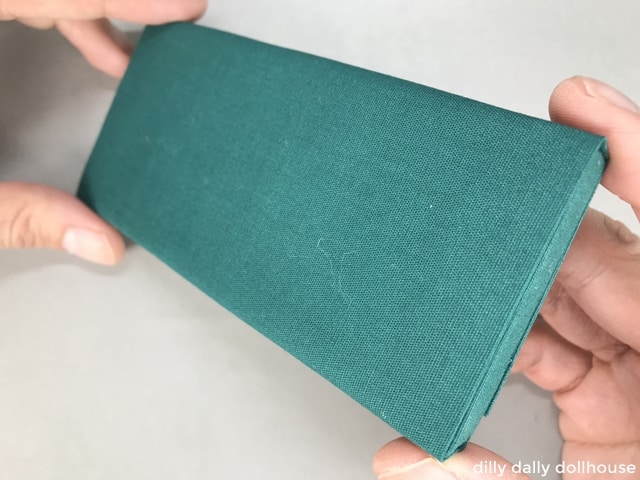
Step 3: Cover the seat cushion
This is also following the same method as the back cushion. Fold the width of the fabric so that the edges meet in the middle. The fabric should span the width of the cushion. Iron the folded fabric to neaten. Then glue the fabric on the foam, making sure the seam ends at the bottom so it won’t be visible.
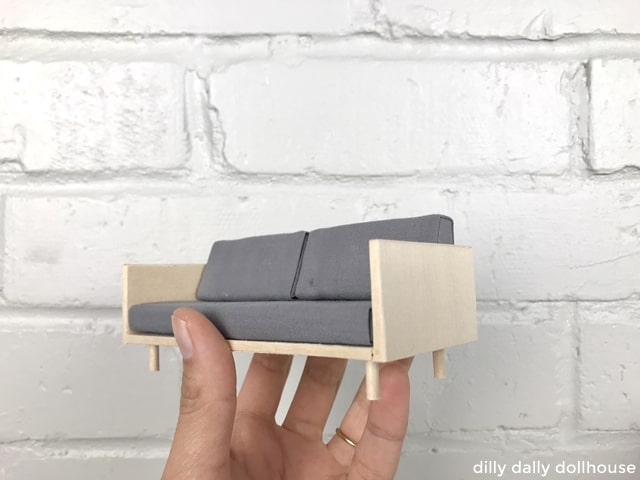
COMPLETE!
My version of the miniature wood case sofa, this one is in 1:16 scale.
19 Incredible Cozy Window Ideas We have different window seat styles for all room types, kitchens, dining rooms, living rooms, attics, home office, hallways, bedrooms, children’s bedrooms, and bathrooms. Be sure to let us know which one most inspires you and can best accommodate your home design. This extravagant window seat in a children’s room provides plenty of areas to play and read. The massive shelves on both sides can store as many toys and books as any child could desire. Source from here
DIY Hand Sanitizer - Natural withour Alcohol DIY Hand Sanitizer Supplies 100% Aloe Vera Gel Tea Tree Oil (Melaleuca oil) Plant Therapy Brand $7 10ml (use approx. 8 to 10 drops per 8 oz ) Doterra Brand 15ml $20 (use approx. 1-3 drops per 8 oz ) Distilled Water Plastic container of choice Printable labels below & wide clear packing tape (optional) Ingredient Option Details Aloe Vera Gel: The Aloe Vera plant is wonderful for using in hand sanitizer because of its powerful antioxidant and antibacterial benefits. Plus it’s great for the skin and is also widely used or healing burns. This will make your sanitizer thick but it’s optional. Tea Tree Oil: Also known as melaleuca oil, this is one of the most powerful and safe antibacterials available. (Natural or otherwise.) There are other oils that have the same property but I always use tea tree. Why? Because it will heal MRSA and did so ...
DIY Plumping Pumpkin Spice Lip Scrub THE SUPPLIES: » 1 Cup brown sugar » 1/3 Cup coconut oil (softened at room temp) » 1 Tablespoon Pumpkin pie spice (mmmm, my fave!!) » 1 Teaspoon vanilla extract » Mini mason jars, for storage Step 1: Combine your dry ingredients: 1 cup of brown sugar + 1 tablespoon of pumpkin pie spice. Step 2: Add in your wet ingredients: 1/3 cup coconut oil + 1 teaspoon vanilla extract & stir until all the dry ingredients are fully saturated. Step 3: Store your scrub in mini mason jars & keep at room temp (it will be good for about 3 months- which is plenty of time to use it all up!). HOW TO USE: » Using the tip of your finger, rub this yummy concoction on your lips in a circular motion for about a minute & rinse off with cool water. It’s also totally great for dry skin as well, so feel free to go to town on those rough elbows/feet/hands/etc.! « Source from here


Komentar
Posting Komentar