Langsung ke konten utama

4 Cozy Reading Nooks You’ll Want in Your Home Right Now

4 Cozy Reading Nooks You’ll Want in Your Home Right Now Constructing a reading nook doesn’t have to be hard. Sometimes all you need is lots of pillows and a little unused space. Reading nooks are also a great way to use dead, unused, or awkward space within a home. Nooks can help maximize living space and provide additional seating, along with providing a personal sanctuary. With these four easy DIY reading nook projects, it won’t be long before you find yourself dreaming of getting lost in a good book. 1. Make Use of Dead Space with a Corner Bench Do you have a dead corner in your house that’s just…there? A great remedy for that empty space is a corner bench. Creating an L-shaped bench will maximize your space. Not only will it provide additional seating, but it can also become storage. Create this bench with bookshelves, cushions, and pillows for the ultimate reading nook space. When the bookshelves are placed together, you can then determine what size cushion you will need to go on ...

4 DELICIOUS DIY LIP SCRUB RECIPES

4 DELICIOUS DIY LIP SCRUB RECIPES


DIY lip scrub without coconut oil

DIY Lip Scrub, Best DIY Homemade Lip Scrub, Rose Mint Lip Scrub

You will need: 

  • 2-3 Tablespoons of sugar
  • 8 Drops of Rose Oil
  • 5 Finely chopped mint leaves and/or 5 drops of mint essential oil
  • 4-5 Finely chopped fresh rose petals (optional)
  • 1/3 Teaspoon of honey

Directions:

For this DIY lip scrub without coconut oil, mix all the ingredients together in your favorite sanitized container. Apply to lips and exfoliate using circular motions with either your finger or a toothbrush. Rinse and moisturize. Your lip scrub can stay in the fridge for about a week or less.

COCONUT LIME LIP SCRUB

Additional Ingredients to Add to Your Base:

2 drops Lime Essential Oil

1/8 teaspoon Coconut Extract

Coconut Lime DIY Lip Scrub

Directions:

Add lime oil and coconut extract to the scrub base and stir together. If you want, you can even grate a little lime zest into the mix for some fun color. I kept it easy with the oil.

DIY lip scrub containers

I found these small screw top containers on eBay that are perfect to house the lip scrubs!

ORANGE CREAMCICLE LIP SCRUB

Additional Ingredients:

2 drops Orange Essential Oil

2 whole Vanilla beans

Orange Creamcicle DIY Lip Scrub

Directions:

Add in orange oil to the scrub base. You can zest if you want to. 😉

Cut a vertical slit down the entire length of the vanilla beans.

Orange Creamcicle DIY Lip Scrub

Peel the bean open and using the corner of your knife, scrape out all of the vanilla goodness inside.

extract vanilla bean

Add said vanilla goodness to the scrub and mix together. Done!

LEMON GINGER LIP SCRUB

Additional Ingredients:

2 drops Lemon Essential Oil

1/2 teaspoon grated fresh Ginger
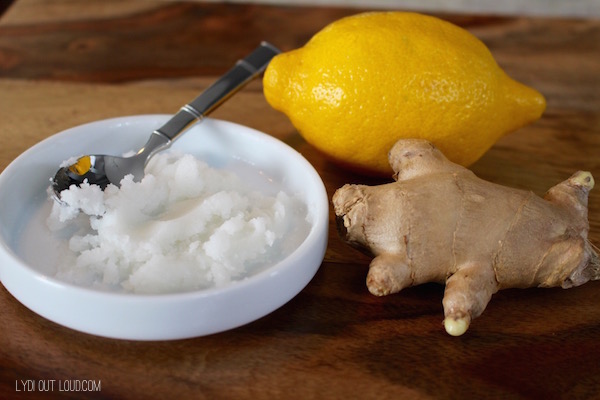
Lemon Ginger DIY Lip Scrub

Directions:

Add lemon oil to the base.

Peel the bark-like skin from a small section of the ginger.

Peeling ginger

Cut off the peeled section from the rest of the ginger root (put the rest of it in the fridge and save it to make some delicious homemade Ginger Ale). Use a microplane to finely grate the ginger.
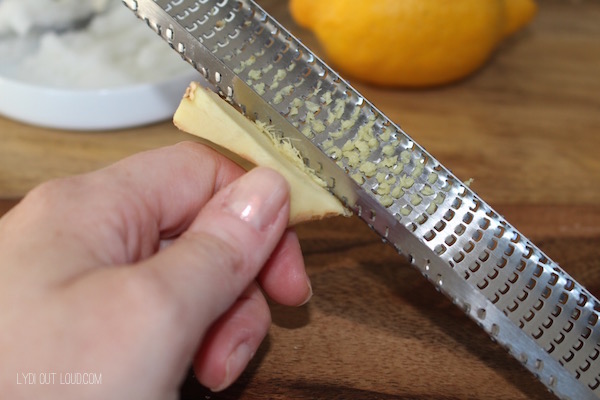
Grating ginger

Add grated ginger to the base and mix well.
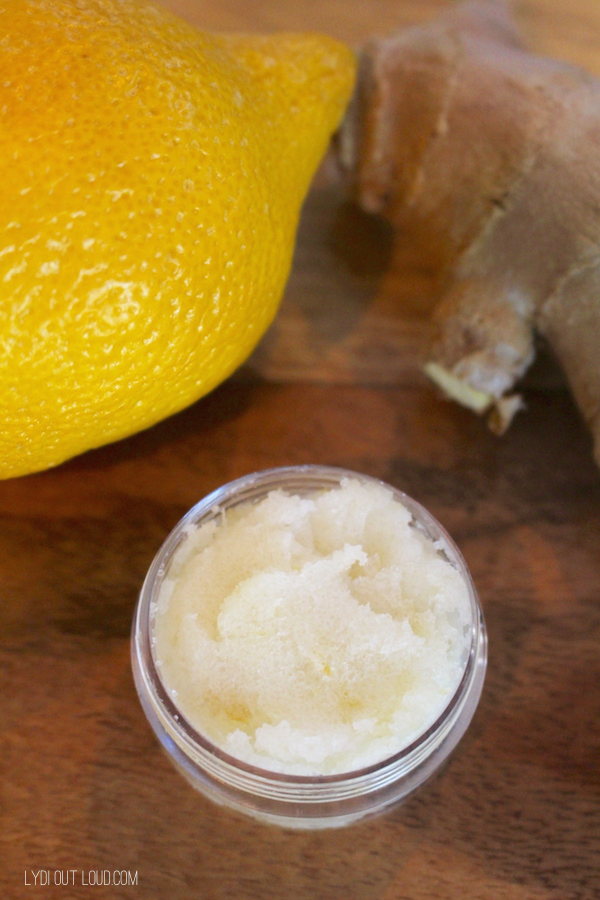
Lemon Ginger DIY Lip Scrub

Source from here, and here

Komentar

Postingan populer dari blog ini

DIY Hand Sanitizer - Natural withour Alcohol

DIY Hand Sanitizer - Natural withour Alcohol DIY Hand Sanitizer Supplies 100%  Aloe Vera Gel   Tea Tree Oil (Melaleuca oil)    Plant Therapy Brand   $7  10ml  (use approx. 8 to 10 drops per 8 oz )   Doterra Brand  15ml  $20 (use approx. 1-3 drops per 8 oz ) Distilled Water Plastic container of choice Printable labels below & wide clear packing tape (optional) Ingredient Option Details Aloe Vera Gel:  The Aloe Vera plant is wonderful for using in hand sanitizer because of its powerful antioxidant and antibacterial benefits. Plus it’s great for the skin and is also widely used or healing burns. This will make your sanitizer thick but it’s optional. Tea Tree Oil:  Also known as melaleuca oil, this is one of the most powerful and safe antibacterials available. (Natural or otherwise.) There are other oils that have the same property but I  always  use tea tree. Why? Because it will heal MRSA and did so ...

DIY BEGINNER MACRAME GARLAND

DIY BEGINNER MACRAME GARLAND MATERIALS NEEDED: macrame yarn (I use this one  HERE  and  HERE ) sharp scissors (I like using haircutting scissors) wood beads (I used these  HERE  and some slightly larger ones I had, I lied alternating slightly different sizes) hair comb (if you want to brush out the edges again) INSTRUCTIONS: I made another video which you can see below and you can also follow my step-by-step instructions as described with the photos:   For my garland, I used 23 wooden beads threaded on a 10-foot piece of macrame cord. I wanted it to belong so I could possibly use it on a Christmas tree shortly. For my length of garland, you need to knot 22 small pieces of macrame altogether. And when you make one piece of macrame in-between the above wood beads you need to cut 6 pieces of 40-inch macrame yarn which you then have to repeat 22 times or however long you want your garland. I had to cut 132 pieces of 40-inch macrame yarn strings. Does that make ...

DIY Home Decor - Letters for Summer Ideas

DIY Home Decor - Letters for Summer Ideas  Supplies: Paper mache letters spelling “BEACH” Mod Podge Satin Scrapbook paper or printed paper Acrylic paint  in cream Bag of seashells Hot glue gun Paintbrush Pencil Scissors Craft knife  and mat Brayer (optional) Tutorial : I found a cool paper pattern online and printed five sheets for “BEACH.” Place each letter face down on the back of the paper (not on the patterned side) and trace with a pencil. Any themed scrapbook paper works as well. Cut out each letter with the scissors – trimming out any small areas with the  craft knife  and mat. Set your paper cutouts aside.  Paint each letter with several coats of  acrylic paint . Use a light color such as a cream or a white (whatever light color coordinates with your paper pattern). Let dry.  Working one letter at a time, paint a medium layer of  Mod Podge  on the top of the letter. Make sure to coat the whole thing.  Place your paper c...